Table des matières
How to create a plugin (Only for ESIA Infinity)
If you have chosen the ESIA Infinity solution, you can develop your own plugins and add them to Esia!
Development
Prerequisites
The plugin must be a file that can be executed by the server. It can therefore be coded in PHP, Perl, Python, … And use independent libraries for these languages. Provided that these languages and libraries are installed on the server.
The plugin must always return one of the following statuses in numerical form :
| Service status | Numeric value |
|---|---|
| OK | 0 |
| Warning | 1 |
| Critical | 2 |
| Unknown | 3 |
Output message
The result of the stdout of the plugin will be displayed in the ⇒ Service status interface.
Example for the check_icmp plugin.
On the command line on the esia server:
- copy
/usr/local/esia/plugins# ./check_icmp -H 10.5.0.1 -w 200,50% -c 500,100%
The result will be :
OK - 10.5.0.1: rta 1.837ms, lost 0%
Will display in the web interface :
To create a stdout, in PHP for example, you just need to do a :
- copy
echo "mon message de sortie";
Don't forget to return the status in numerical form:
Check out how the other plugins are built!
On your Esia server in the directory /usr/local/esia/plugins/
Plugin nomenclature
In Esia, the names of plugins are always in capital letters and the words separated by underscores. Make sure you give your plugins clear, explicit names so that you know what they do just by reading their name.
Use the following format: <type de plugin>_<protocole>_<plateforme>_<élément testé>
| Plugin type | Description |
|---|---|
| GESA | For plugins that go through a Unity to find the information they are looking for (ESIA Unity) |
| CHECK | For plugins that directly query a node (mainly ESIA Infinity). |
| TRAP | For plugins that use SNMP Trap. |
| MAN | For Management plugins. |
| CORR | For correlation plugins. These are plugins that work on the results of other plugins. |
Examples:
GESA_SNMP_WINDOWS_STORAGE
- GESA: Tests via the Unity box.
- SNMP: uses the SNMP protocol.
- WINDOWS: for all Windows OS.
- STORAGE: tests the storage space used on a drive.
CHECK_HTTPS
- CHECK: Tests directly from the server.
- HTTPS: if an HTTPS server is present
It's important that you follow these rules when you add a new plugin to keep things consistent.
Adding a plugin to the Esia interface
First, copy the executable of your plugin to the Esia server in the directory /usr/local/esia/plugins/ (Check that the file has execution rights X)
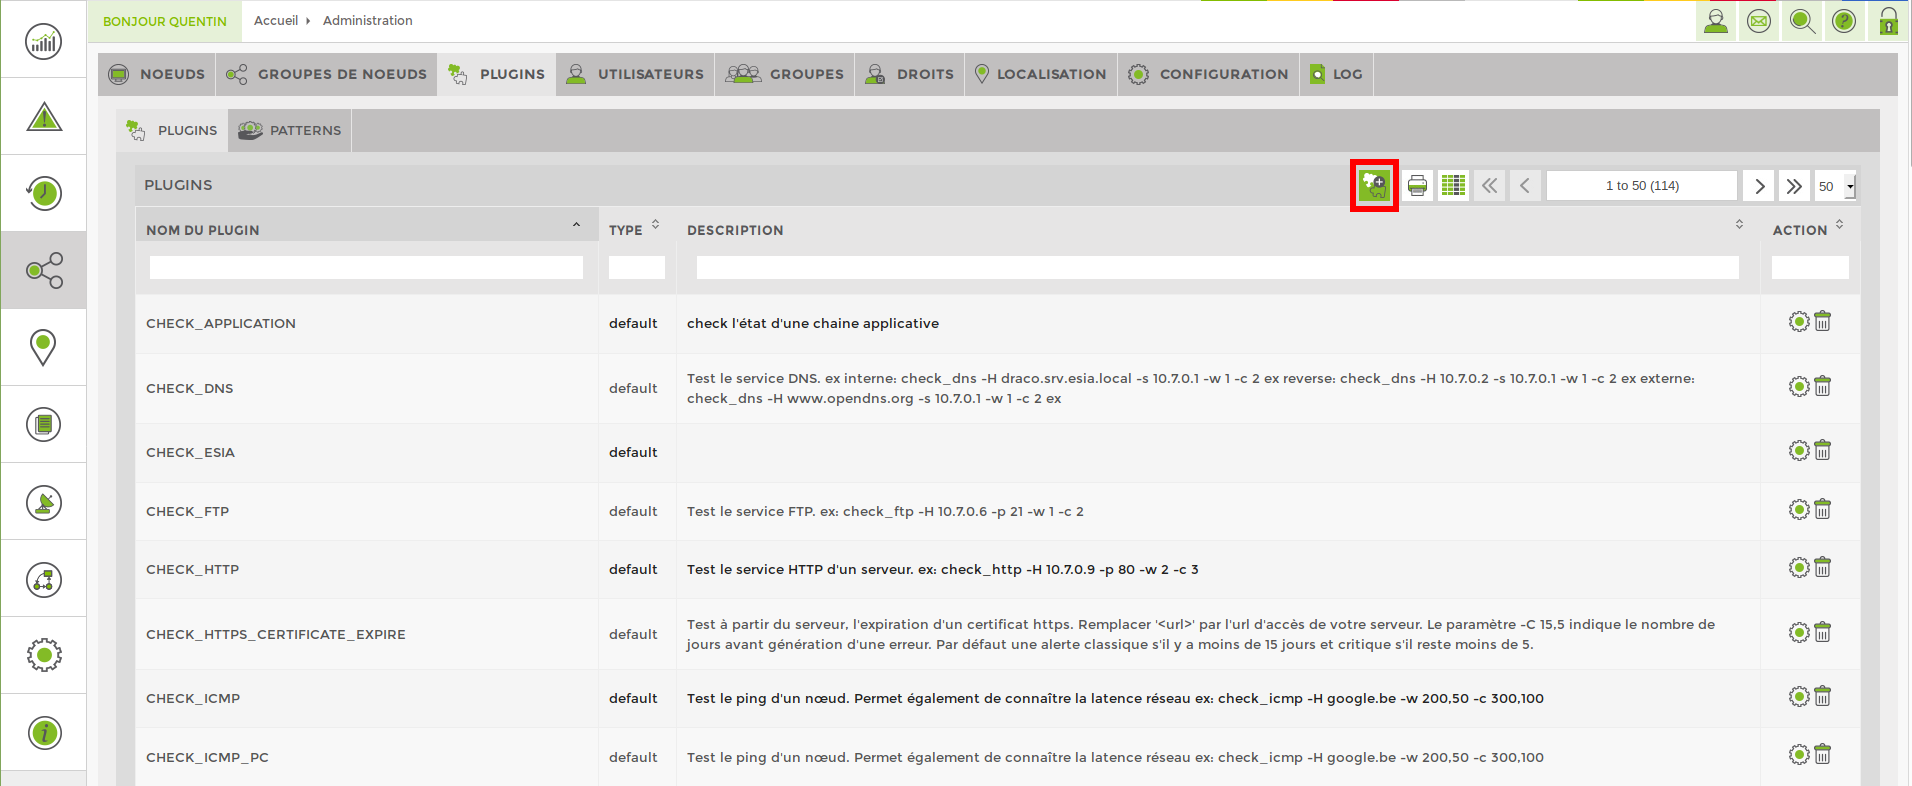
On the web interface, go to the menu « Administration ![]() ». Go to « Plugins » then click on the
». Go to « Plugins » then click on the ![]() at the top right.
at the top right.
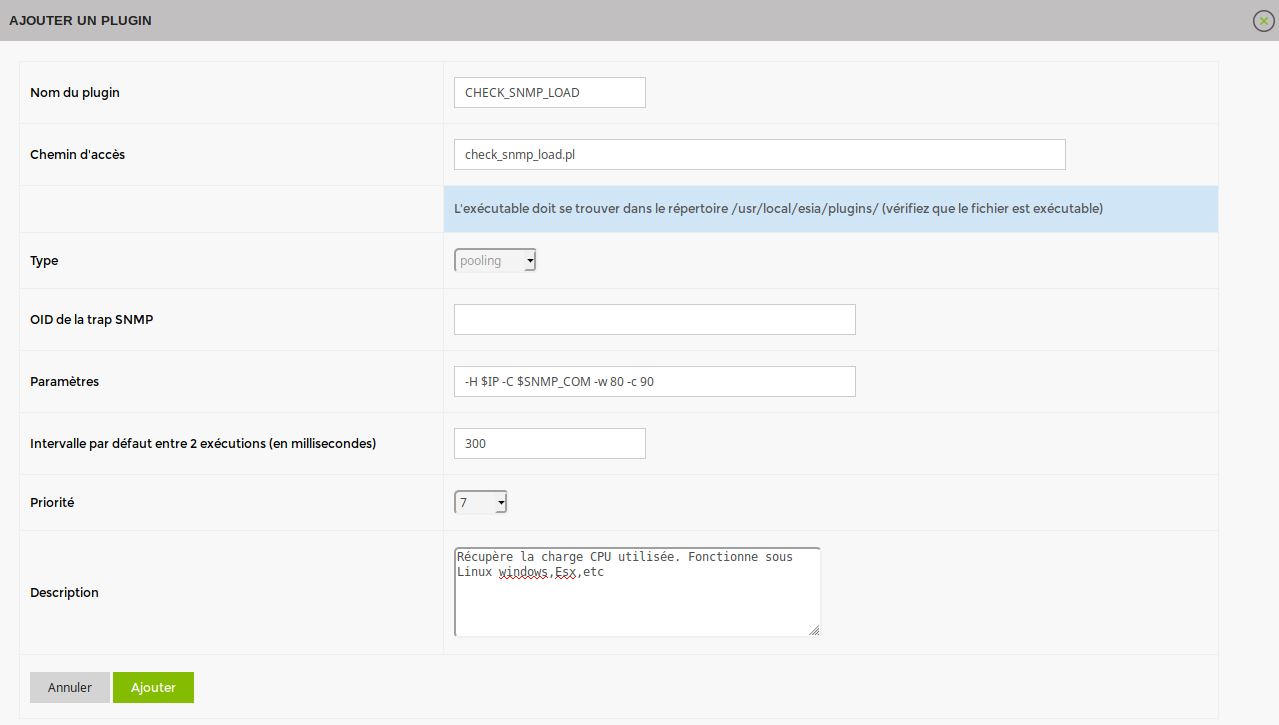
This will open a new window.
Configure the new plugin:
Plugin nameThe name it will have in the interface. Plugin Nomenclature)
Access pathThe path and name of the executable file from the directory on the server
/usr/local/esia/plugins/(Check that the file has execution rights X).ExampleOn the image above, our executable
check_snmp_load.plis located at the root of the/usr/local/esia/plugins/Type: This option will be implemented in the future.SNMP trap OID: This option will be implemented in the future.Settings*: Here you can configure the default options to be passed to the plugin.
Interval*: Default time between plugin executions in milliseconds (300 = 5 minutes).
Priority* Choose a default priority for the test (See Adding services => Priority of services).
DescriptionWhat this plugin does.
* Parameters, Interval and Priority are default values. They can be modified on a case-by-case basis for each node if necessary.
Don't forget to click on “Add” at the bottom left to save the plugin.


