Table des matières
Installation of a virtualised Svalinn probe
Svalinn Scanner
Installing the Svalinn probe on the VM
- copy
apt update
apt install gnupg
- copy
echo "deb http://stable.repository.esia-sa.com/esia bookworm main contrib non-free non-free-firmware" >> /etc/apt/sources.list
wget -O- "http://stable.repository.esia-sa.com/esia/gnupg.key" | apt-key add -
- copy
apt update
apt install snmpd -y
apt install gesa-base -y
apt install gesa-svalinn-base -y
Add the serial number
You need to edit the /etc/gesa/sn file
- copy
echo "<ton SN>" > /etc/gesa/sn
Configure SNMP
Next, edit the :
- copy
nano /etc/snmp/snmpd.conf
You then need to configure the SNMP community by adding the following line:
- copy
rocommunity public localhost
Save the file with ctrl+o and ctrl+x to exit.
Restart services
- copy
/etc/init.d/snmpd restart
/etc/init.d/ecatp-client restart
Your Unity is now active and should appear in your interface like a regular Unity. You can go to the following tutorial following tutorial.
Server-side installation
Esia mercury with Svalinn. If you don't have an Esia server yet, you need to install one on a VM other than the probe so that the probe can connect to it. You will also need an Esia Mercury + Svalinn licence. See here for Mercury server requirements
- copy
apt update
apt install gnupg
- copy
echo "deb http://stable.repository.esia-sa.com/esia bookworm contrib non-free" >> /etc/apt/sources.list
wget -O- "http://stable.repository.esia-sa.com/esia/gnupg.key" | apt-key add -
- copy
echo "deb http://svalinn.repository.esia-sa.com/svalinn bookworm contrib non-free" >> /etc/apt/sources.list
wget -O- "http://svalinn.repository.esia-sa.com/svalinn/gnupg.key" | apt-key add -
- copy
apt update
apt install esia-enterprise-base esia-db-plugins-gesa esia-ecatp-server
apt install esia-webp-svascan esia-webp-inventory
apt install esia-svascan-cve
Configure interfaces
Once you have installed the vulnerability scanner, you need to add the interfaces from the scanner's graphical interface. Connect via https to its IP.
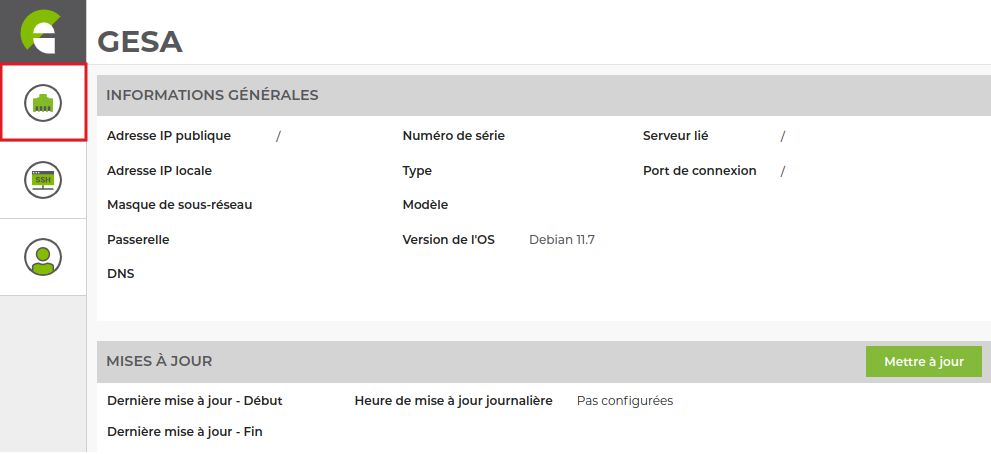
Then go to the interface tab.
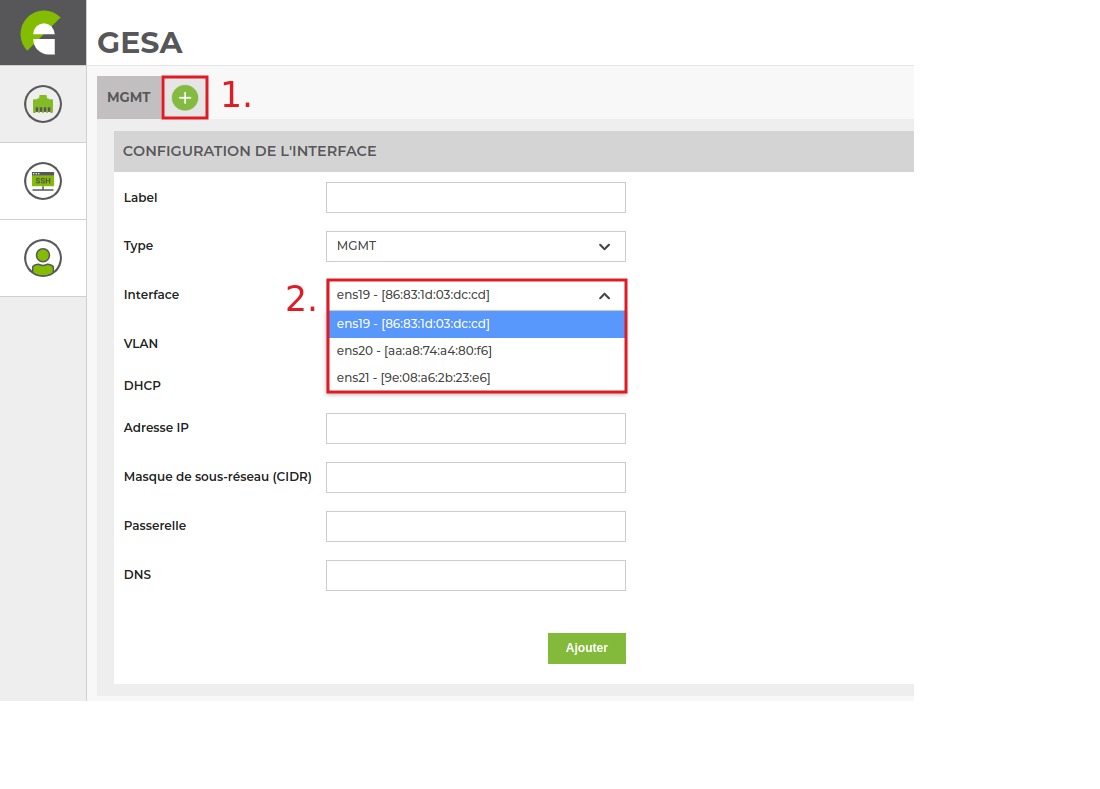
Click on the +, fill in the form and choose the interface.
Enter the information for your physical or virtual interface (check the VLAN option to enter the VLAN ID). Then configure how you obtain your IP address (static/dynamic).
VM Svalinn scanner under VMWare
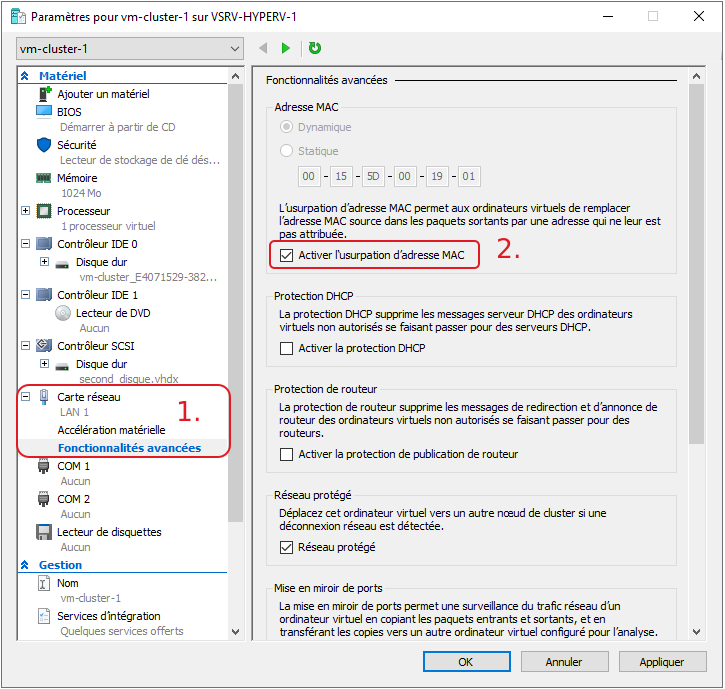
If you are using VMWare, Svalinn scans may not detect nodes (even in the same VLAN). This is due to the use of containers and macvlan network drivers which require the VM to use different mac addresses to the network interface (VMWare).
You can check the following options in VMWare:


