Table des matières
Webplugin virtualization
Installation/Activation
As root, on the command line of your Esia
- copy
apt update
apt install esia-webp-virtualization
Important note (for VMware only)
Always configure a Virtual Cluster node. Even if the hypervisor is alone and not connected to a Vcenter.
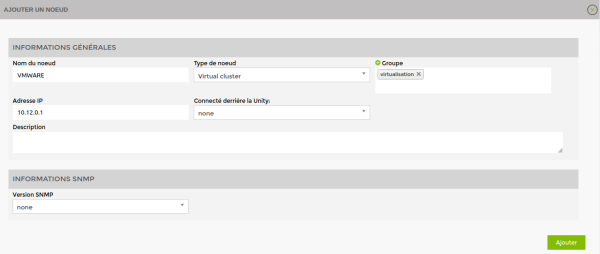
Add a Virtual cluster node
You need to configure :
- The name of the desired node
- The 'Virtual cluster' node type
- The desired node group
- The IP address (for VMware, preferably vcenter, ESX if you have no choice).
- A desired description.
- SNMP parameters (optional)
Currently, the virtualisation webplugin is only accessible live and cannot be used through Unity.
Choose the type of driver you want
Configuring the url
The node's URL is automatically configured according to the IP encoded above. But you can modify the url.
Configure login/password
Different possible cases
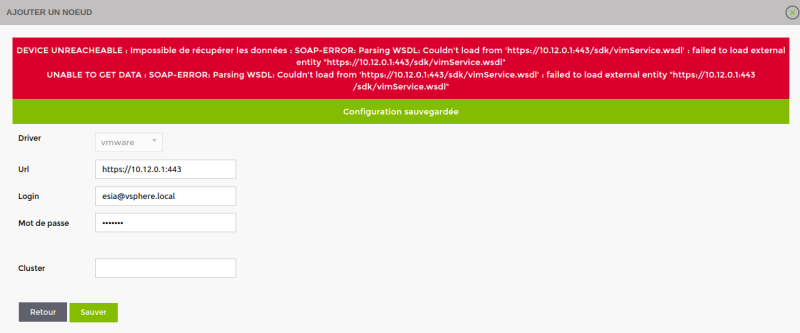
If the node cannot be reached
An error message is displayed indicating that it is impossible to recover the data. But the configuration is still saved. This allows the device to be configured later.
For VMWare only, as it is not possible to retrieve the cluster name (in Vcenter), or even to know whether it is a Vcenter or ESX hypervisor, a textbox is displayed allowing you to encode it.
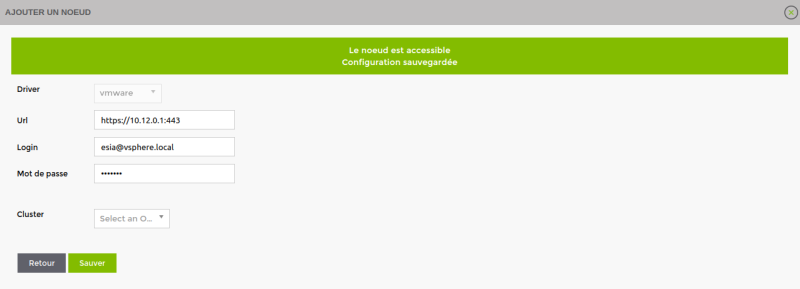
ESX-type device (for VMware only)
If the encoded node is an ESX encoded in a Vcenter
In this case, the configuration is saved but a message warns that it is advisable to use the vcenter
If the encoded node is an ESX without Vcenter
Vcenter device (for VMware only)
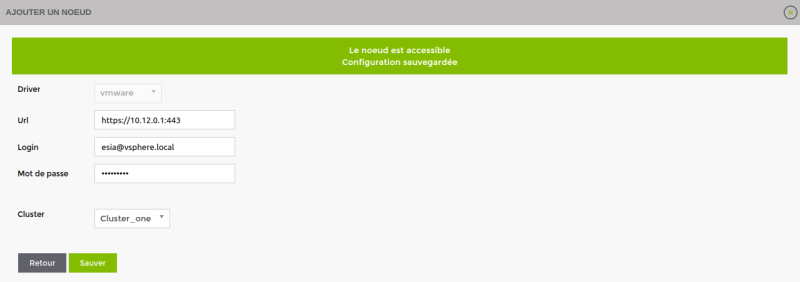
If the encoded node is a Vcenter with only 1 cluster
If the encoded node is a multicluster Vcenter
Add the various hypervisors
On the previously encoded Vcenter main page.
Click on the add button of the desired hypervisor
Customise the main parameters of your hypervisor.
Troubleshooting
Memory allocation issue
If you receive the error message “Allowed memory size of XXX bytes exhausted …”. This means you need to allocate more memory to your Esia web server. To do this, you need to modify the php.ini file via SSH (root) on the Esia server. Note that the file path contains the latest version of PHP installed on your server (here, 8.2).
- copy
nano /etc/php/8.2/apache2/php.ini
Press ctrl+w to search for “memory_limit” and find the line :
php_value memory_limit 128MIncrease this number (without exaggeration). Here we will replace the line with :
- copy
php_value memory_limit 256M
Next, save the file and then restart the Apache server.
- copy
service apache2 restart


