Table des matières
SNMP activation on a Fortinet firewall

This tutorial has been made available to the entire Esia community thanks to the contribution of our partner Rcarré.
Their website: https://www.rcarre.com
Via the WEB interface
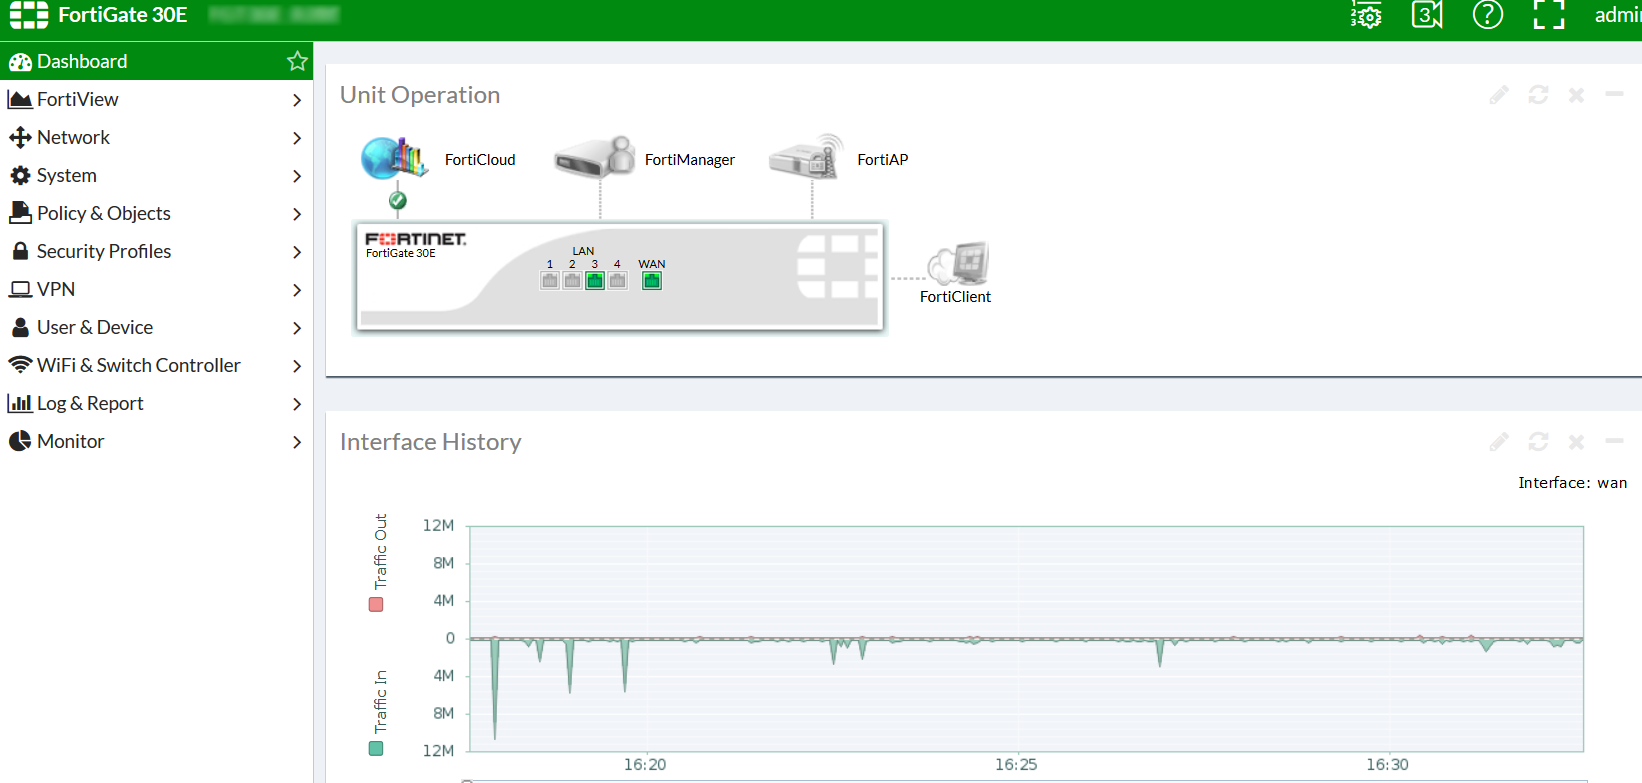
Once you have logged in, you will be taken to the firewall dashboard as shown in the image below.
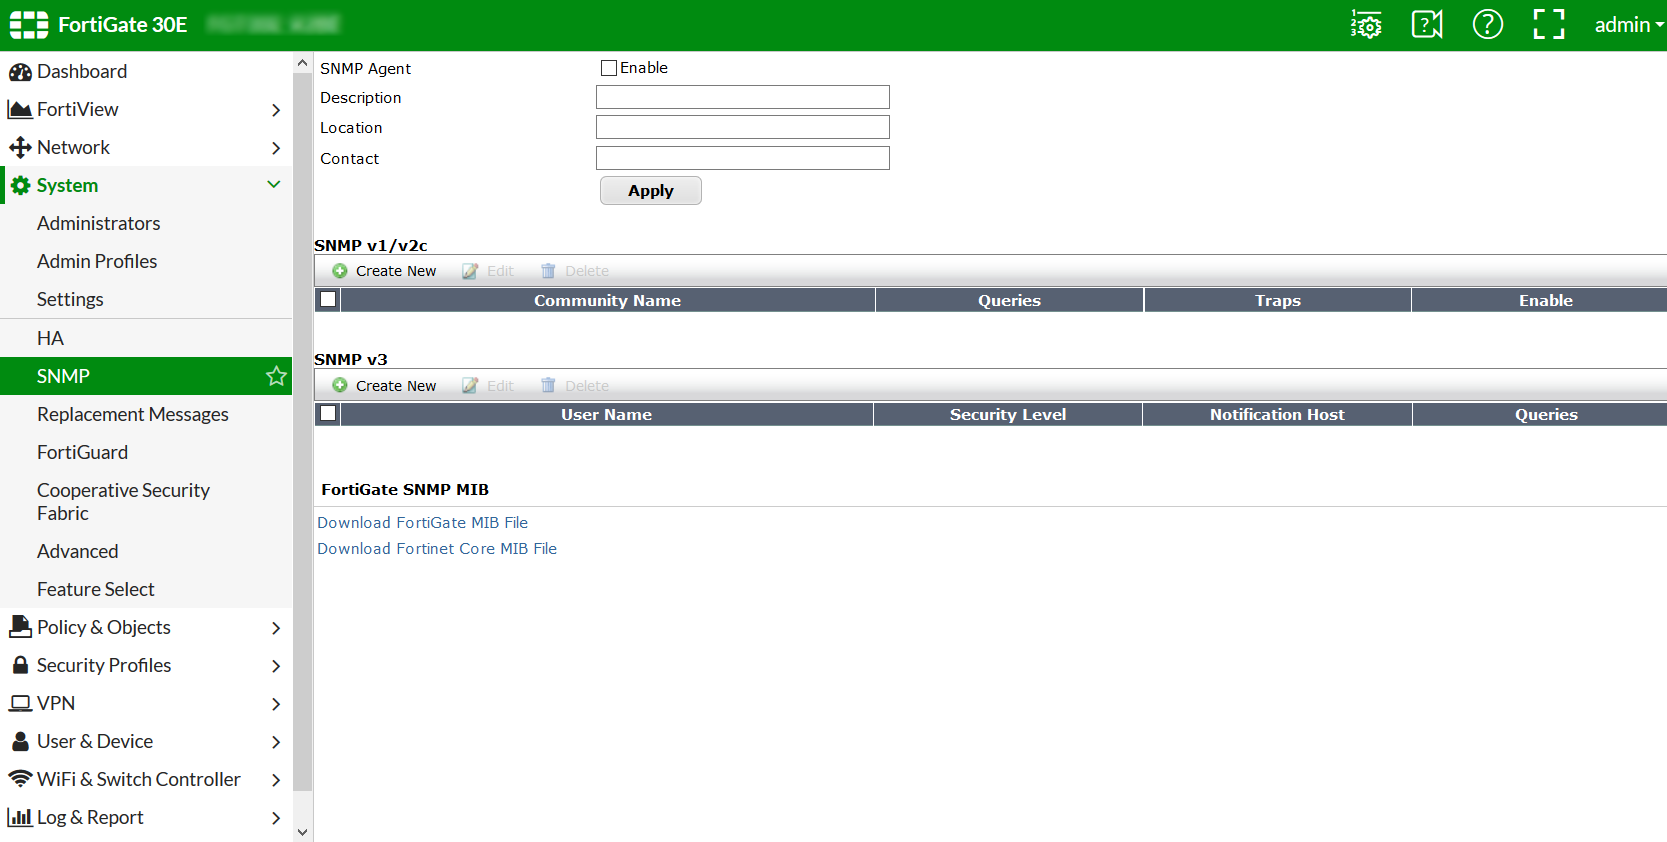
Click on “System” and then on “SNMP” to go to the SNMP configuration page. As shown below:
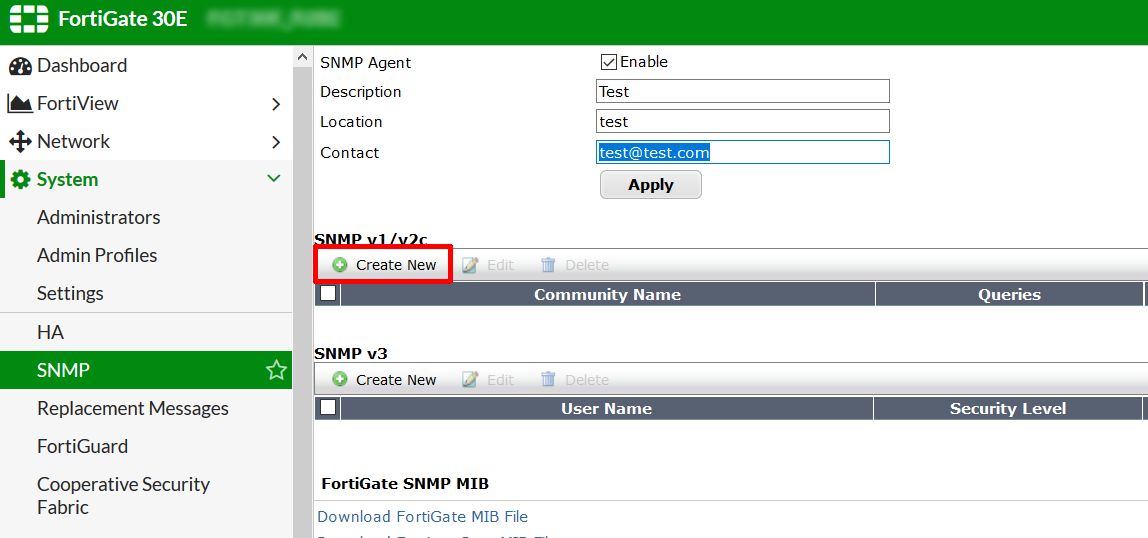
Tick the “Enable” box and enter the description, location and contact. Then click on “Apply”. Now you need to create the SNMP community. Just below the “Apply” button, click on “Create New”.
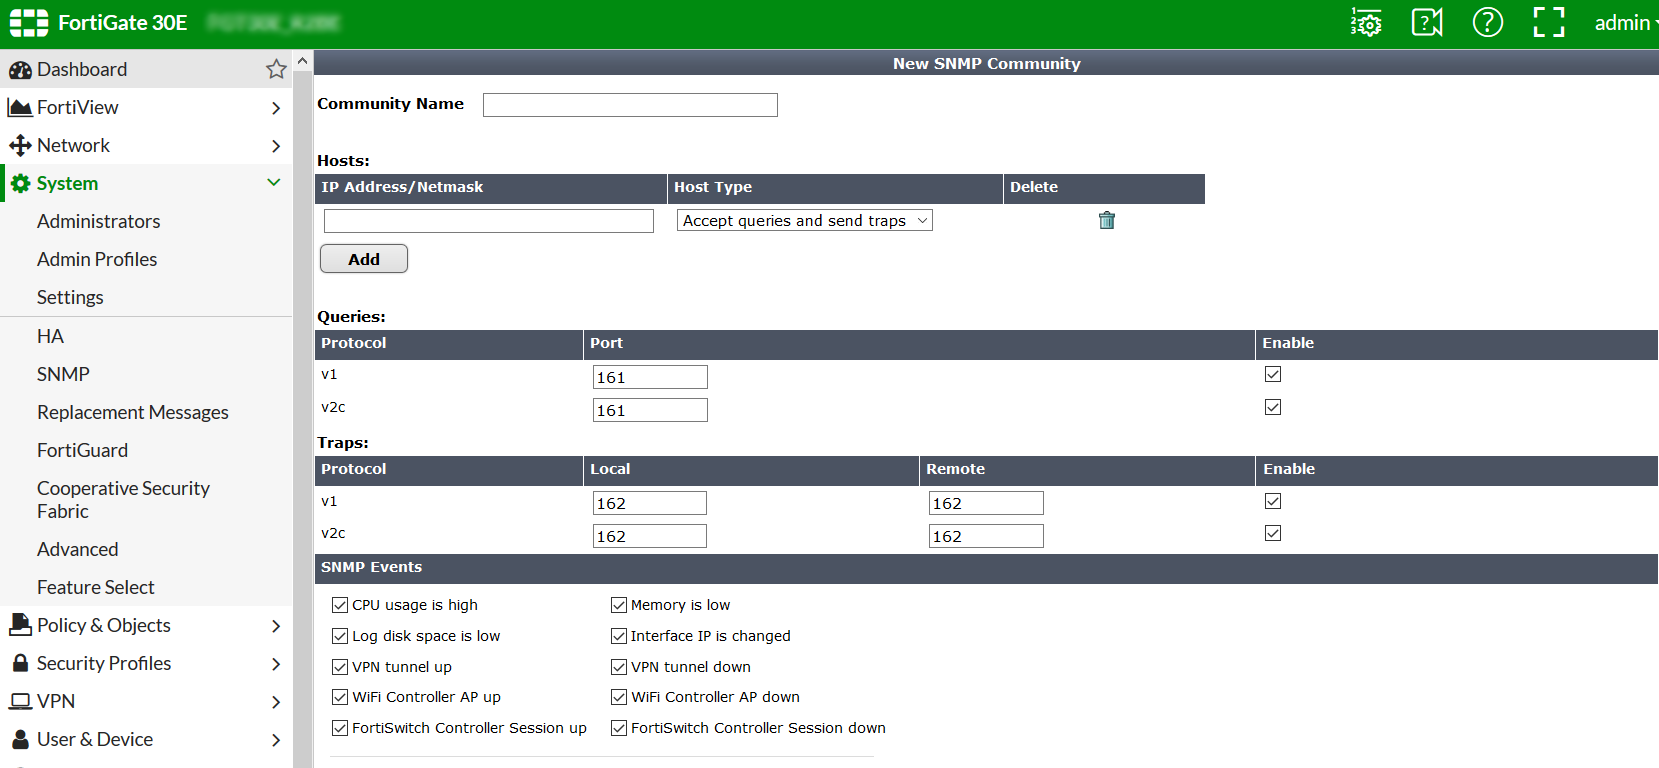
On the page that appears, enter the SNMP community, the IP address of your Esia server or your unity in the HOST field and tick the boxes as shown below. Then click on “Apply”.
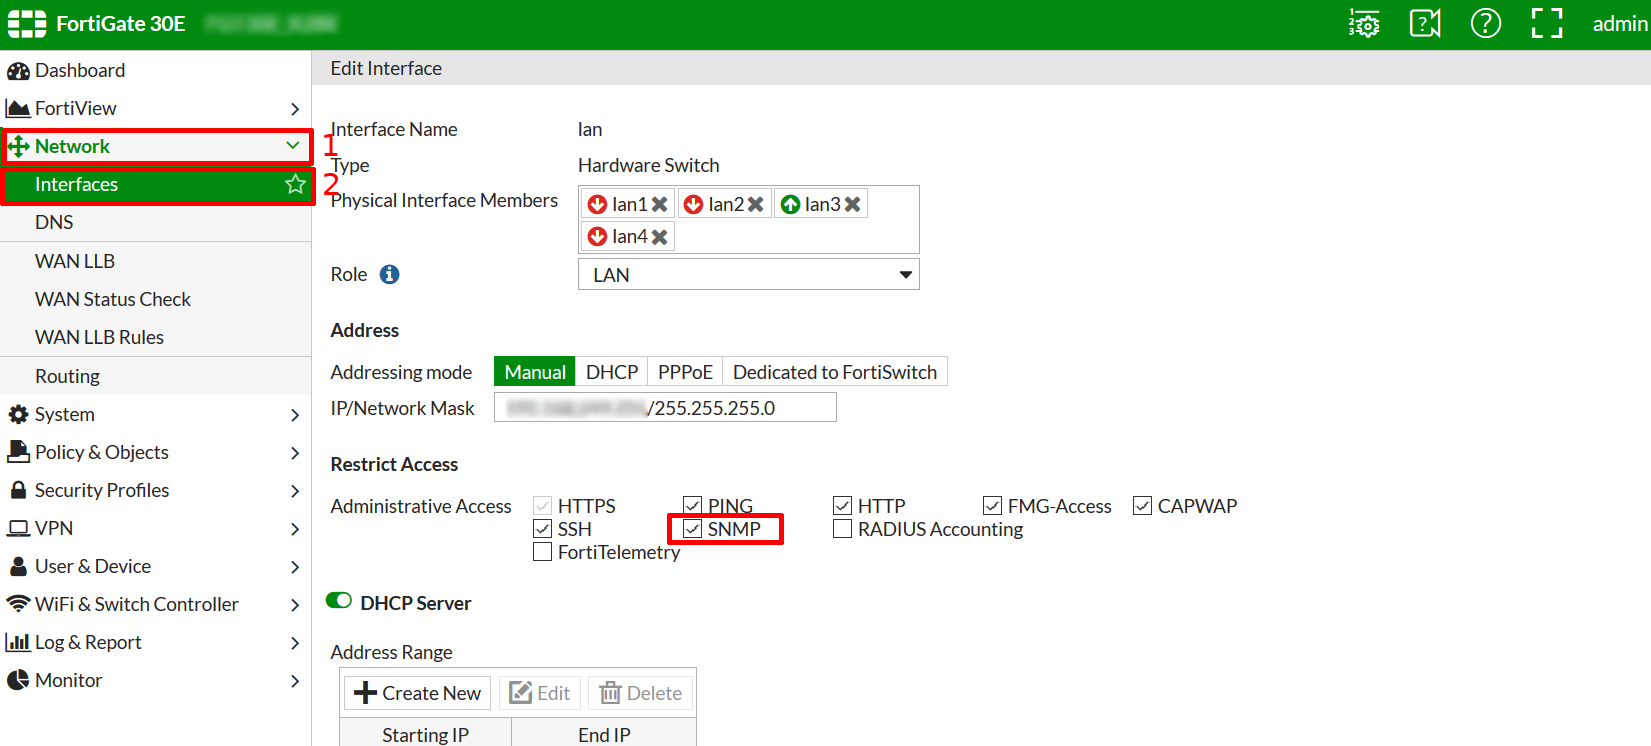
Now you need to authorise the SNMP protocol on the LAN interface of your firewall. To do this, go to the “Network” menu and then “Interface”. Then tick the SNMP box in “Restrict Access”.
Click “Apply” to save the configuration.
SNMP is now enabled on your Fortigate firewall.
Via CLI/SSH
Once connected via SSH, you can type the following commands to activate SNMP. You will obviously need to adapt the description/contact/location fields.
config system snmp sysinfo
    set status enable
    set description "ce que je veux"
    set contact-info "absent"
    set location "Liège"
end
Now that SNMP has been activated, we need to configure the SNMP community using the following commands:
config system snmp community
    edit 1
        set name "public"
        config hosts
            edit 1
            next
        end
        set events cpu-high mem-low log-full intf-ip vpn-tun-up vpn-tun-down ha-switch ha-hb-failure ips-signature ips-anomaly av-virus av-oversize av-pattern av-fragmented fm-if-change bgp-established bgp-backward-transition ha-member-up ha-member-down ent-conf-change av-conserve av-bypass av-oversize-passed av-oversize-blocked ips-pkg-update ips-fail-open faz-disconnect wc-ap-up wc-ap-down
    next
end
Don't forget to change the community to “public”.
