Activating SNMP on an OPNsense firewall
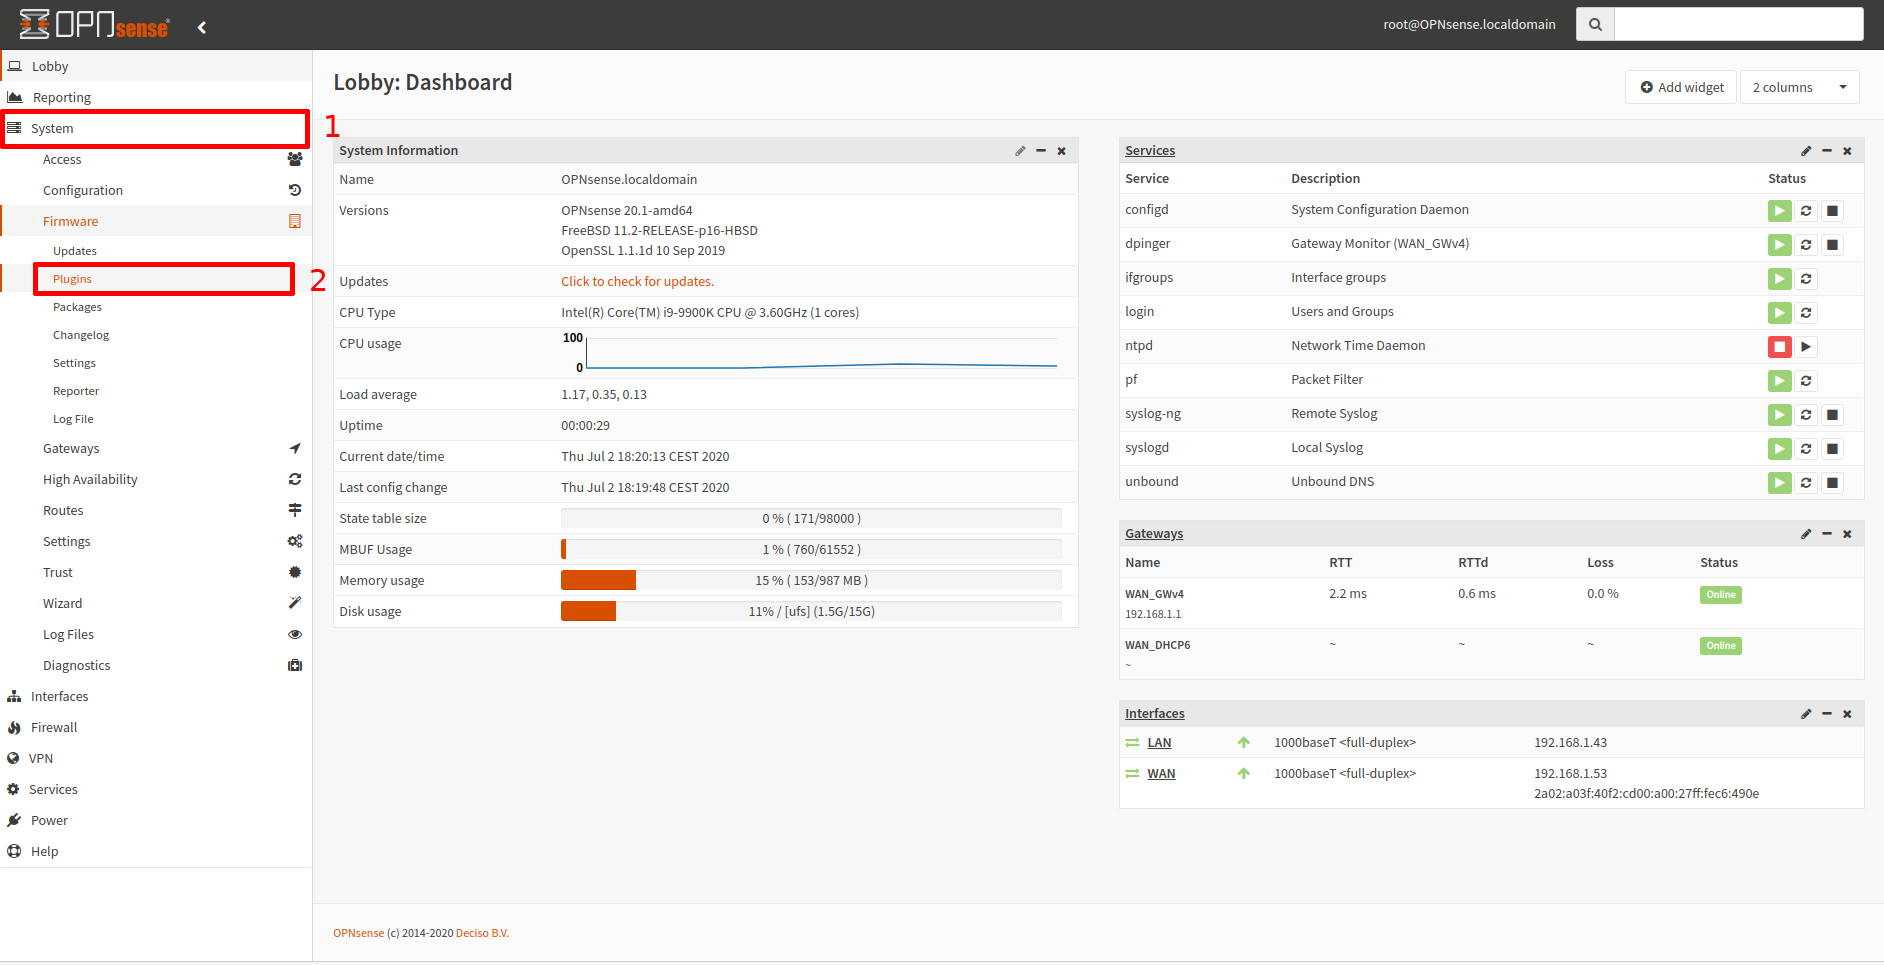
Once connected, you will be taken to the firewall dashboard as shown in the image below.
First you need to install the NET-SNMP agent, go to “System” and then click on “Plugins”.
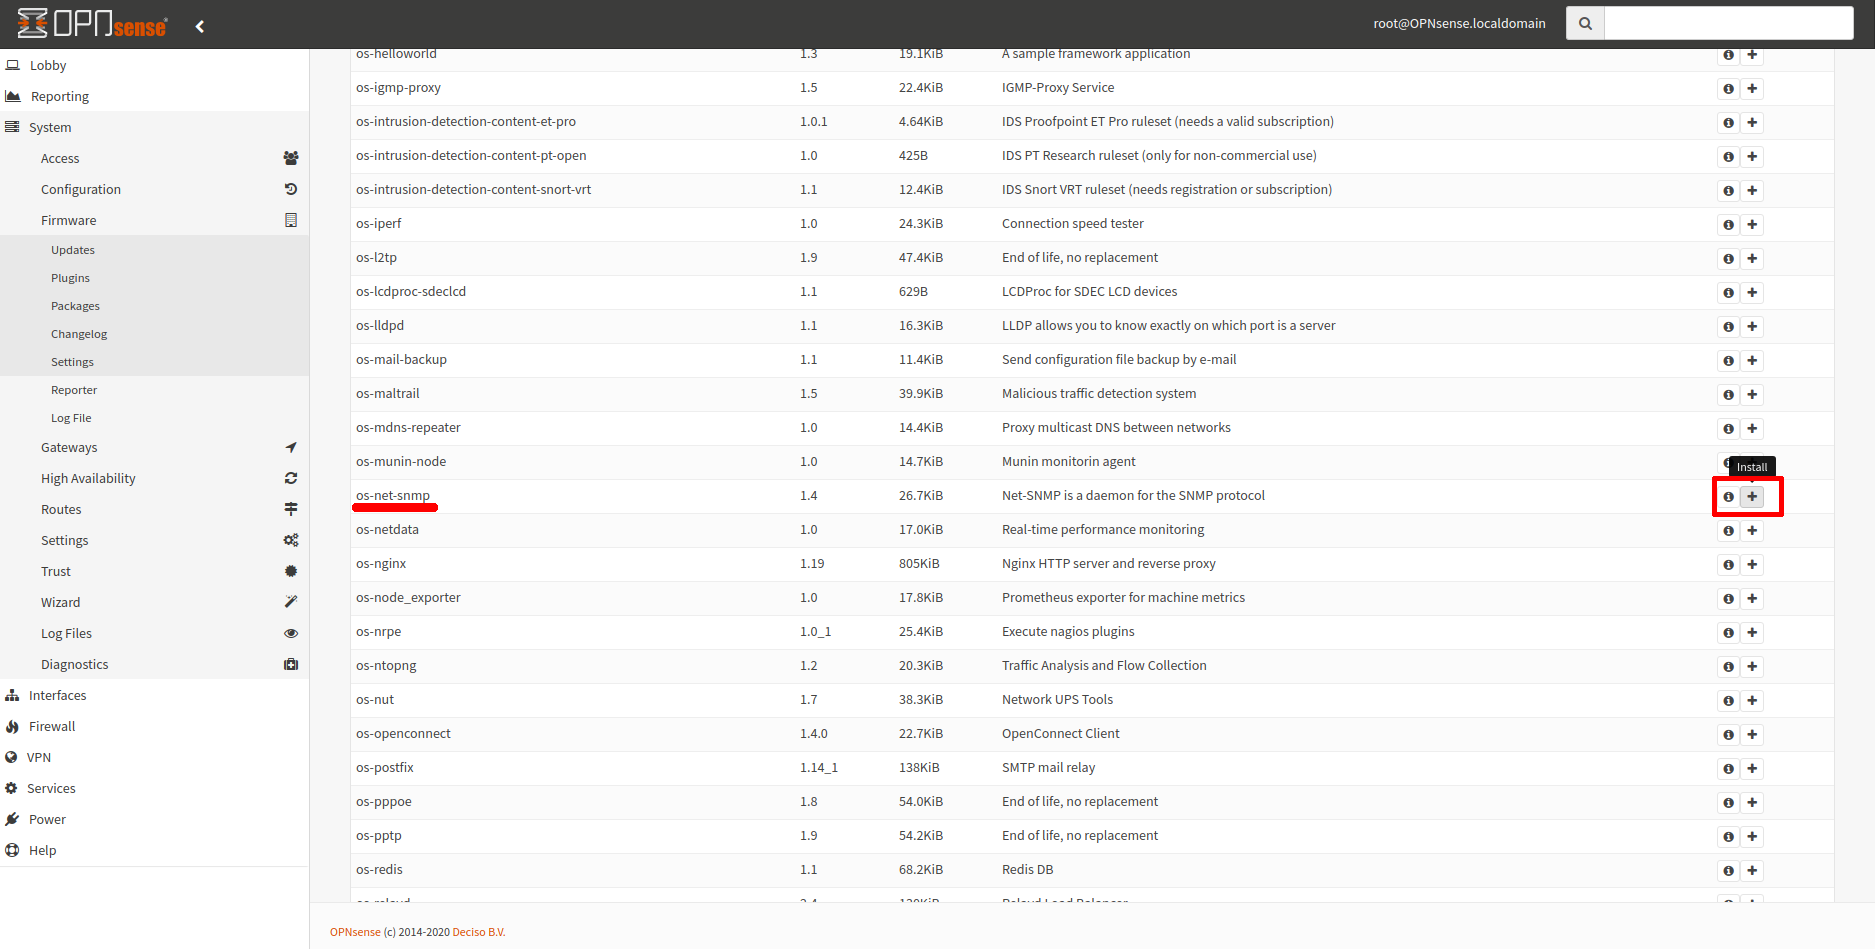
In the drop-down list, search for “os-net-snmp” and click on the small “+” to the right.
If the installation went well, you will get this message:
You need to reload the menu on the left and click on “lobby”, for example.
Now go to the “Services” menu and a new line will appear in it: “Net-SNMP”. Click on it.
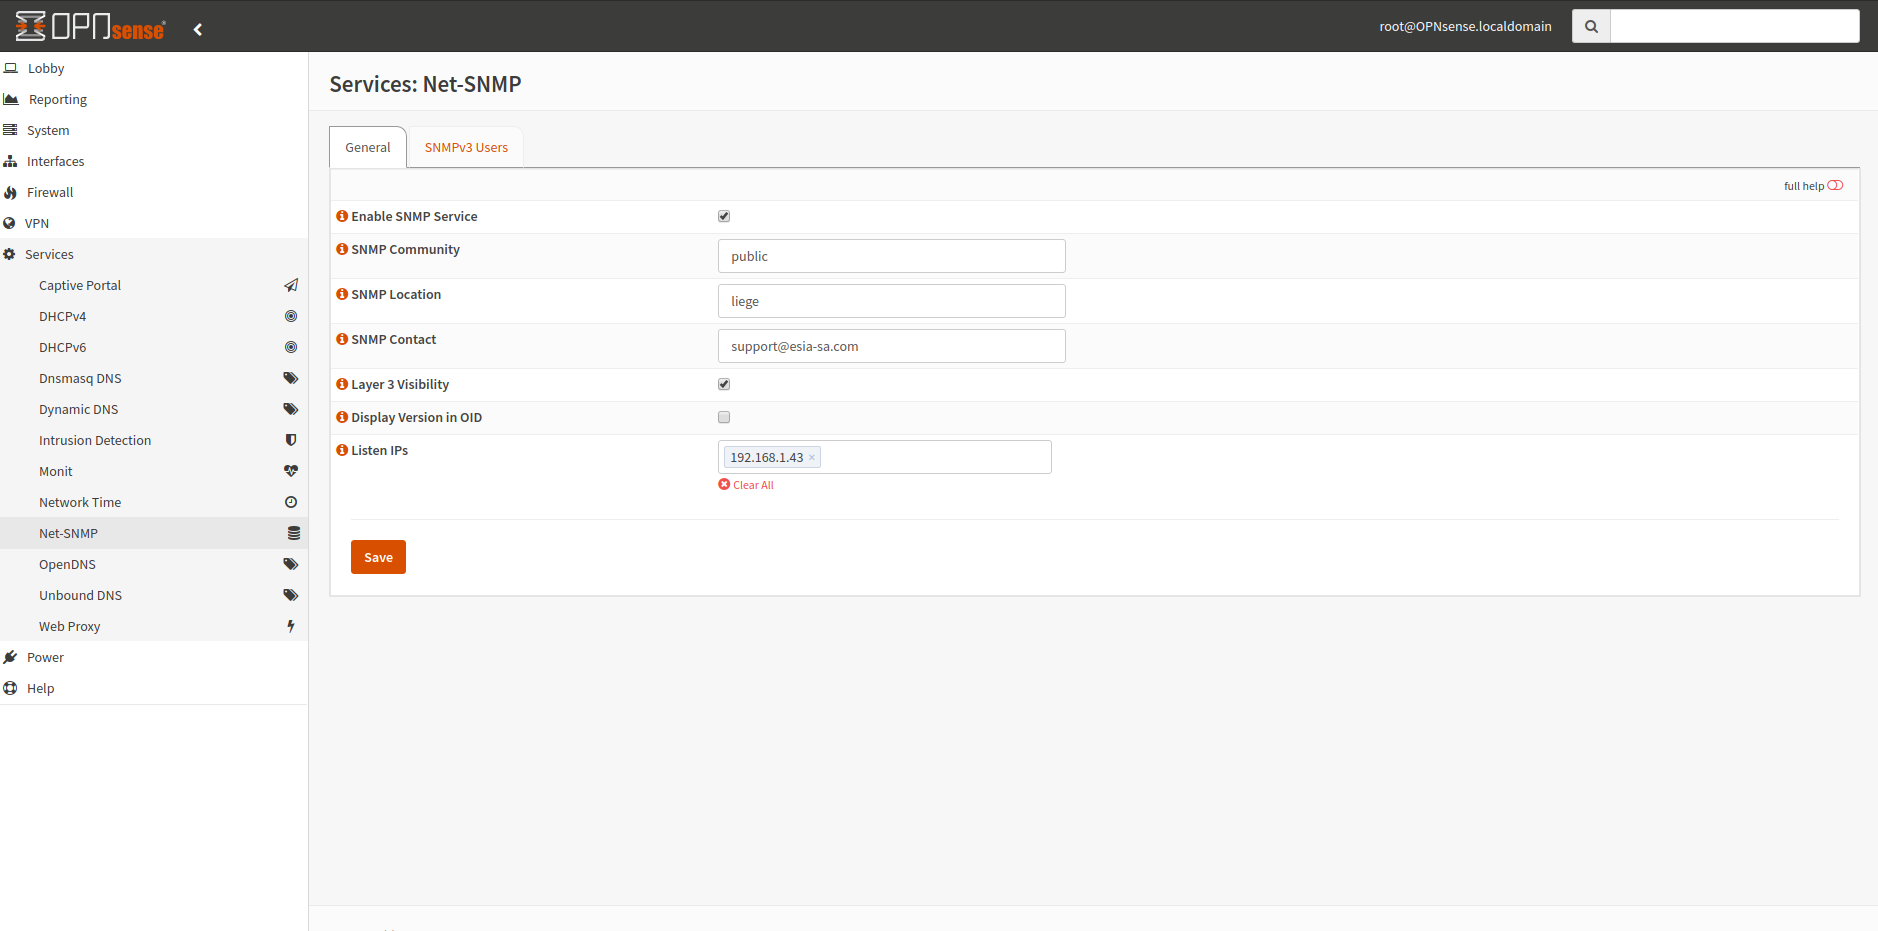
This screen appears:
Check the “Enable SNMP Service” box. Enter the SNMP community as well as contact and location information. Also tick “Layer 3 Visibility”. The last step is to enter the IP addresses to be listened to. In this example, I've entered the IP of my “LAN” interface.
Click “Save” to apply the configuration. SNMP is now enabled on your OPNsense firewall.


