SNMP activation on a Pfsense firewall
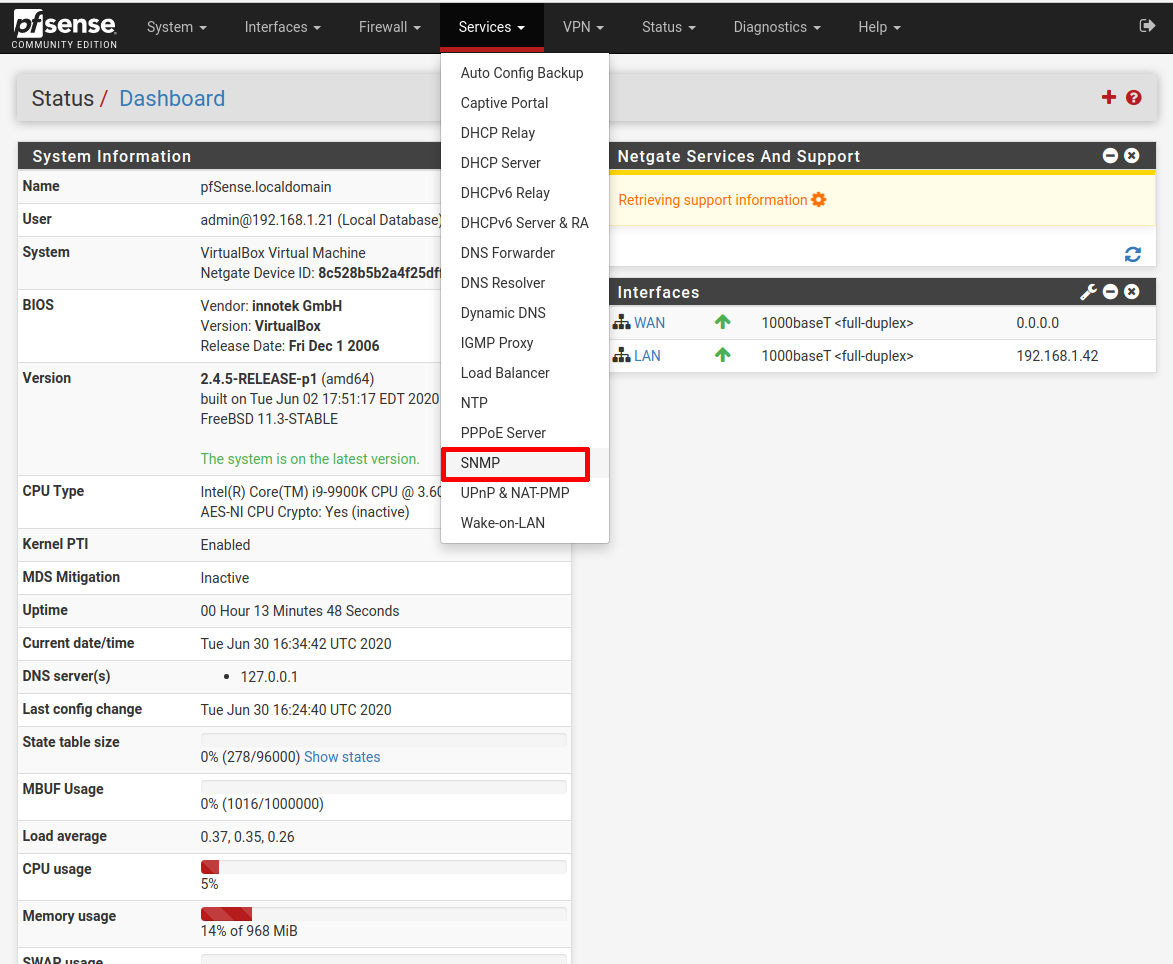
Once connected, you will be taken to the firewall dashboard as shown in the image below.
Go to the service menu in the top centre and in the drop-down menu you will see an SNMP menu. Click on it.
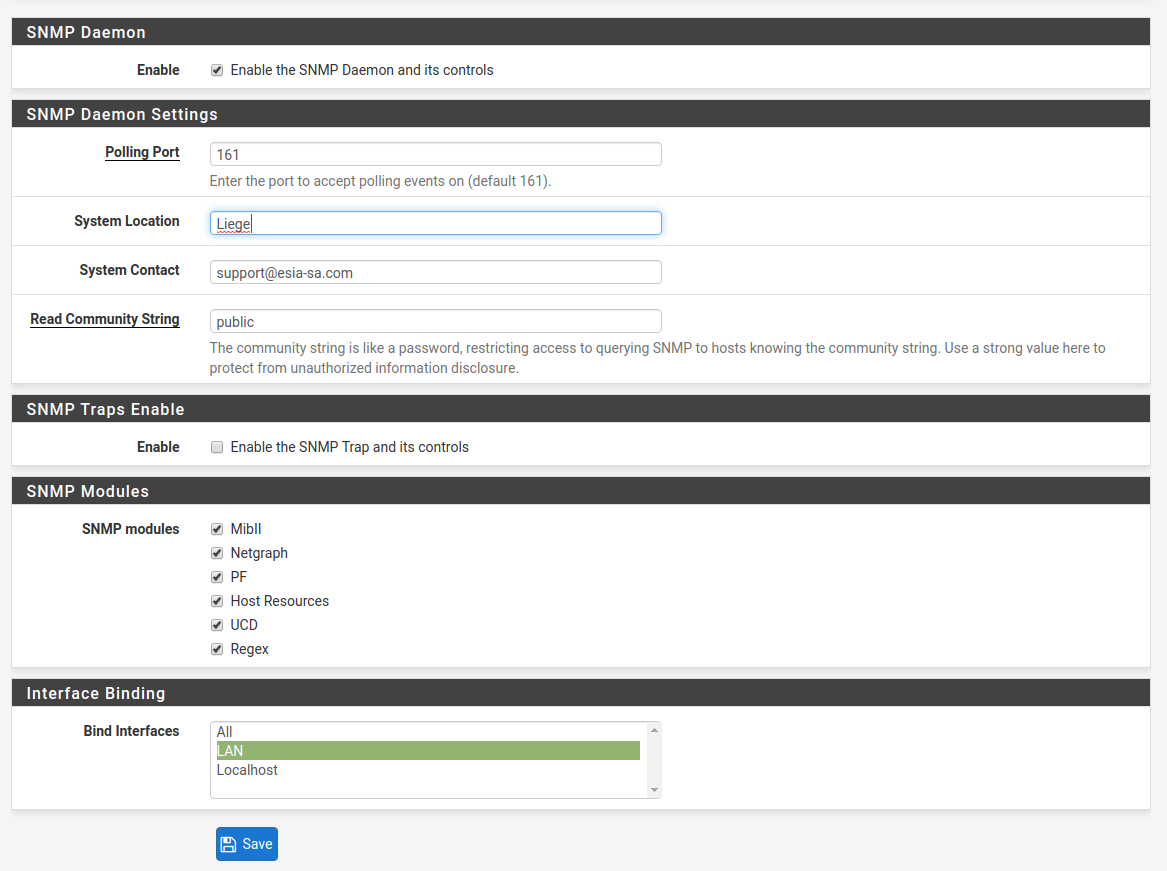
In the menu, tick “Enable the SNMP Daemon and its controls”. If you wish, you can fill in the “system location” and “system contact”. Change the community so as not to leave “public”.
Check that all SNMP modules are ticked.
Finally, make the SNMP agent listen on the interface you want (here the LAN interface).

Click on “save” and wait for the SNMP daemon loading message. The SNMP agent for your Pfsense is now activated.
Be sure to check the firewall rules on your Pfsense.

