SNMP activation on a Ricoh printer

This tutorial has been made available to the entire Esia community thanks to the contribution of our partner Factoria.
Their website: https://www.factoria-groupe.fr
Via the WEB interface
Log on as administrator. This will take you to the copier control panel as shown in the image below.
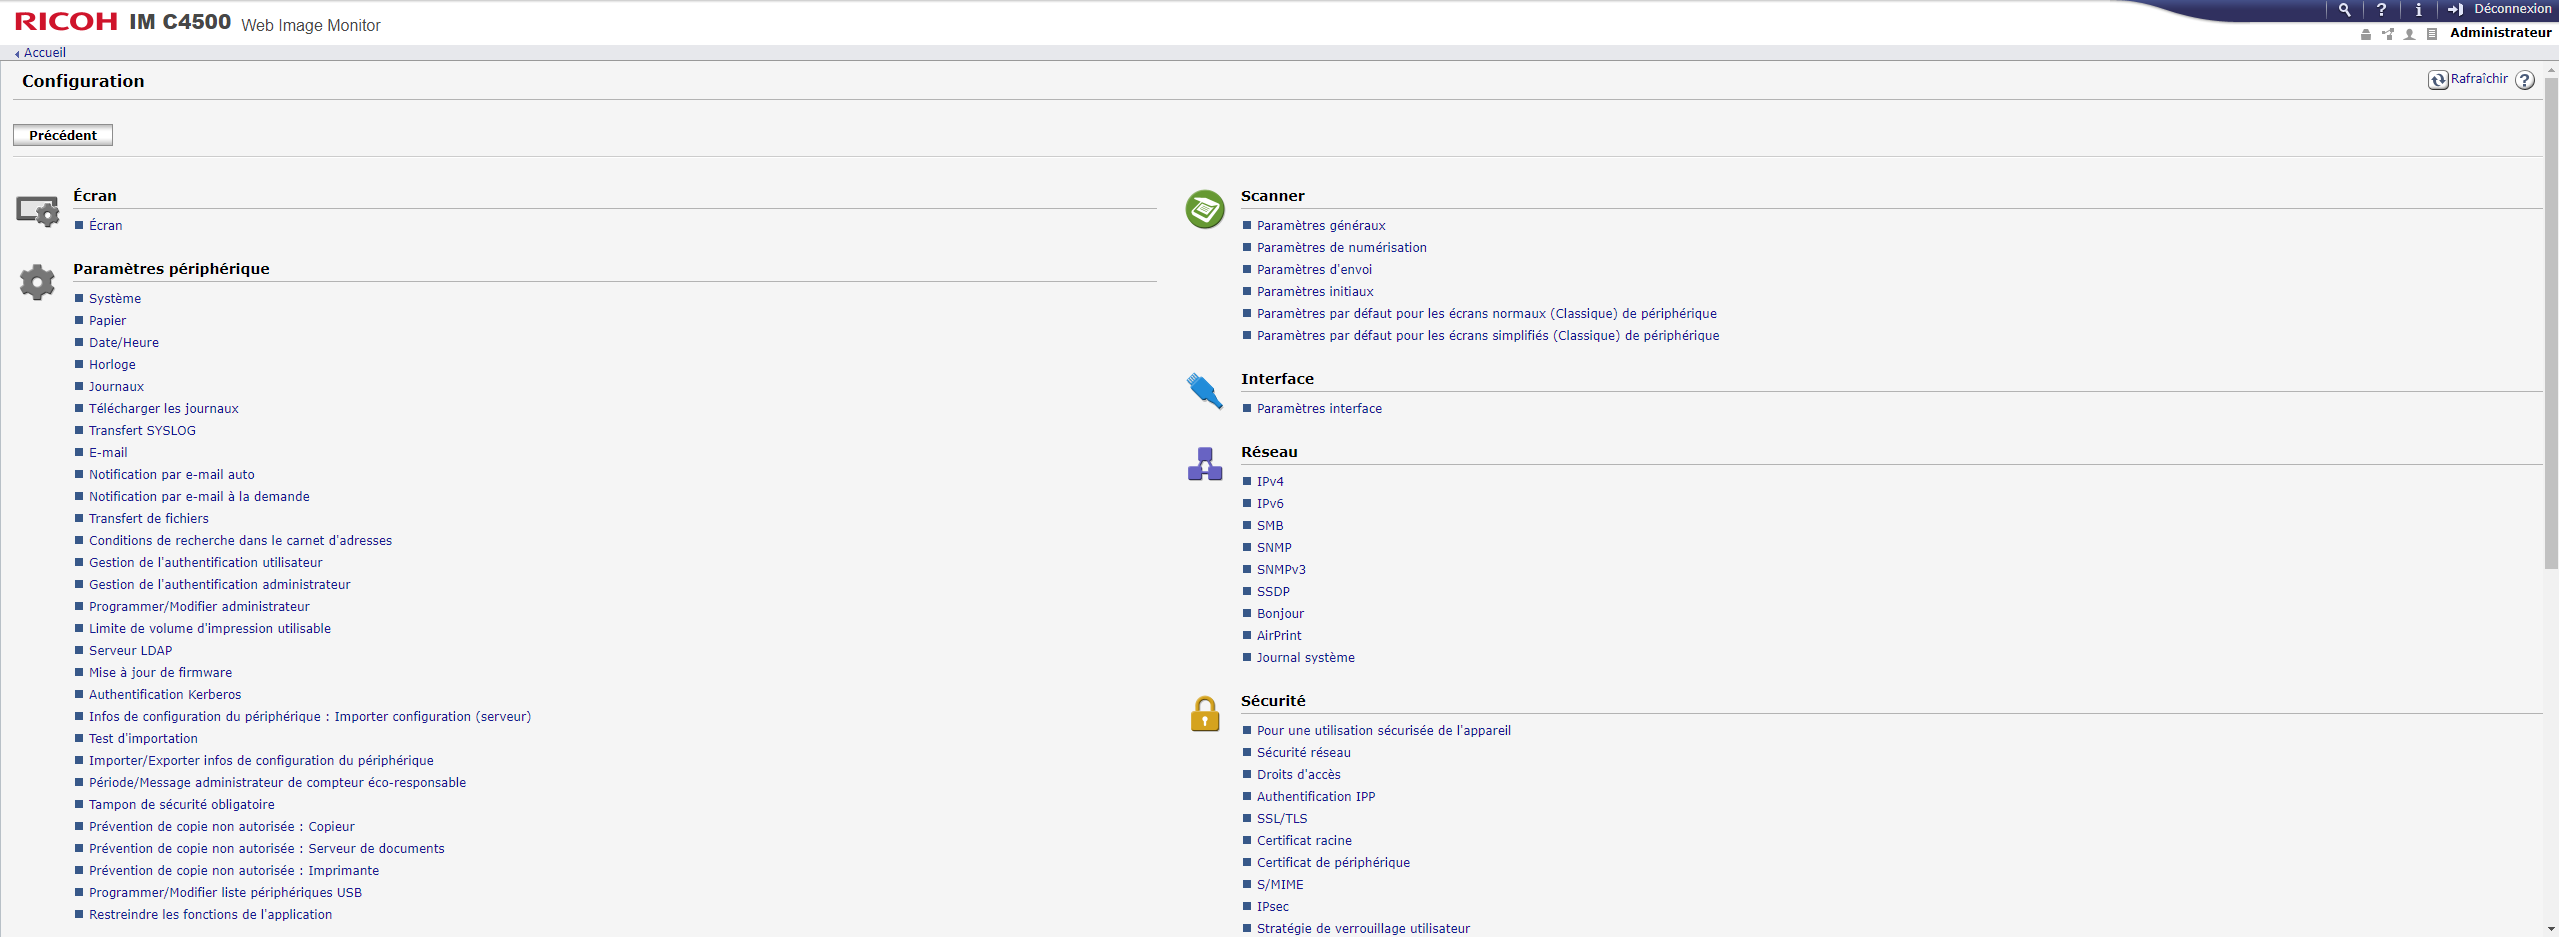
Click on “Device Management” and then on “Configuration”. Then on SNMP.
This is the SNMP configuration page:
On the page that appears, SNMP must be “Active”, IPv4 and/or IPv6 must be “Active”.
Indicate the SNMP community and the IP address of your Esia server or your unity in the “Manager address” field. Then click on “OK”.
SNMP is now activated on your copier.
It will receive the pattern “default_snmp_printer” when scanning or adding your copier in ESIA. This will give you the consumables and ping status.


