Table des matières
SNMP activation on a Stormshield firewall
Before version 4

This tutorial has been made available to the entire Esia community thanks to the contribution of our partner Ab Network. Many thanks to them.
Their website: https://www.abnetwork.be/
Via the WEB interface
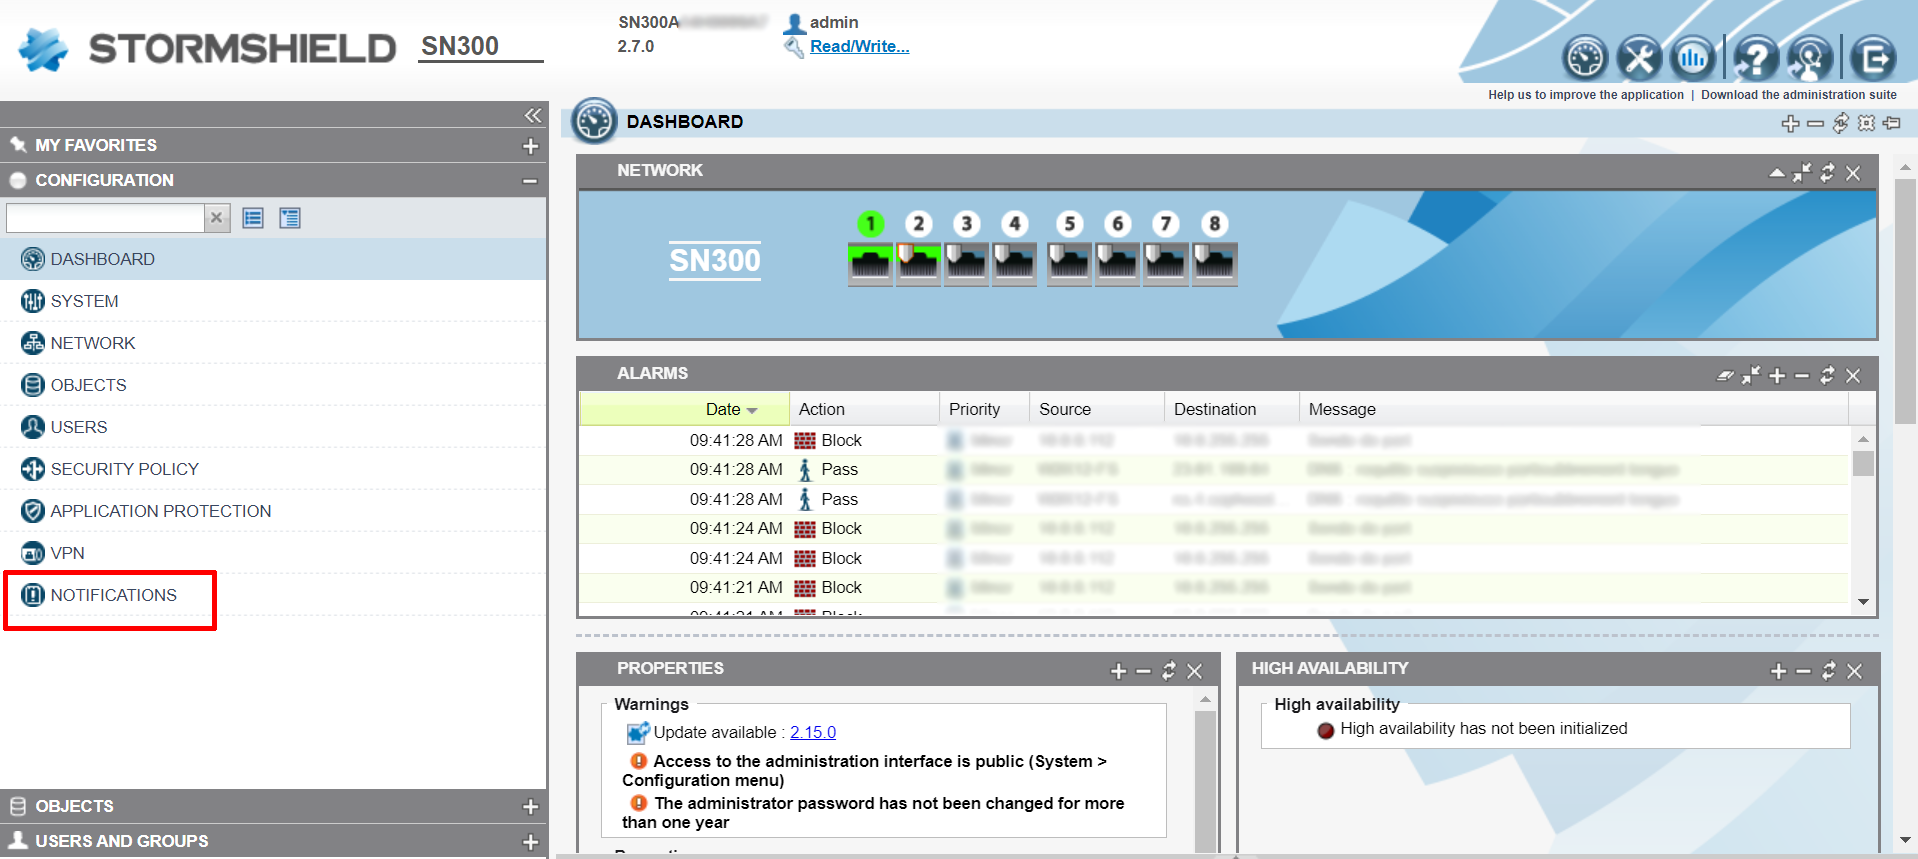
Once you have logged in, you will be taken to the firewall dashboard as shown in the image below.
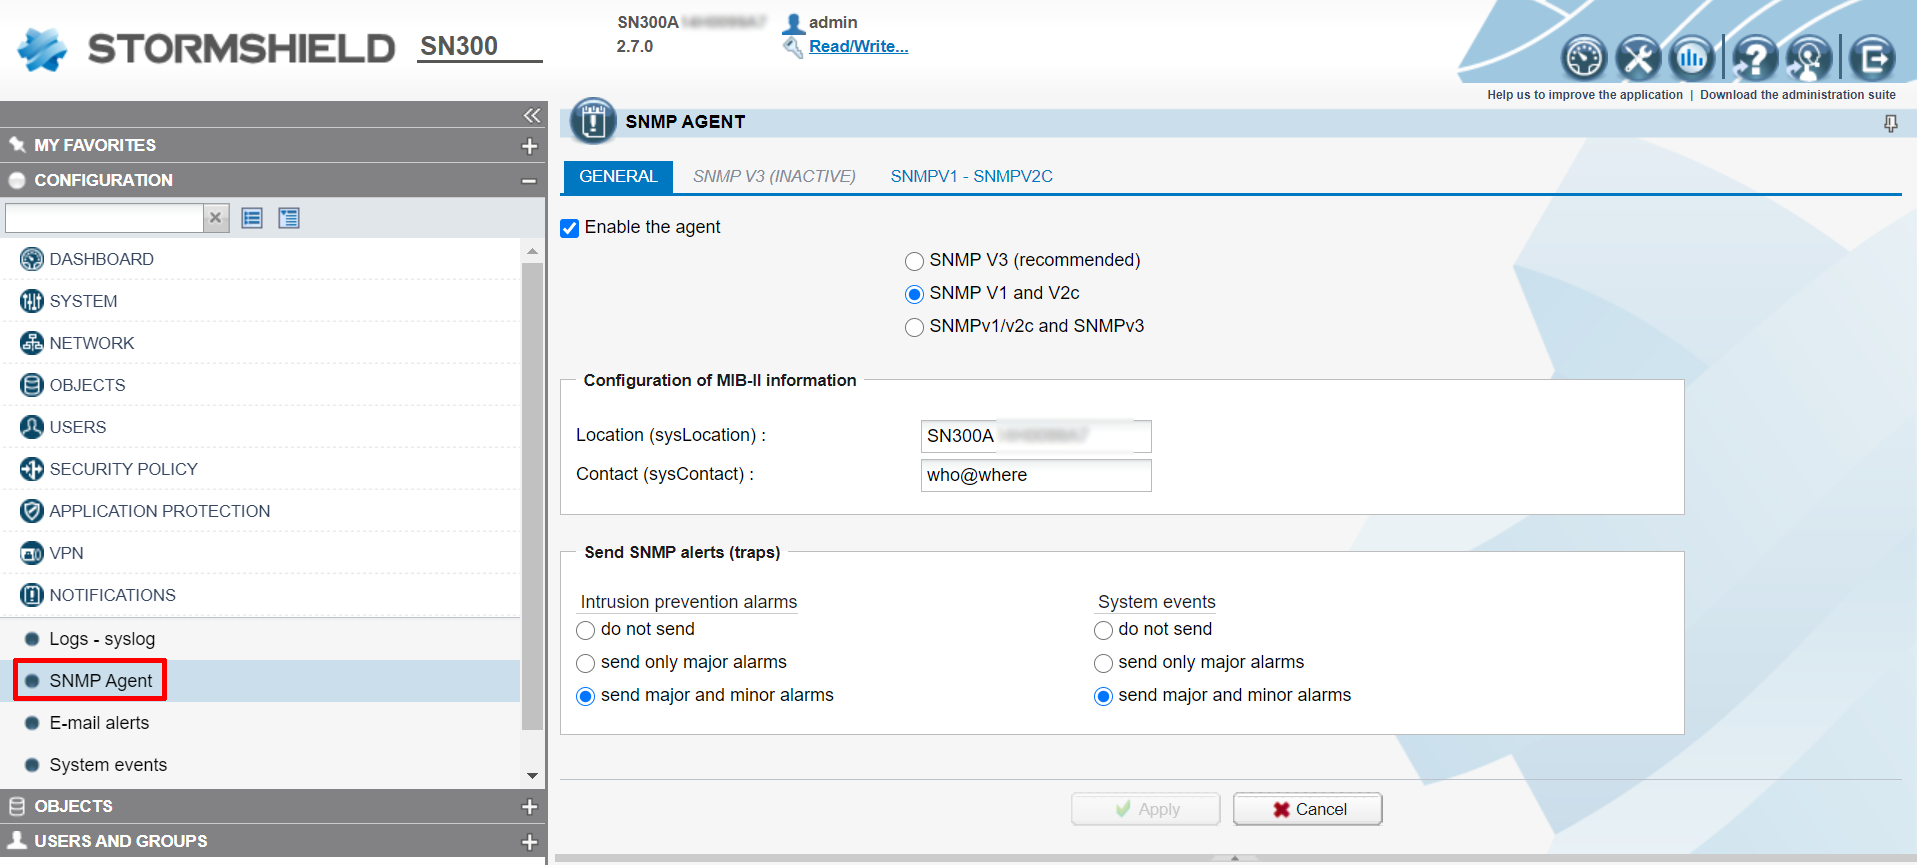
Click on “Notification” and then on “SNMP Agent” to go to the SNMP configuration page. As shown below:
Tick the “Enable the agent” box and enter the location and contact. Then click on “Apply”.
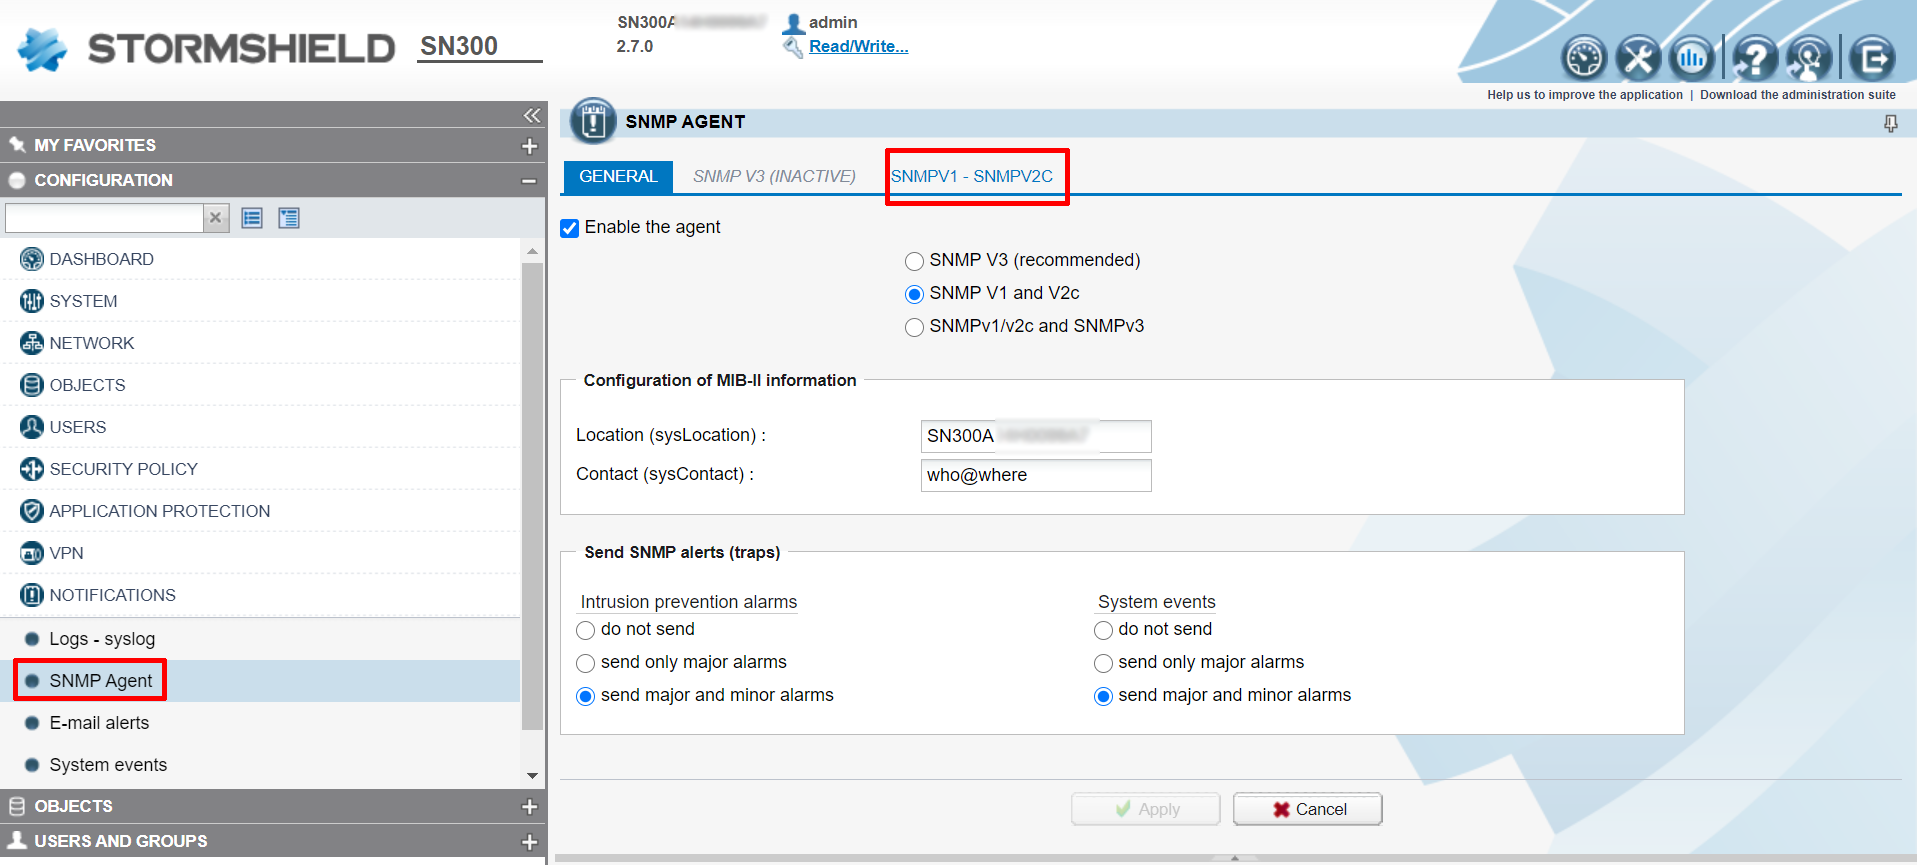
Now you need to create the SNMP community. Go to the SNMPV1-SNMPV2 tab
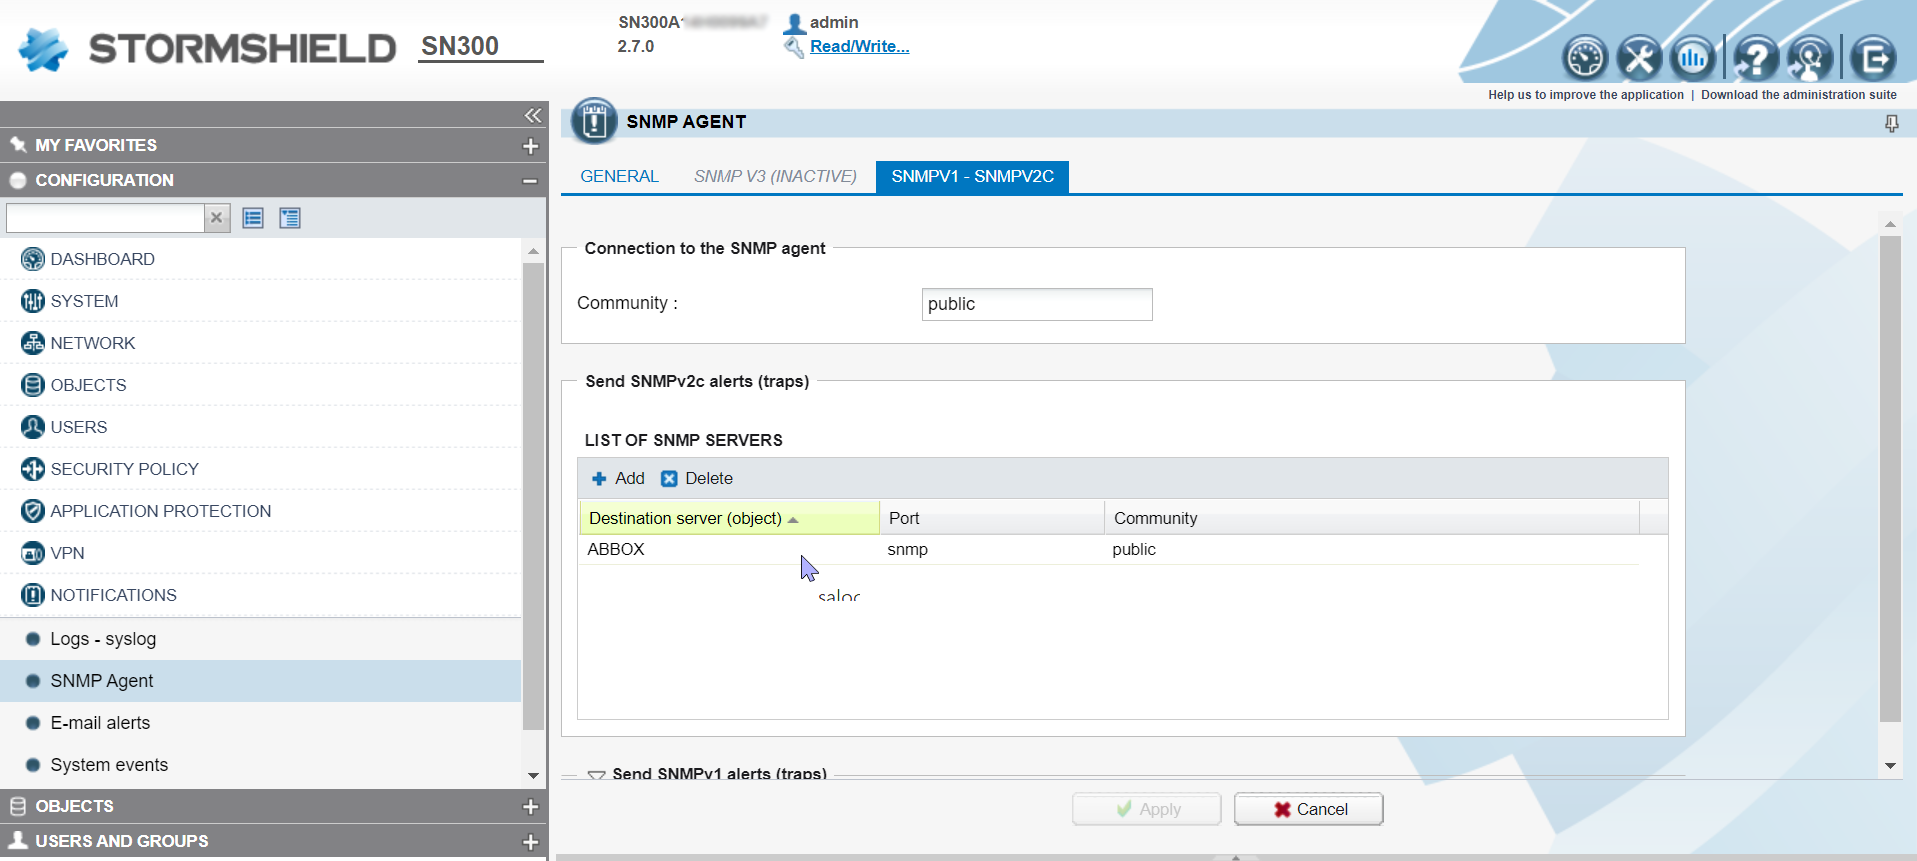
On the page that appears, specify the SNMP community and add the destination object. Then click on “Apply”.
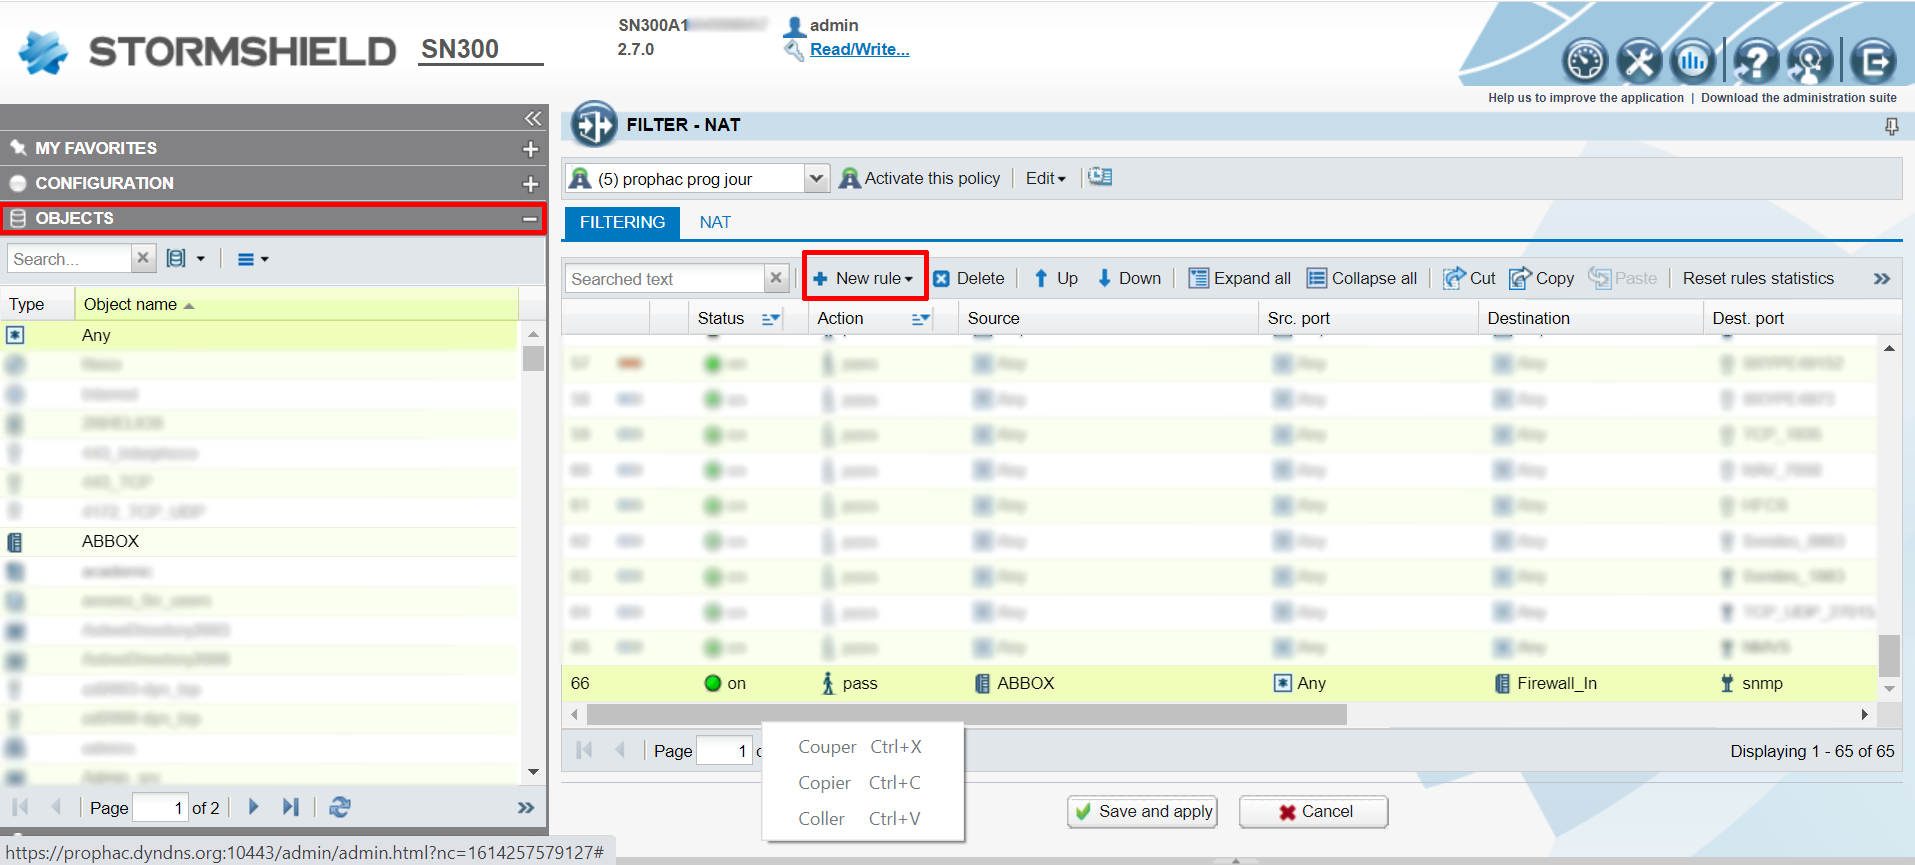
Now you need to add a rule for the SNMP protocol to your firewall. Click on Objects and then on “New Rules”.
Click on “Save and apply”, SNMP is now configured on your Stormshield firewall.
