Table of Contents
Veeam - Database
This tutorial enables you to activate the monitoring of Veeam backups on Galaxy and Infinity. You need to go through the Universe central server as Unity cannot do this natively.
To enable Esia to connect to the VeeamBackup database, you need to :
- Enable SQL and Windows authentication.
- Create a user for Esia with READ-ONLY rights.
- Check the listening port
The first 2 operations listed below are performed using the “Microsoft SQL Server Management Studio” application on the machine containing the Veeam database. And the last in the “Sql Server Configuration Manager” application.
SQL Server Management Studio
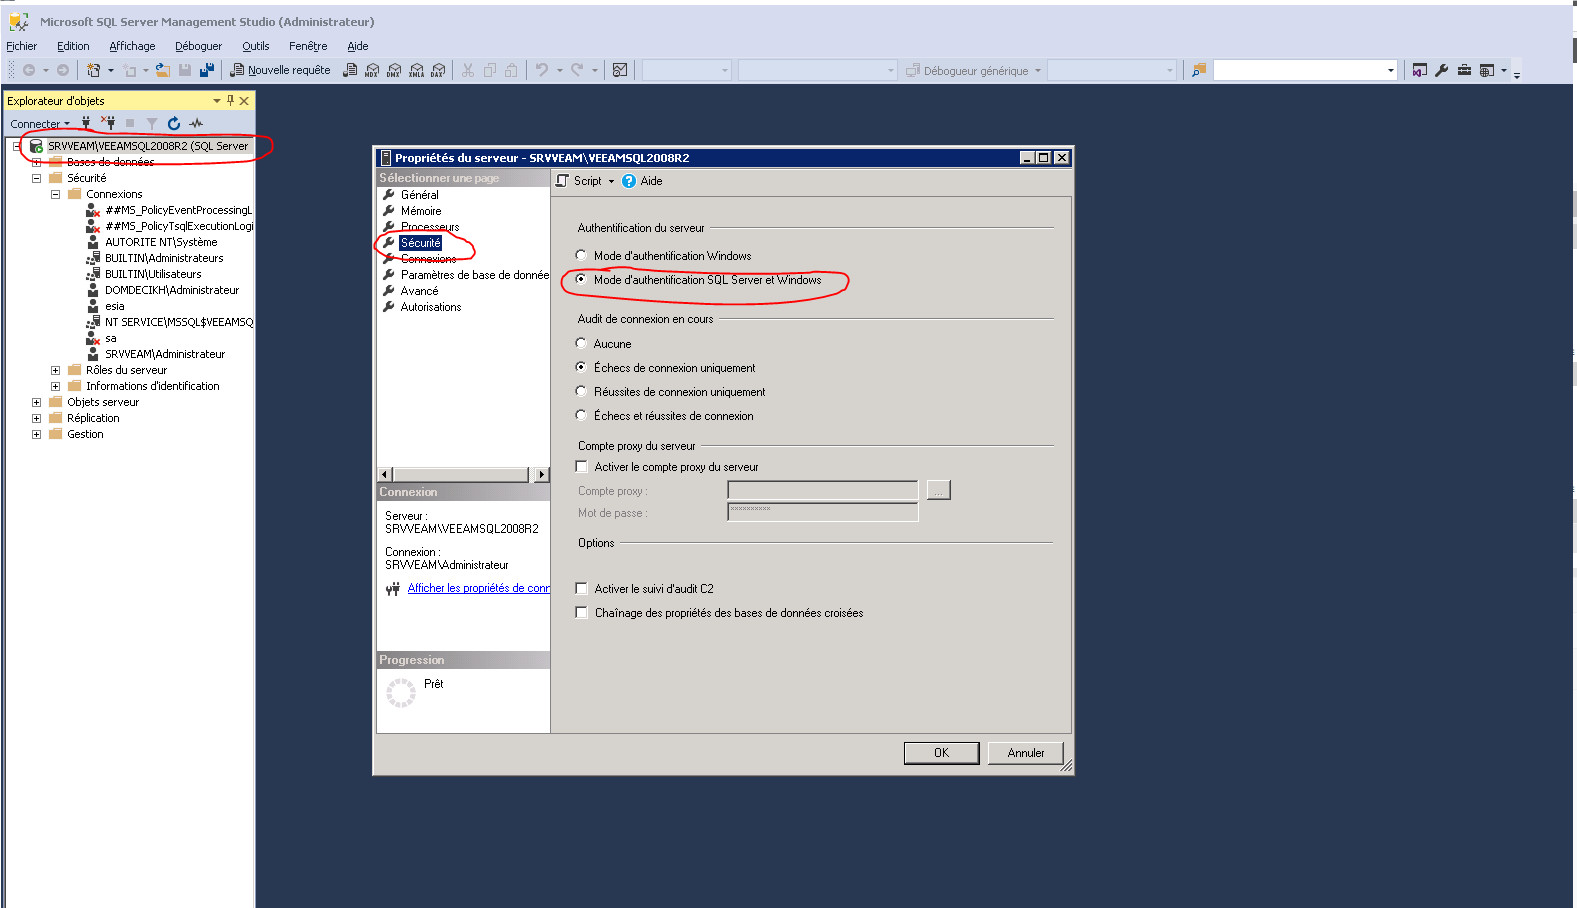
Enable SQL and Windows authentication
Right-click on property in the left-hand menu. Then, in the “security” section. Tick “SQL Server and Windows authentication mode”, then click OK.
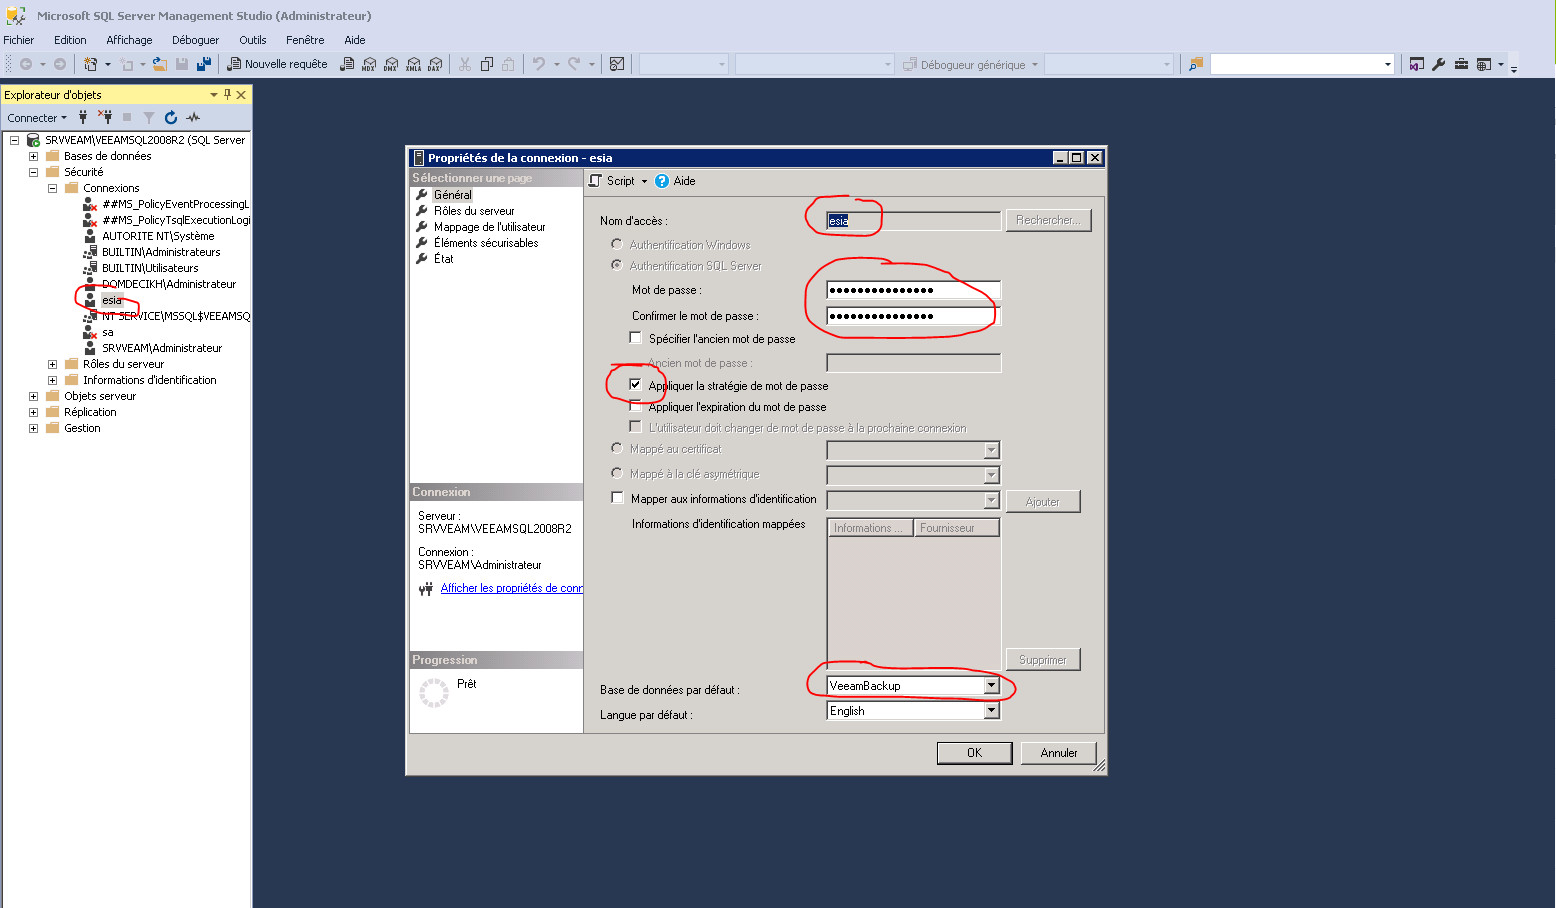
Create a user for Esia
Right-click on “Security” in the left-hand menu. Go to “New” and then “User”. Now fill in the user name + password. It is advisable to uncheck “Apply password expiry”. Finally, select VeeamBackup as the default database.
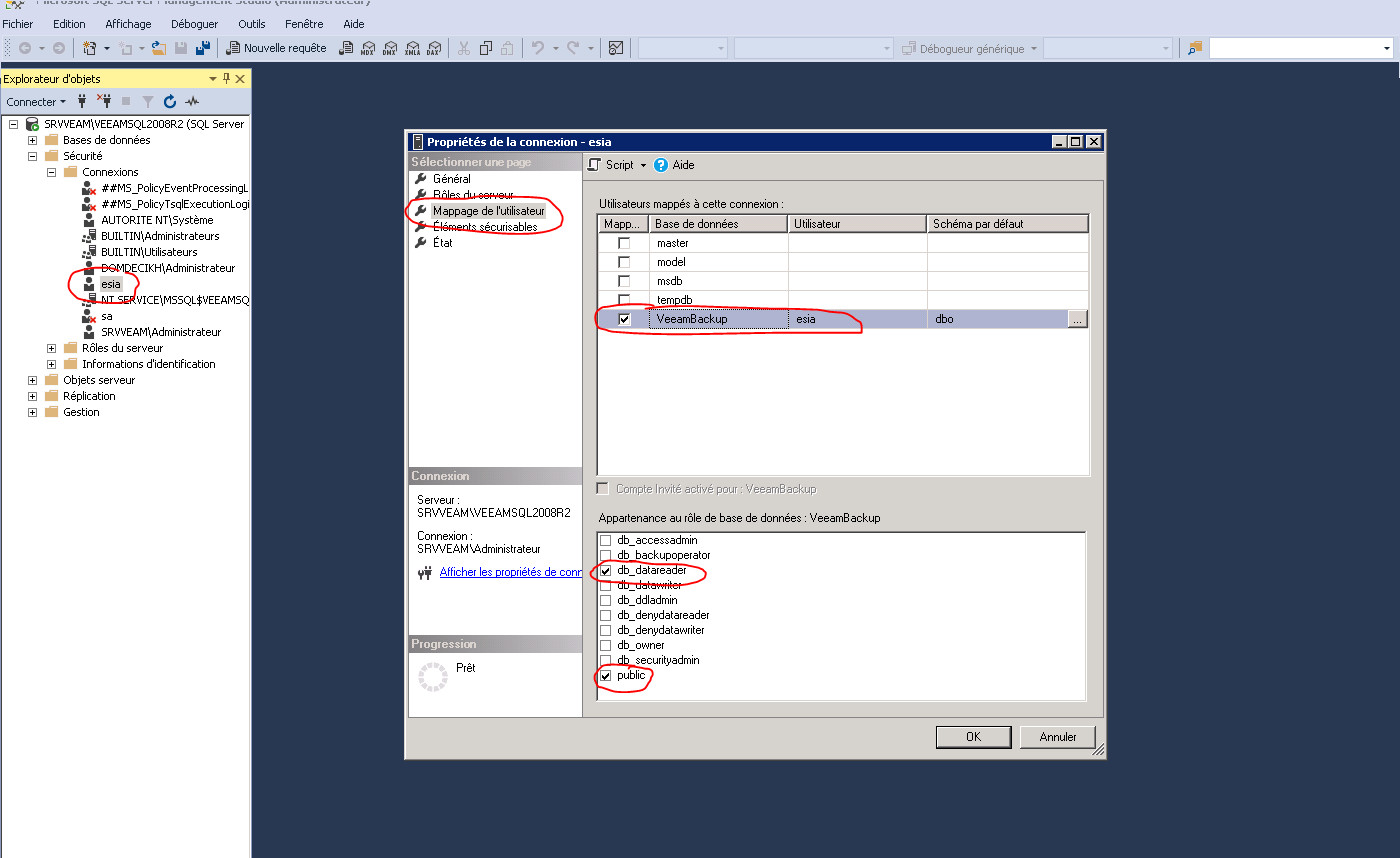
Assign read-only rights to this user
In the user properties, go to “User mapping” and check that VeeamBackup is ticked. And select the following rights:
- db_datareader
- public
Sql Server Configuration Manager
Now go to the SQL Server Configuration Manager.
In the tree on the right, scroll down to “SQL Server Network Configuration” and click on “Protocols for VEEAMSQLXXXX”.
Then right-click on TCP/IP and open the properties. In the “IP addresses” tab, go to the bottom of the drop-down list. You can indicate or check that the TCP Port value is set to 1433.
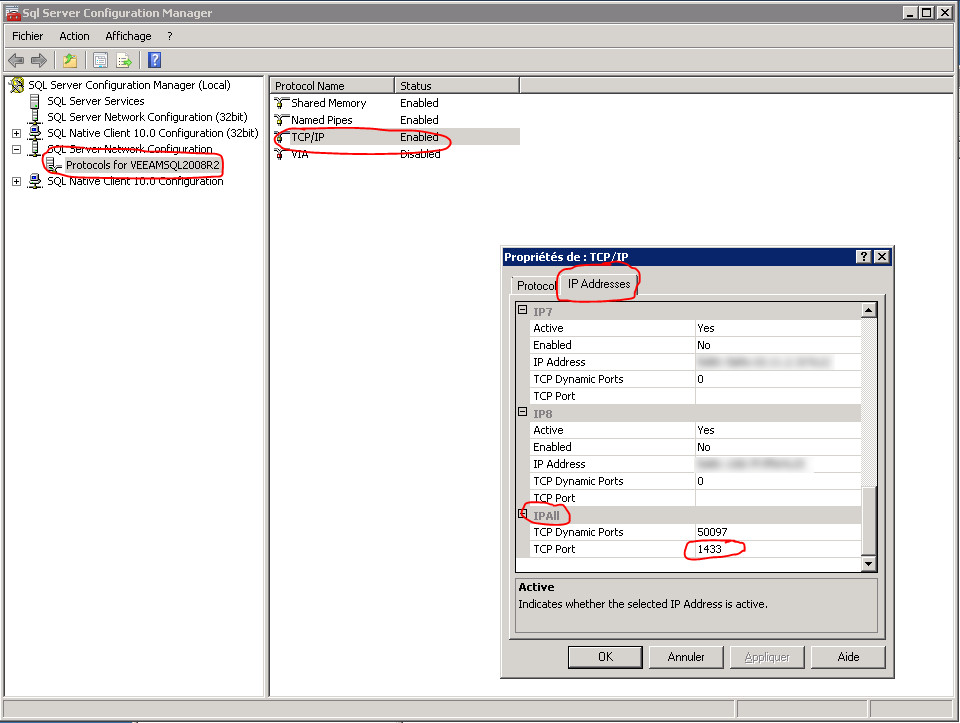
If necessary, you will need to restart the SQL service.
Configuration on Esia
Esia Galaxy only
You need to activate the Esia backup webplugin. To do this, connect to the Esia server using ssh (Putty) and enter the following command as root: apt-get update && apt-get install esia-webp-backup
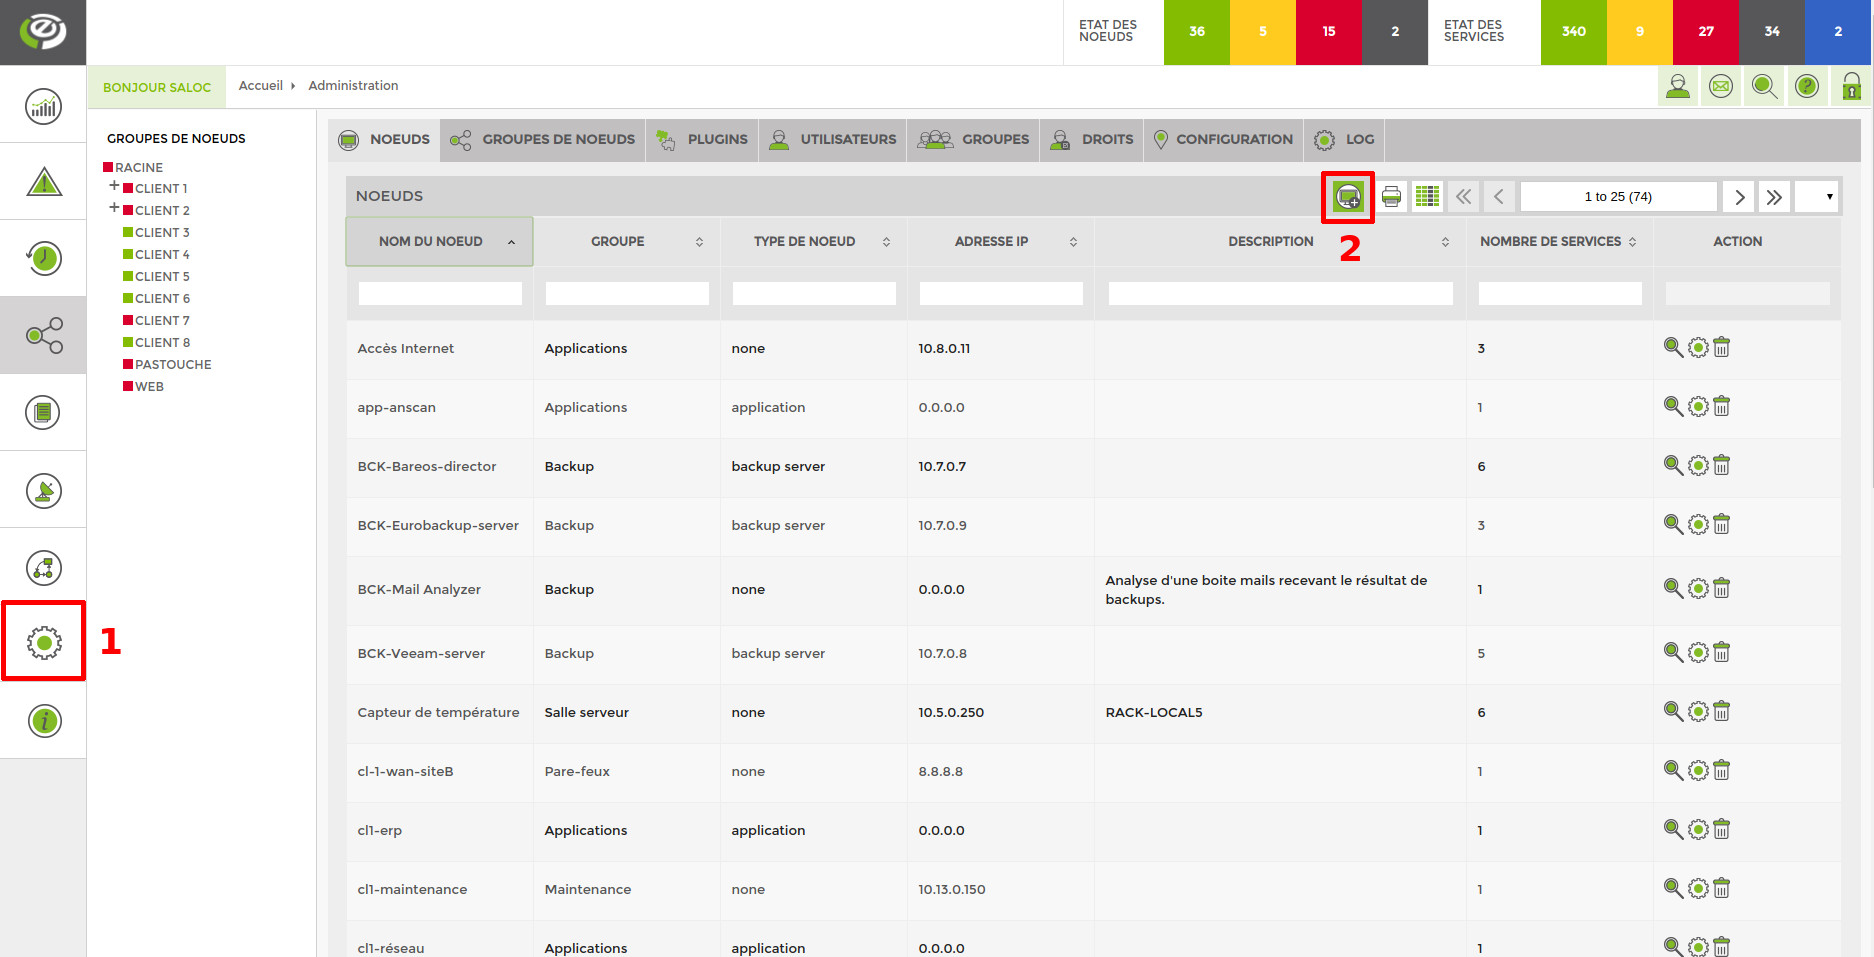
Add a backup node.
In your Esia interface, go to administration (the toothed road on the left) and then click on the “manually add node” button in the top right-hand corner. As shown in the image below.
The following page appears:
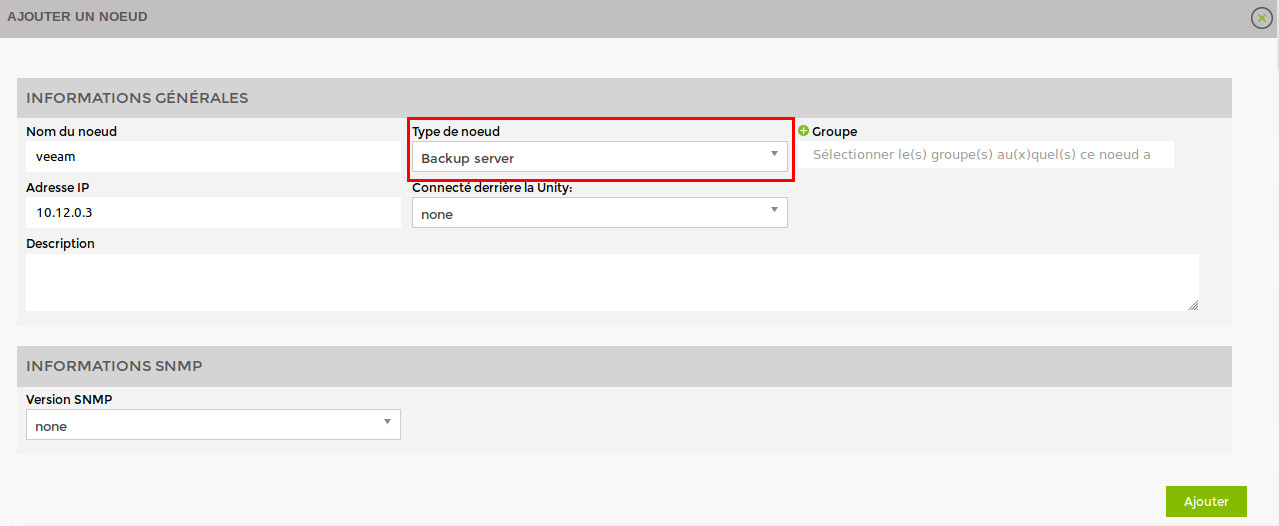
Specify the name, IP address and group in which the node should appear. The most important thing is to indicate the type of node, such as “backup server”. A configuration page will appear, asking you to configure the driver. Select the “veeam - db” driver and a menu will appear below it. Click on “SQL Authentication” and enter your database connection parameters.
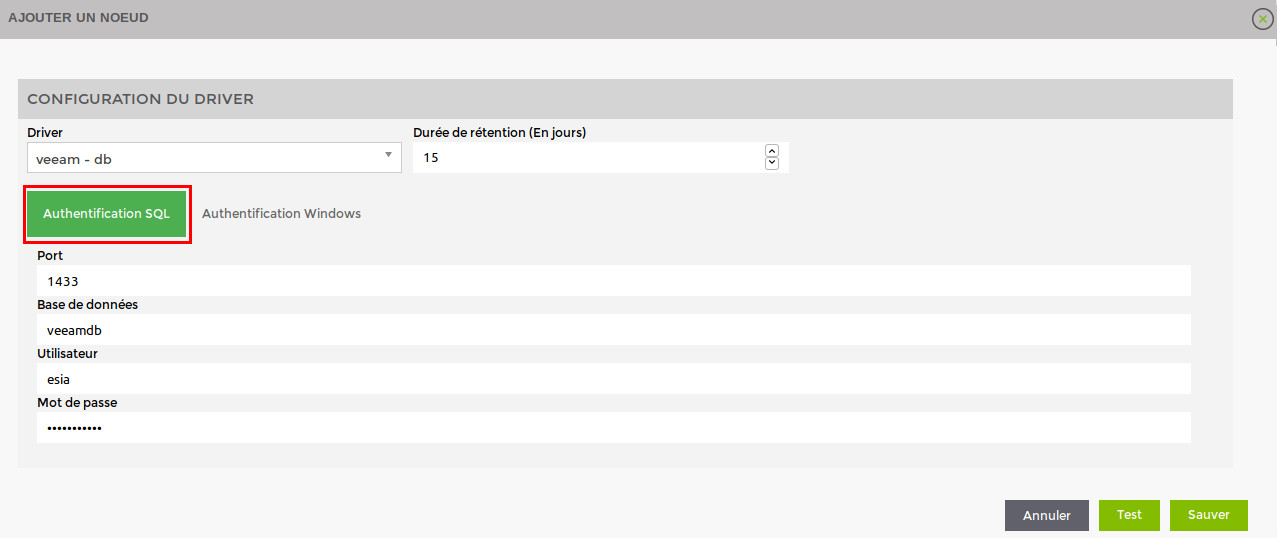
Once you have filled in the details, click on 'Test' to validate your user parameters. If the test is OK, you can save it.
You now need to wait 15 to 30 minutes for synchronisation to take place. Once synchronisation is complete, you can start monitoring your backups. You can continue the tutorial by following this link: Activate back-up monitoring