Table of Contents
EGIDE Vulnerability scanner
Prerequisites
- Mercury active licence
- EGIDE licence
- The Egide box or an Egide VM configured on your network
- You can perform this task using this tutorial
- Check that the ESIA repository is present in /etc/apt/source.list
- if you don't have the repository: stable.repository.esia-sa.com, add the repository: Adding the esia repot
Install
Add the Egide repository to get the latest CVEs
- copy
echo "deb http://egide.repository.esia-sa.com/egide bullseye contrib non-free" >> /etc/apt/sources.list
wget -O- "http://egide.repository.esia-sa.com/egide/gnupg.key" | apt-key add -
You can now install the EgideScanner web plugin
- copy
apt update
apt install esia-webp-egidescan
apt install esia-egide-cve-all
Now go to the WEB console of your Esia to add the EGIDE licence.
Go to the “About” menu and then click on “Upload a licence file”.

Once the file has been loaded, you should see a MER-XXXX line followed by an EGI-XXXX in the licence ID. Your server is now ready to configure the scanner.
Configuring the scanner
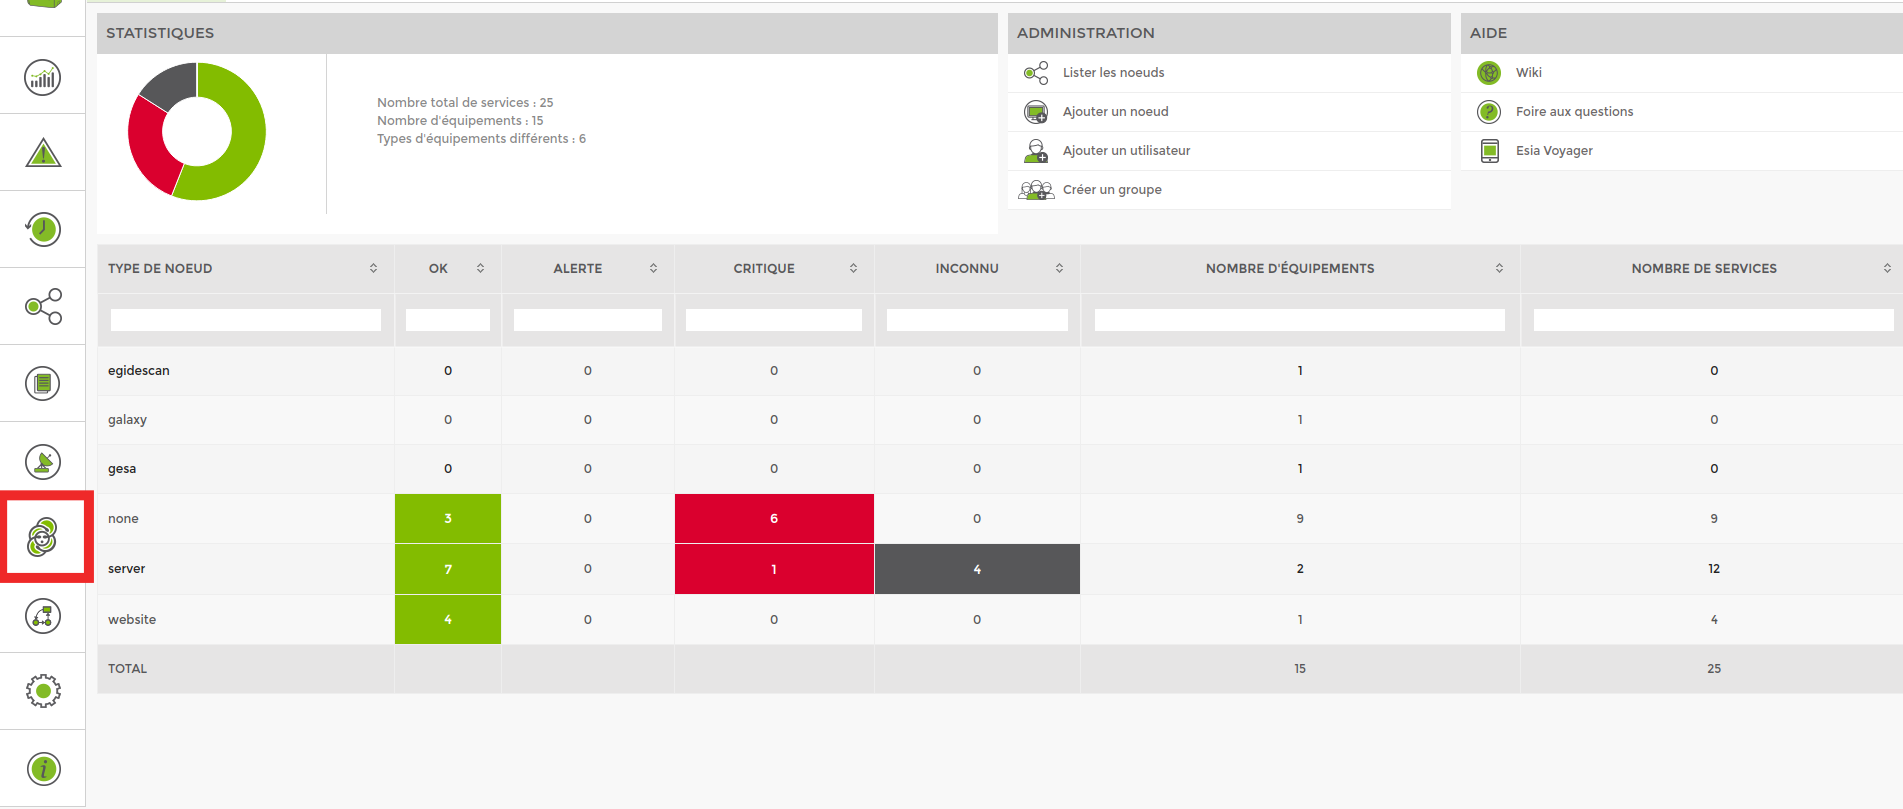
In the Esia interface, click on the “Scan Egide” menu.
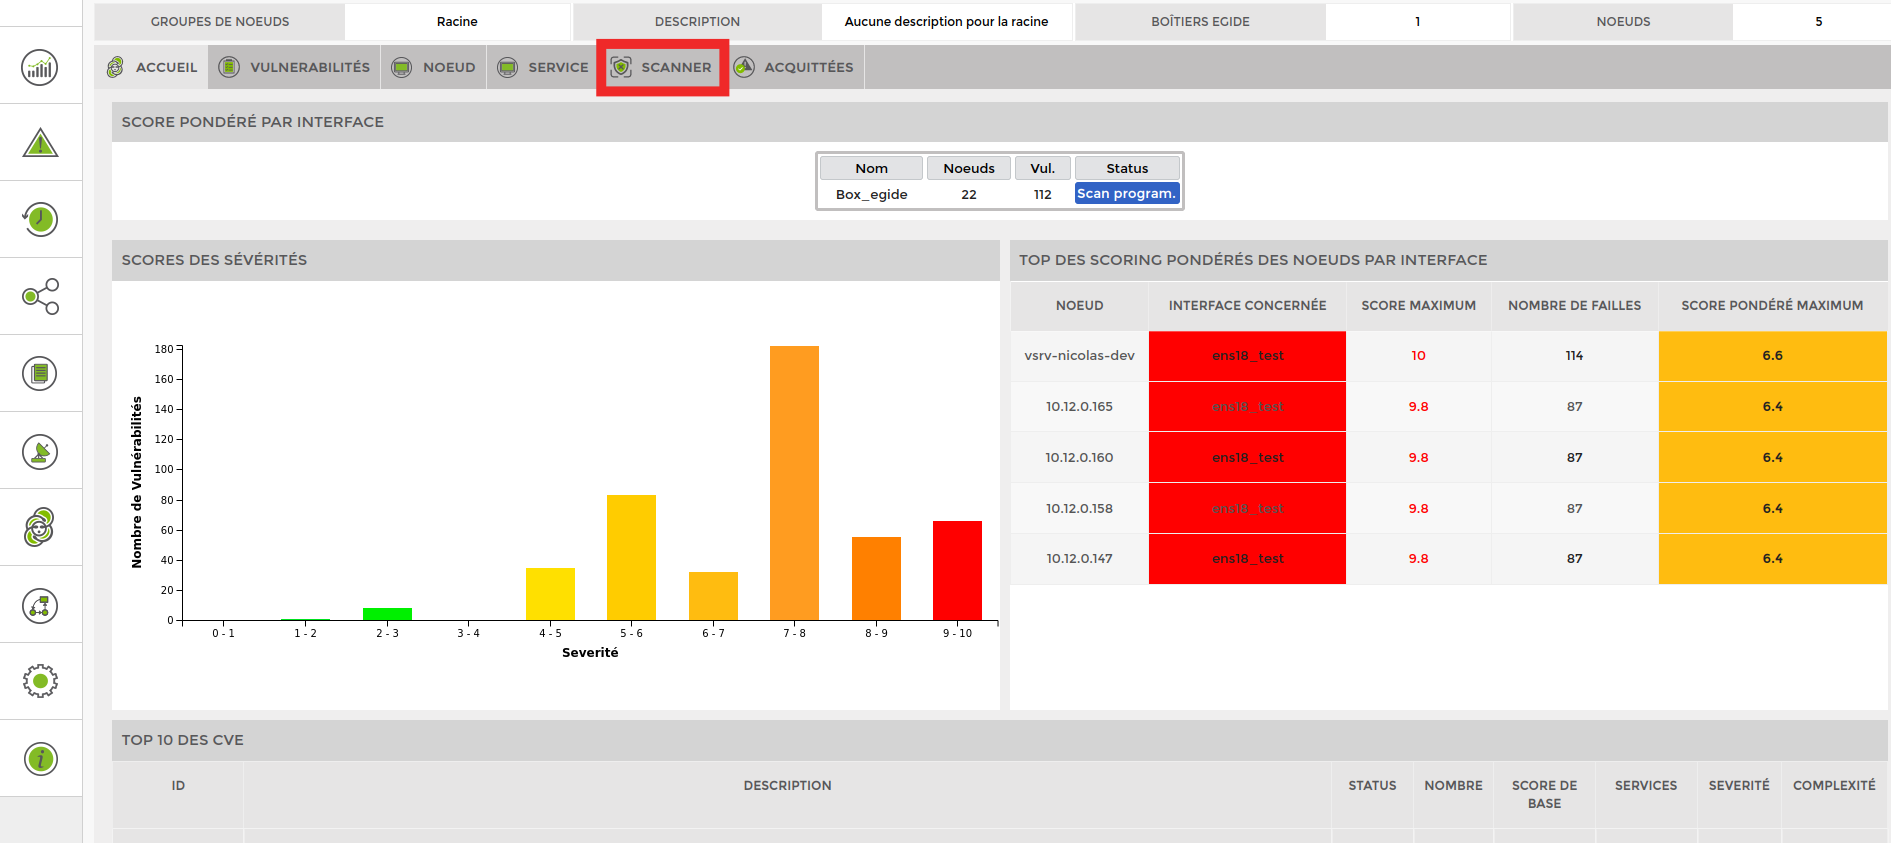
Go to the “Scan” tab
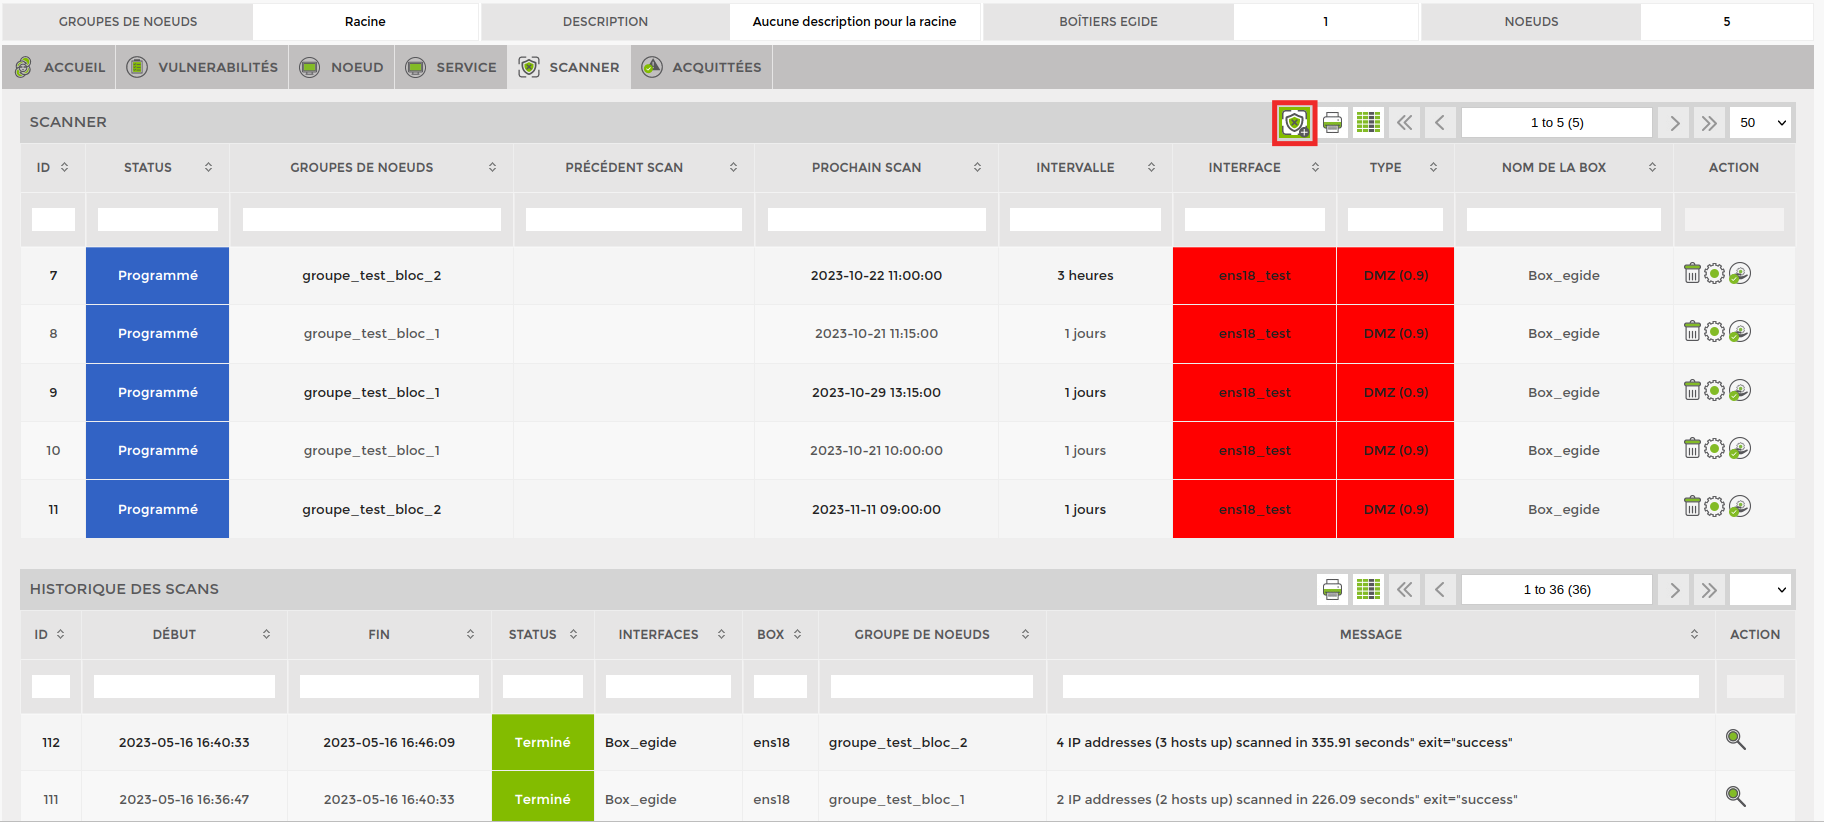
Then click on “Add” to schedule your scan.
On the window that appears, please fill in all the fields
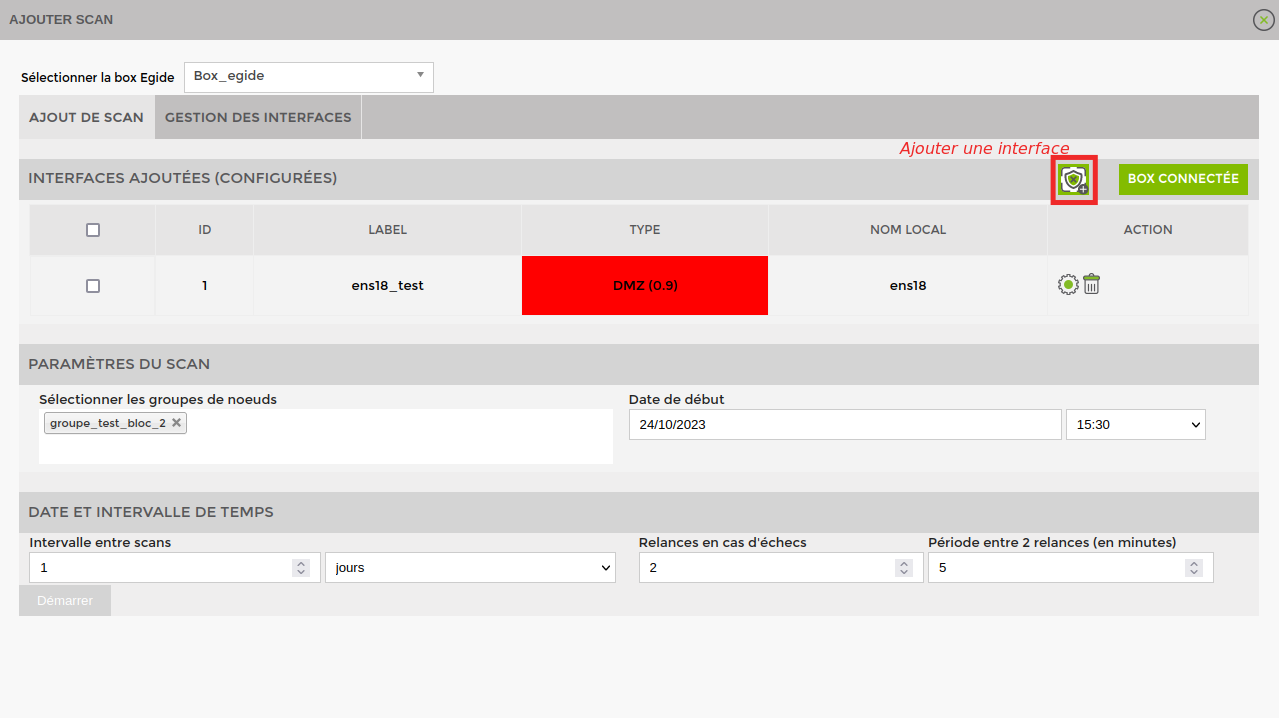
First of all, you need to add an interface (on which the scan will be based) using the red framed icon
Select the interface (from those you have added)
The groups of nodes to be scanned
Scan start date
The interval between scans
Then press “start”.