Table des matières
Enabling SNMP on Netgear GSM7224R Switches
By default, SNMP v1/v2 is enabled for the following communities public and private communities, which can be accessed from any network.
To modify the SNMP parameters, go to the switch's web interface by typing its IP in the URL. Go to the « System ⇒ SNMP ».
Add an SNMP community (SNMP v1/v2c)
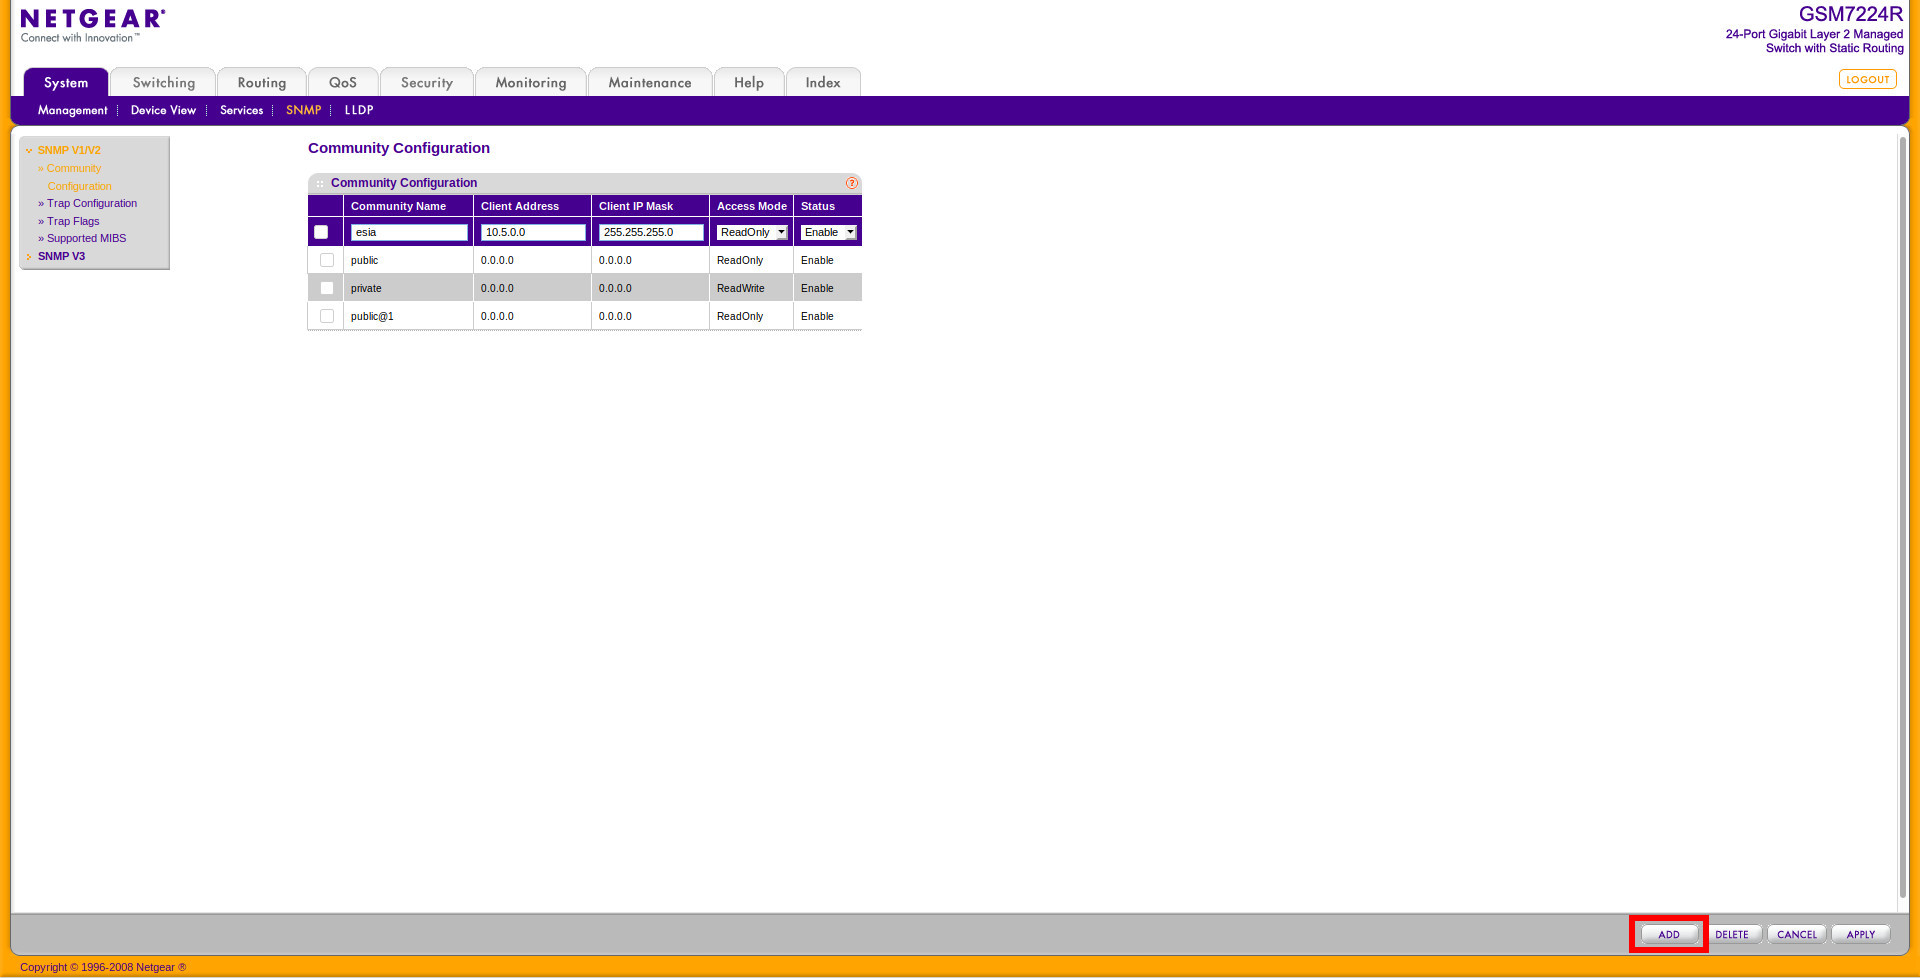
In the left-hand menu bar, click on « System ⇒ SNMP ⇒ SNMP V1/V2 ⇒ Community Configuration ».
This will take you to the following page:
By default, the public and private communities are activated and accessible from any network. You can change their settings by clicking on the checkbox next to their name.
To add a new community, fill in the following fields:
- Community Name: The name of the new community.
- Client Address: The first IP of the network on which the community will be accessible.
- Client IP Mask: The mask of the network on which the community will be accessible.
- Access Mode: Give access in ReadOnly or ReadWrite.
- Status: Activate or deactivate the community.
Next, click on « ADD » at the bottom right of the page.
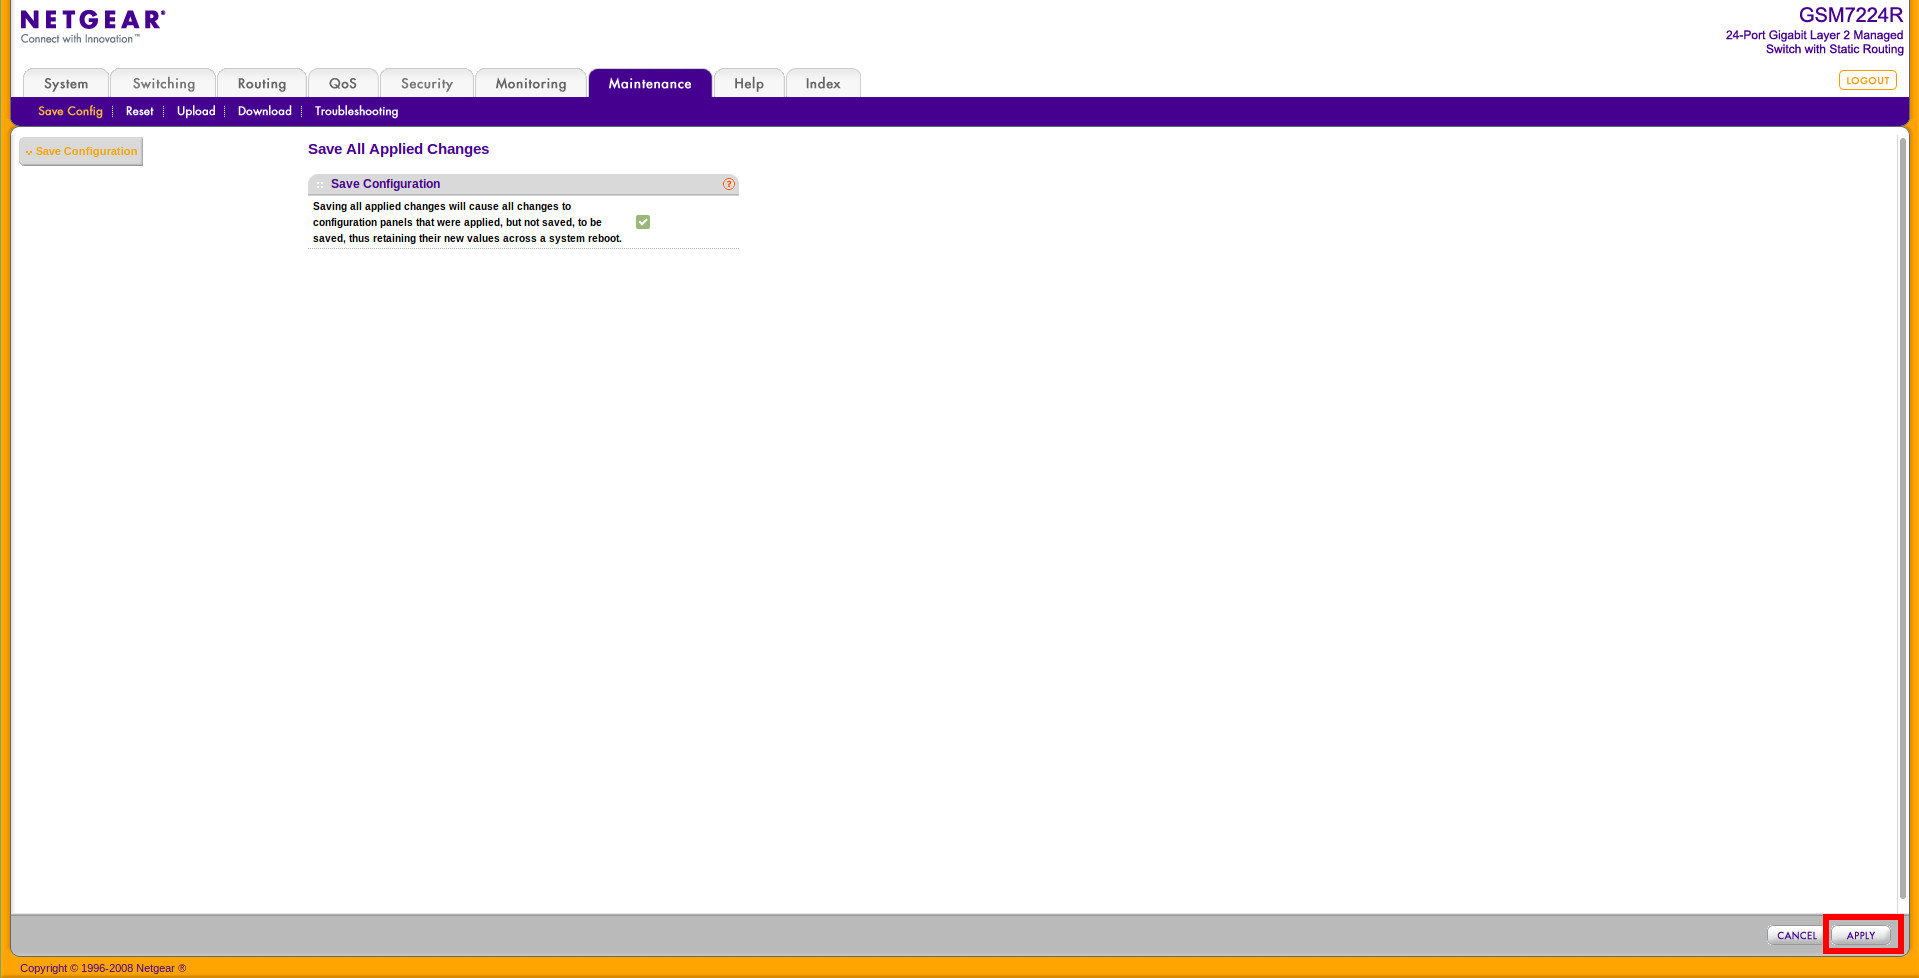
Don't forget to save your configuration. Go to the menu « Maintenance ⇒ Save Config » click on the checkbox and then on « APPLY » at the bottom right of the page. Otherwise your configuration will be lost when the switch is rebooted.
If you wish to configure SNMP v3
It is not necessary to use SNMP v3 with ESIA. However, if you do want to enable it, you should know that in ESIA you can only configure your nodes for SNMP v3 by manually adding them (See Adding nodes manually). Via a network scan, you can only configure in v1 or v2c.
Add / Modify a user for SNMP v3
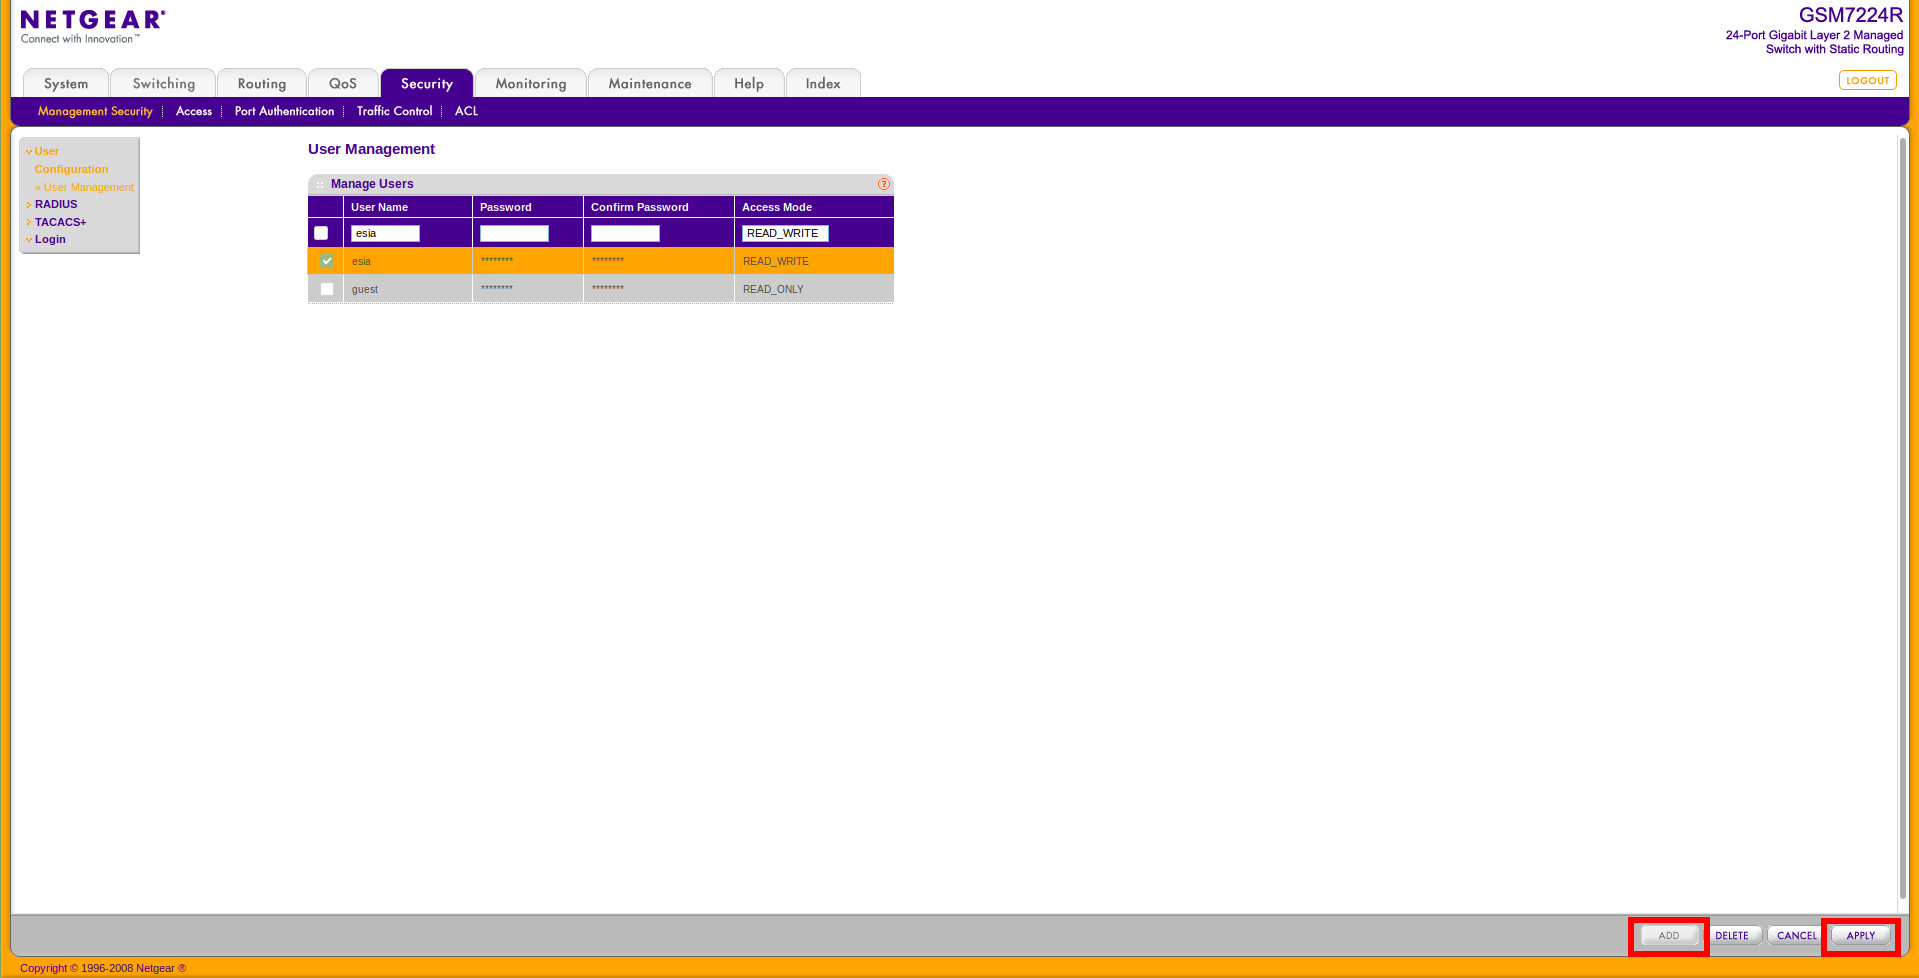
On GSM7224R switches, you can only have one user with the rights READ_WRITE. The default user is admin (here renamed to esia). You can choose this user to configure SNMP v3 or create a new user with READ_ONLY rights (the WRITE rights are not required for esia). To use SNMP with the MD5authentication mode, the user password must be at least 8 characters long. To change this password, go to « Security ⇒ Management Security ⇒ User Configuration ⇒ User Management ».
This will take you to the following page:
To add a user, enter a name and password (at least 8 characters) in the text fields above and click on « ADD » at the bottom right of the page.
To modify a user, click in the checkbox next to their name. It will now appear in the text fields just above. Modify the password field with a new password of at least 8 characters and the user name if you wish. (Warning: it is this user that allows you to connect to this web interface. Be careful not to lose the User Name and Password).
Then click on « APPLY » at the bottom right of the page.
Configuring the SNMP v3 user
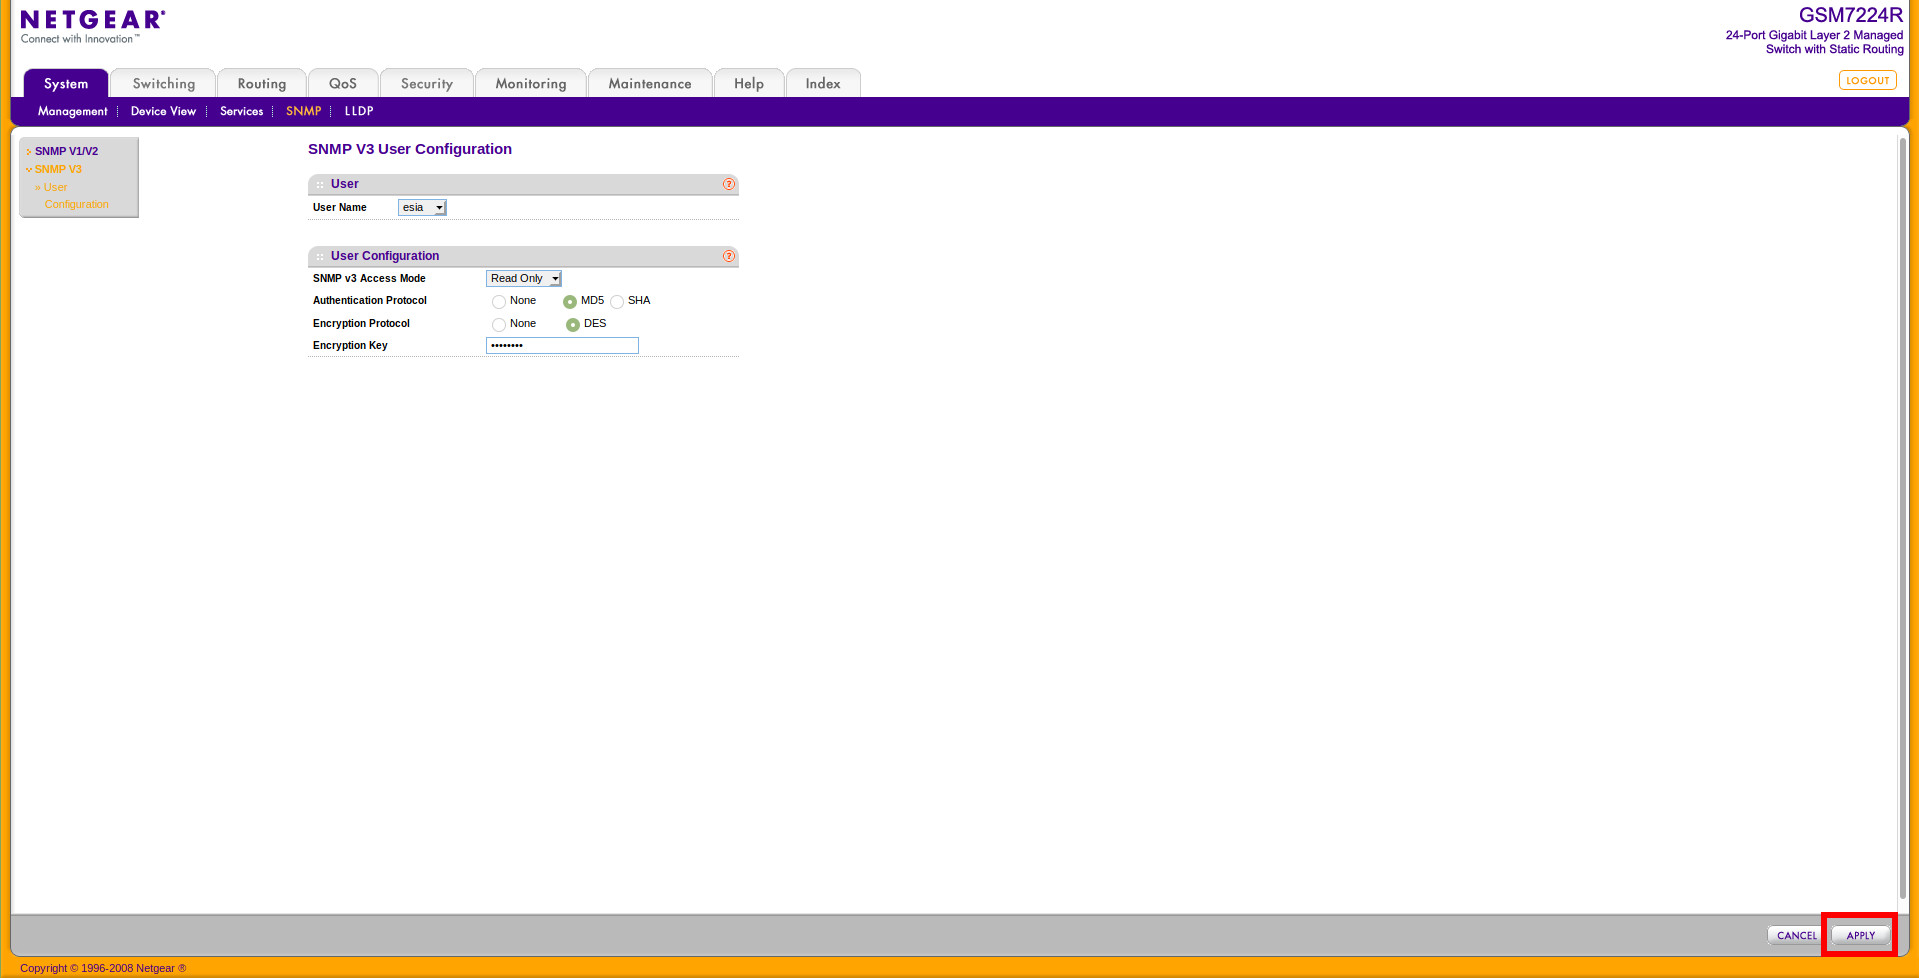
In the left-hand menu bar, click on « System ⇒ SNMP ⇒ SNMP V3 ⇒ User Configuration ».
This will take you to the following page:
Fill in the fields :
- User NameSelect the user.
- SNMP v3 Access ModeSelect READ_WRITE or READ_ONLY (the WRITE rights are not required for esia).
- Authentication ProtocolSelect MD5 or SHA
- Encryption ProtocolIf you wish to use the encrypted communication system, choose the encryption mode DES.
- Encryption KeyType an encryption password.
Then click on « APPLY » at the bottom right of the page.
That's it, SNMP v3 is now configured.
Don't forget to save your configuration. Go to the menu « Maintenance ⇒ Save Config » click on the checkbox and then on « APPLY » at the bottom right of the page. Otherwise your configuration will be lost when the switch is rebooted.
For more information on Netgear GSM7224R Switches : See Netgear GSM7224R support.


