Table des matières
Enabling SNMP on TP-Link TL-SG2452 switches
Go to the switch's web interface by typing its IP in the URL. Go to the menu « SNMP ⇒ SNMP Config ».
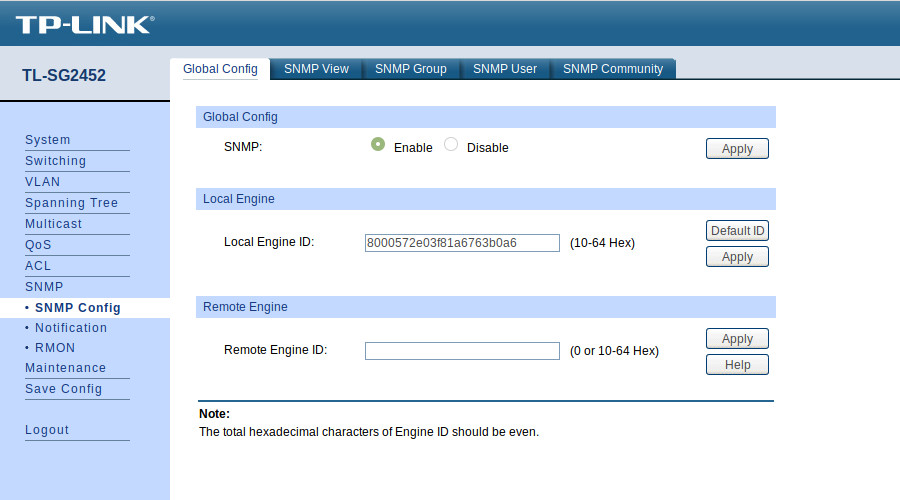
You will arrive on the tab « Global Config » :
Tick the « Enable » and click on « Apply ».
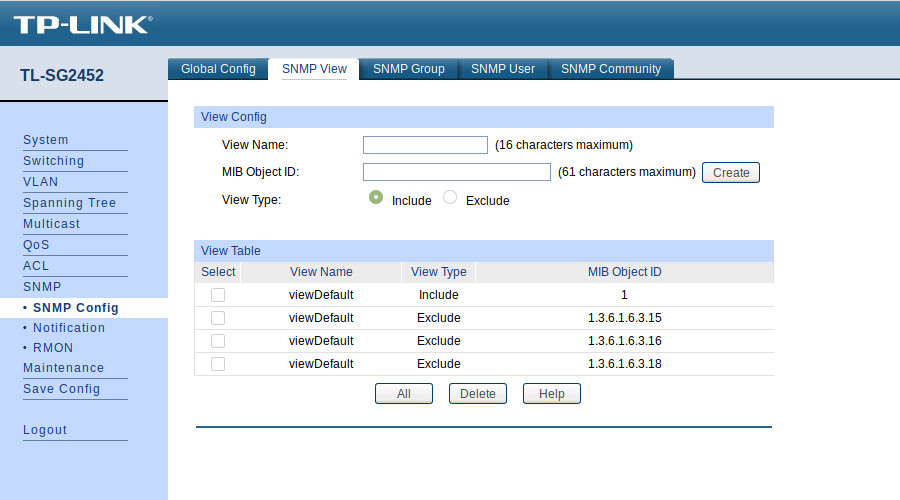
In the tab « SNMP View » :
Here you can create views, which are sets of rules for including or excluding MIB elements in our supervision via their OID. The « viewDefault » view includes OID 1, i.e. all the elements of this MIB (since it is a hierarchical system) except for the 3 excluded OIDs.
For this tutorial, we are going to use this « viewDefault ». You can therefore go directly to « Ajouter une communauté SNMP ».
Add an SNMP community (SNMP v1/v2c)
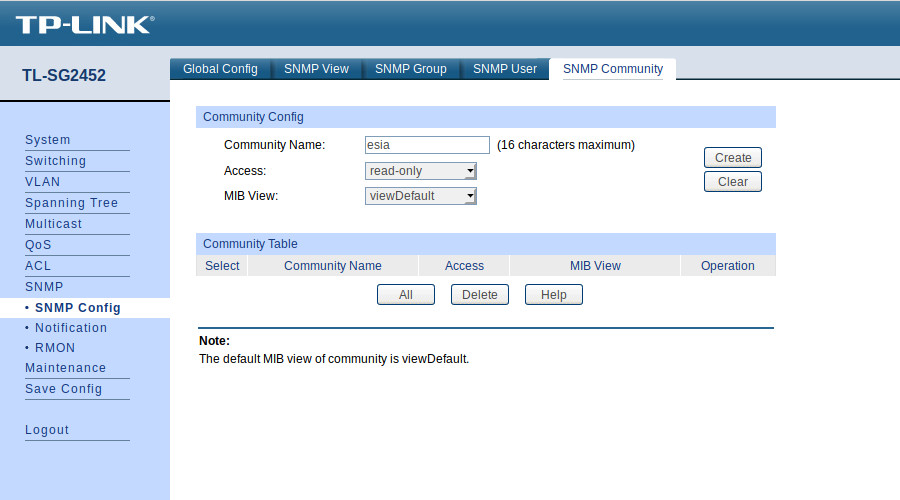
In the « SNMP Community » :
- Enter the name of the SNMP community.
- Choose the access type (leave « read-only » because ESIA does not use write).
- Choose the view to be used (here we are using the « viewDefault »).
Then click on « Create ».
That's it, SNMP is now configured for versions v1 and v2c.
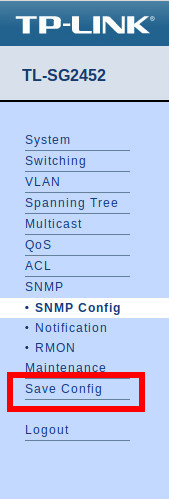
Don't forget to click on « Save Config ». Otherwise your configuration will be lost when the switch is rebooted.
If you want to configure SNMP v3
It is not necessary to use SNMP v3 with ESIA. However, if you want to enable it, you should know that in ESIA you can only configure your nodes with SNMP v3 by adding them manually (See Adding nodes manually). Via a network scan, you can only configure in v1 or v2c.
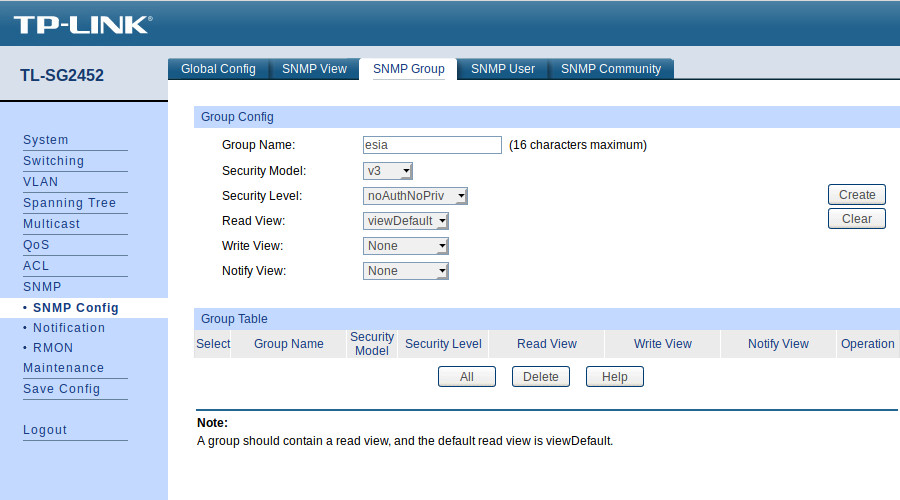
Click on the « SNMP Group » :
Give the group a name.
Choose the SNMP version (v3).
Choose the security mode.
noAuthNoPriv: no security.
AuthNoPriv: authentication by user and password.
AuthPriv: authentication by user and password + encrypted communication.
Choose the view to be used for « Read, Write et Notify » access (here we are using the « viewDefault » Read only).
Then click on « Create ».
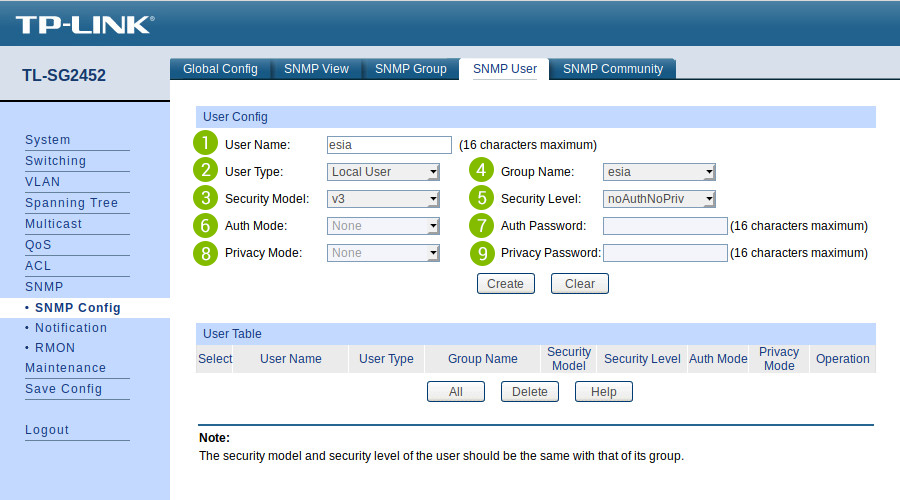
Click on the « SNMP User » :
- Give the user a name.
- Choose the user type (Local User).
- Choose the SNMP version (v3).
- Choose the group name (the one created previously and linked to the view you wish to use).
- Select the security mode.
- If security mode « Auth » is selected, choose the Hash algorithm to use (MD5 or SHA).
- Enter a password for authentication.
- If security mode « Priv » is selected, choose the encryption mode (this switch only offers DES encryption).
- Enter a password for encryption.
Then click on « Create ».

That's it, SNMP is now configured for version v3.
Don't forget to click on « Save Config ». Otherwise your configuration will be lost when the switch is rebooted.
For more information on TP-Link TL-SG2452 switches: See TP-Link TL-SG2452 support.
