Table of Contents
Veeam PostgreSQL database link
![]()
This tutorial has been made available to the entire Esia community thanks to the contribution of our partner Altiore.
Their website: https://www.altiore.be
Introduction
This tutorial was written for the 15 of PostgreSQL. Be careful when following this tutorial on another version. In particular the PostgreSQL configuration files which are located in a directory whose name is the version number (here \15\).
Creating the database user
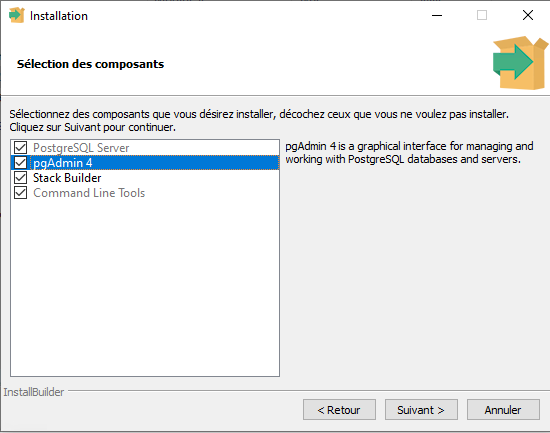
To create the user «esia» we will use the pgAdmin application.
Installing pgAdmin
From the Installation ISO, in “Redistr\x64\PostgreSQL\15.1-1”
As a download: Community DL Page
Make sure you select the correct major version for your version of PostgreSQL Server (here 15.XX HERE)
Adding the server to pgAdmin
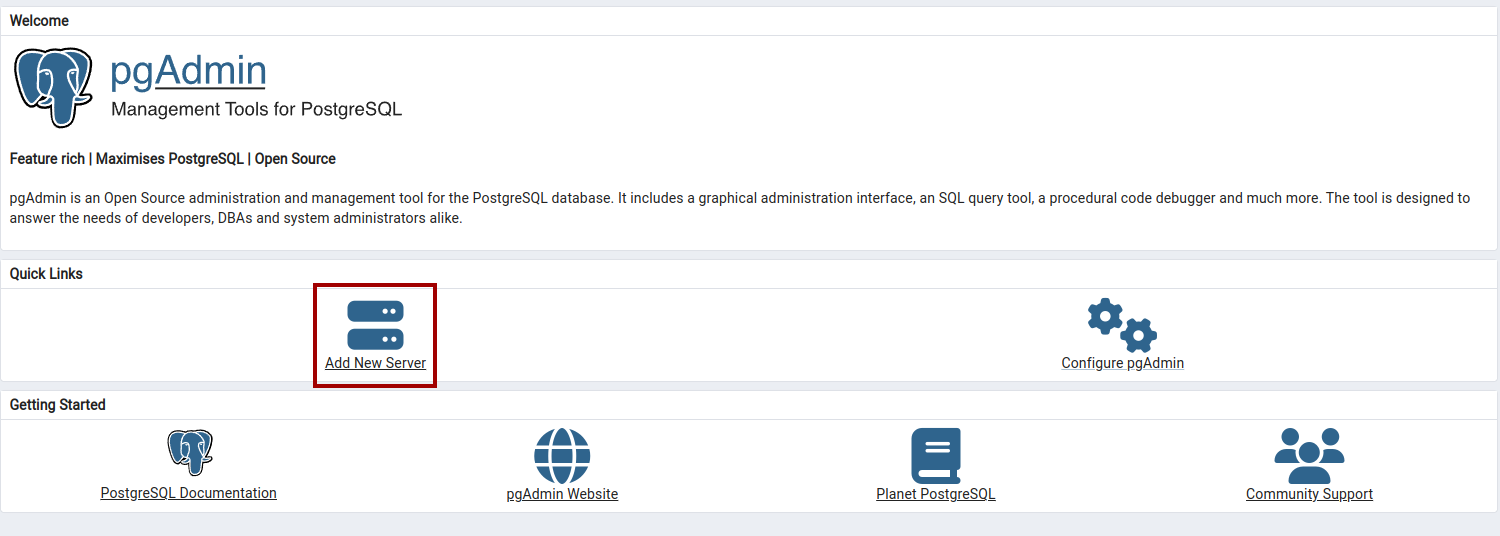
You now need to add Veeam's PostgreSQL server to pgAdmin by clicking on “Add New Server”.Add New Server“.
In theGeneral“tab, give it a name.
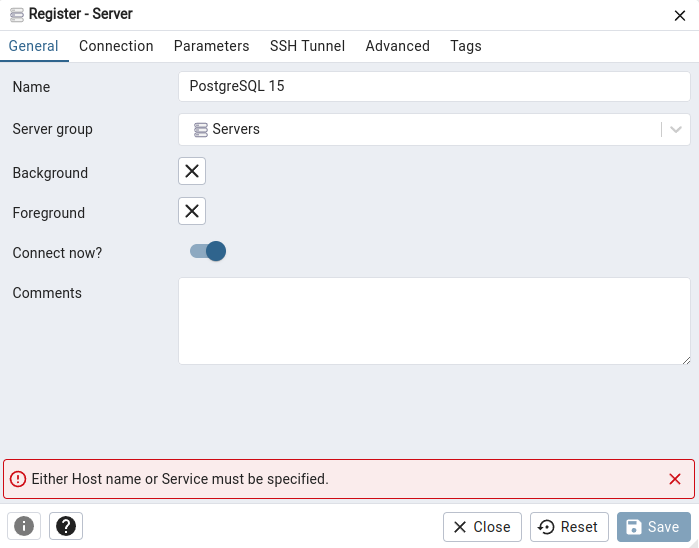
Then go to the “Connection”.
- Host name: 127.0.0.1
- Maintenance database: postgres
- Username: postgres
- Password: * Identical to the Windows password for your Veeam server
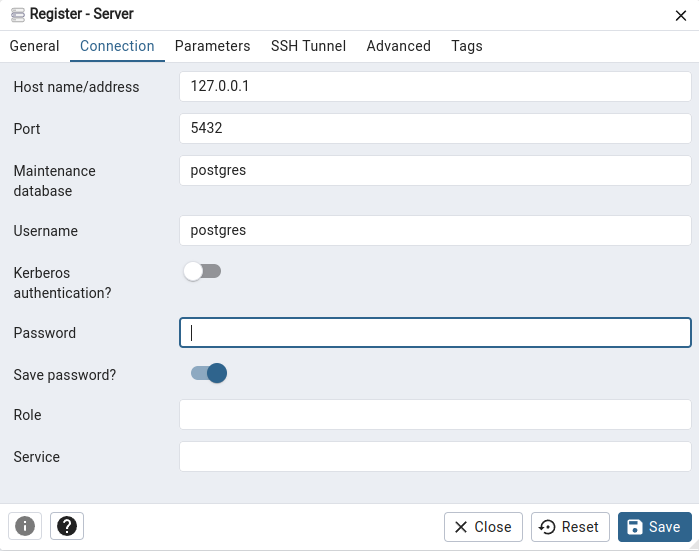
Then click on “Save”.
Creating a user
In the left-hand menu, open/unfold your server and right-click on “Login/Group”.Login/Group”.
Name your user «esia».
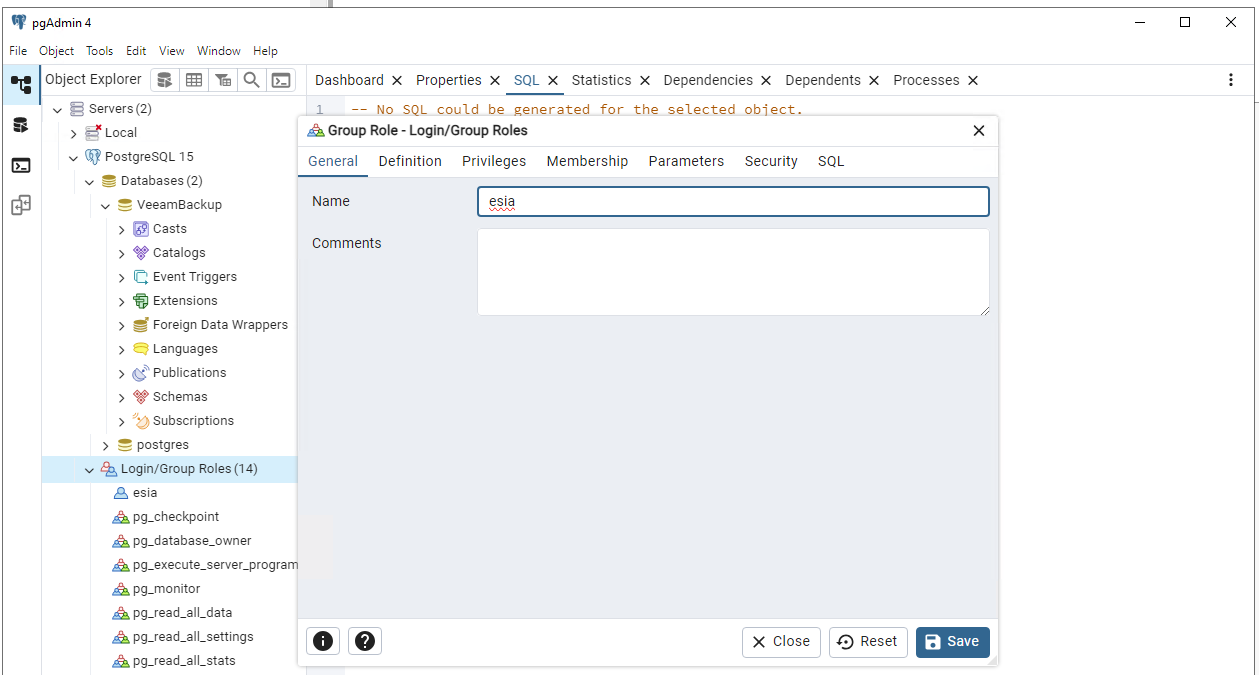
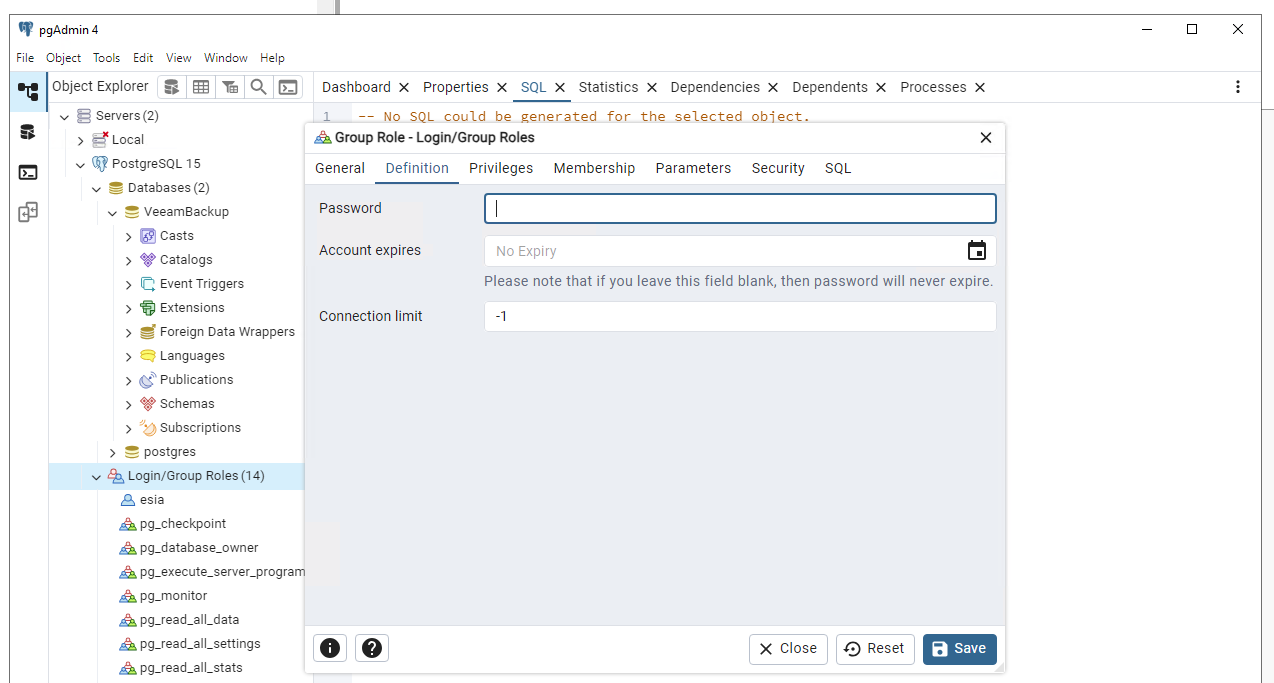
Go to the ” tabDefinition“tab to assign a password.
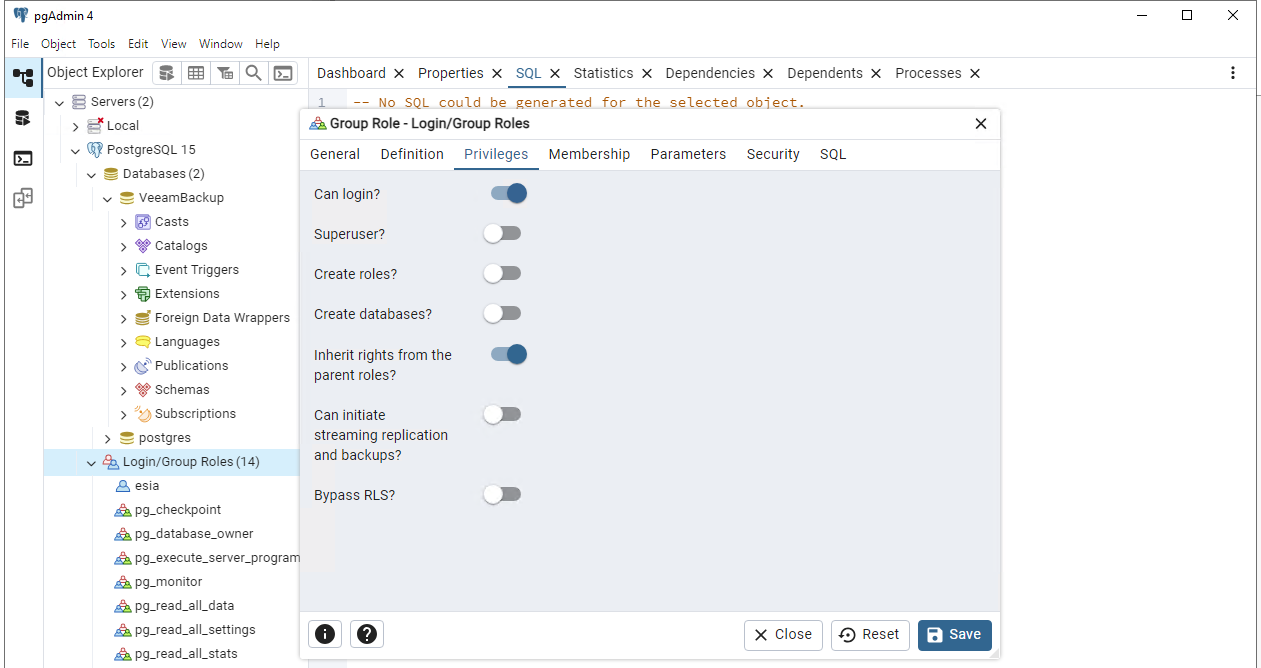
Go to the “Privileges“tab and tick “Can login?”.
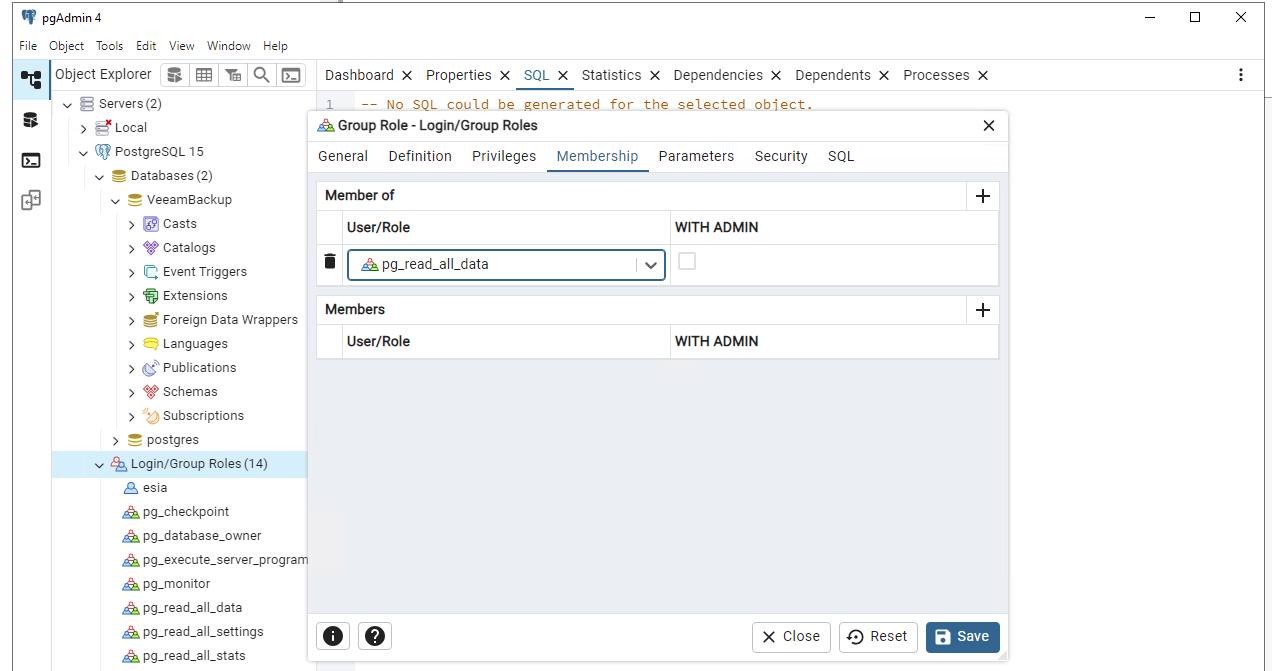
Go to the “Membership“tab and add the user to the “pg_read_all_data”.
Then click on “Save”.
Next, we need to give our user read access rights to all the tables and views.
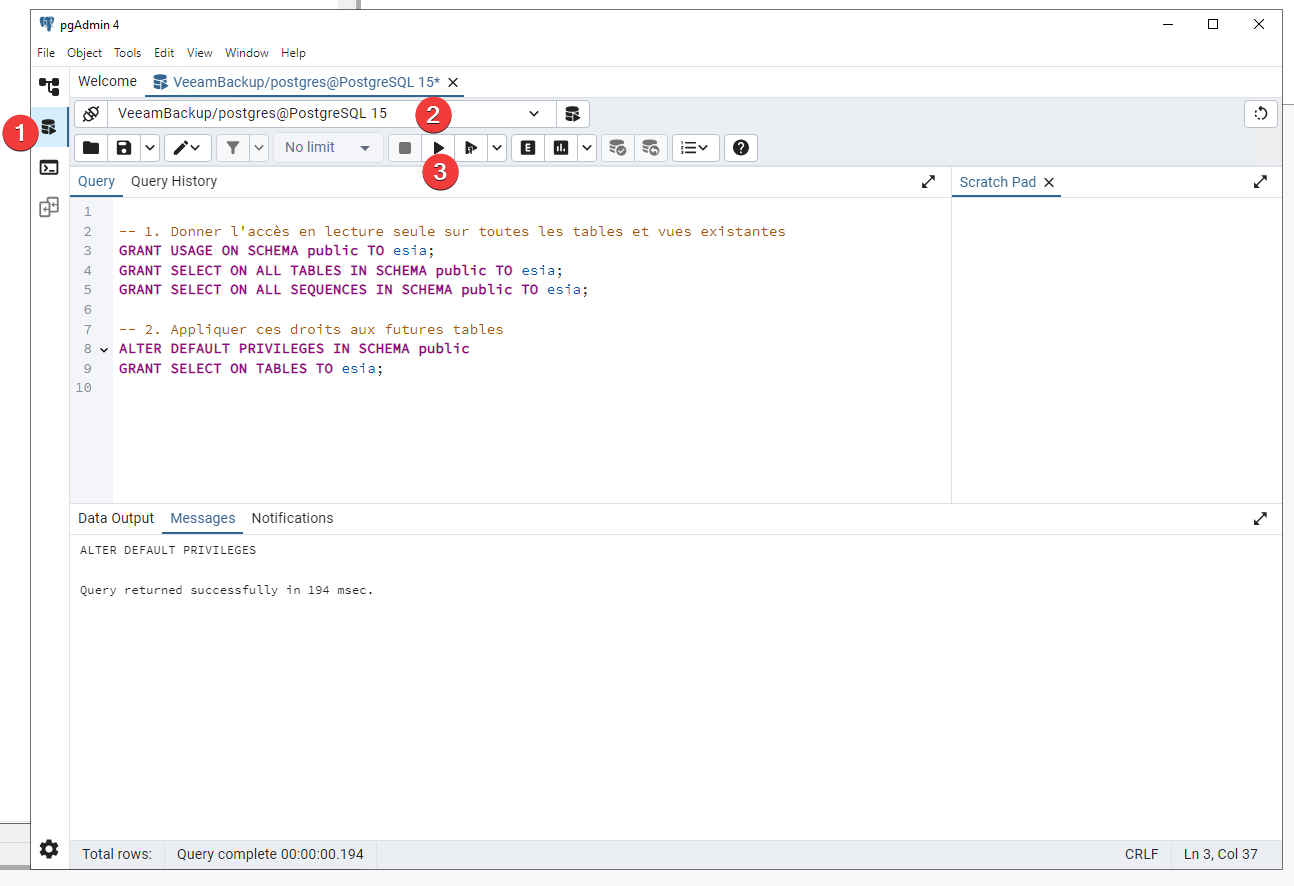
Go to the “Query”.
Choose the DB “VeeamBackup”
Run the following commands :
- copy
-- 1. Donner l'accès en lecture seule sur toutes les tables et vues existantes
GRANT USAGE ON SCHEMA public TO esia;
GRANT SELECT ON ALL TABLES IN SCHEMA public TO esia;
GRANT SELECT ON ALL SEQUENCES IN SCHEMA public TO esia;

-- 2. Appliquer ces droits aux futures tables
ALTER DEFAULT PRIVILEGES IN SCHEMA public GRANT SELECT ON TABLES TO esia;
Allow connection from Esia server
PostgreSQL configuration files are located in a directory whose name is the version number (here \15\).
Add the IP of the Esia or Unity server in pg_hba.conf
- copy
C:\Program Files\PostgreSQL\15\data\pg_hba.conf
Example :
# TYPE DATABASE USER ADDRESS METHOD

# IPv4 local connections:
host VeeamBackup esia 192.168.10.100/32 md5
Add the listening addresses in postgresql.conf
- copy
C:\Program Files\PostgreSQL\15\data\postgresql.conf
Replace :
# - Connection Settings -
#listen_addresses = 'localhost' # what IP address(es) to listen on;
By :
# - Connection Settings -
listen_addresses = '*' # what IP address(es) to listen on;
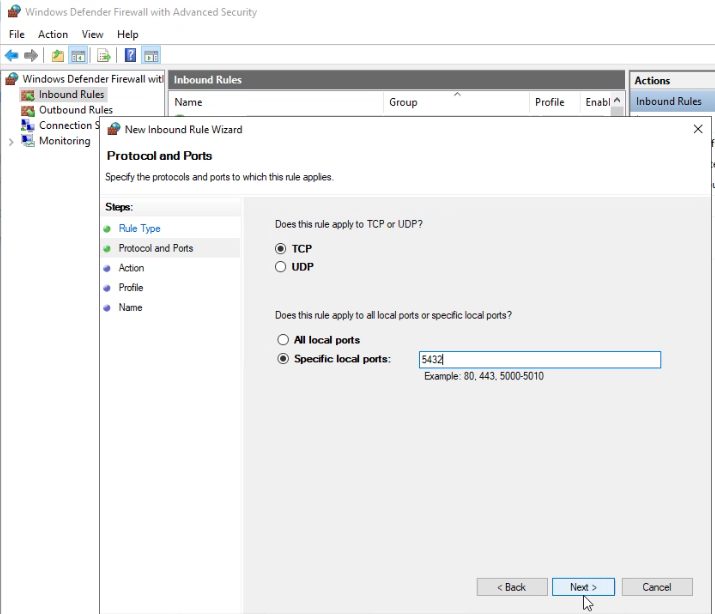
Open the PostgreSQL port in the incoming firewall (5432 in TCP)
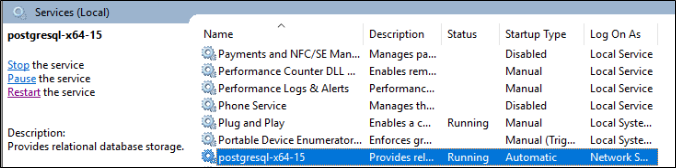
Restart the PostgreSQL service
Configuration on Esia
You need to activate the Esia backup webplugin. To do this, connect to the Esia server using ssh (Putty) and enter the following command as root: apt update && apt install esia-webp-backup
Add a backup node.
In your Esia interface, go to administration (the toothed road on the left) and then click on the “manually add node” button in the top right-hand corner. As shown in the image below.
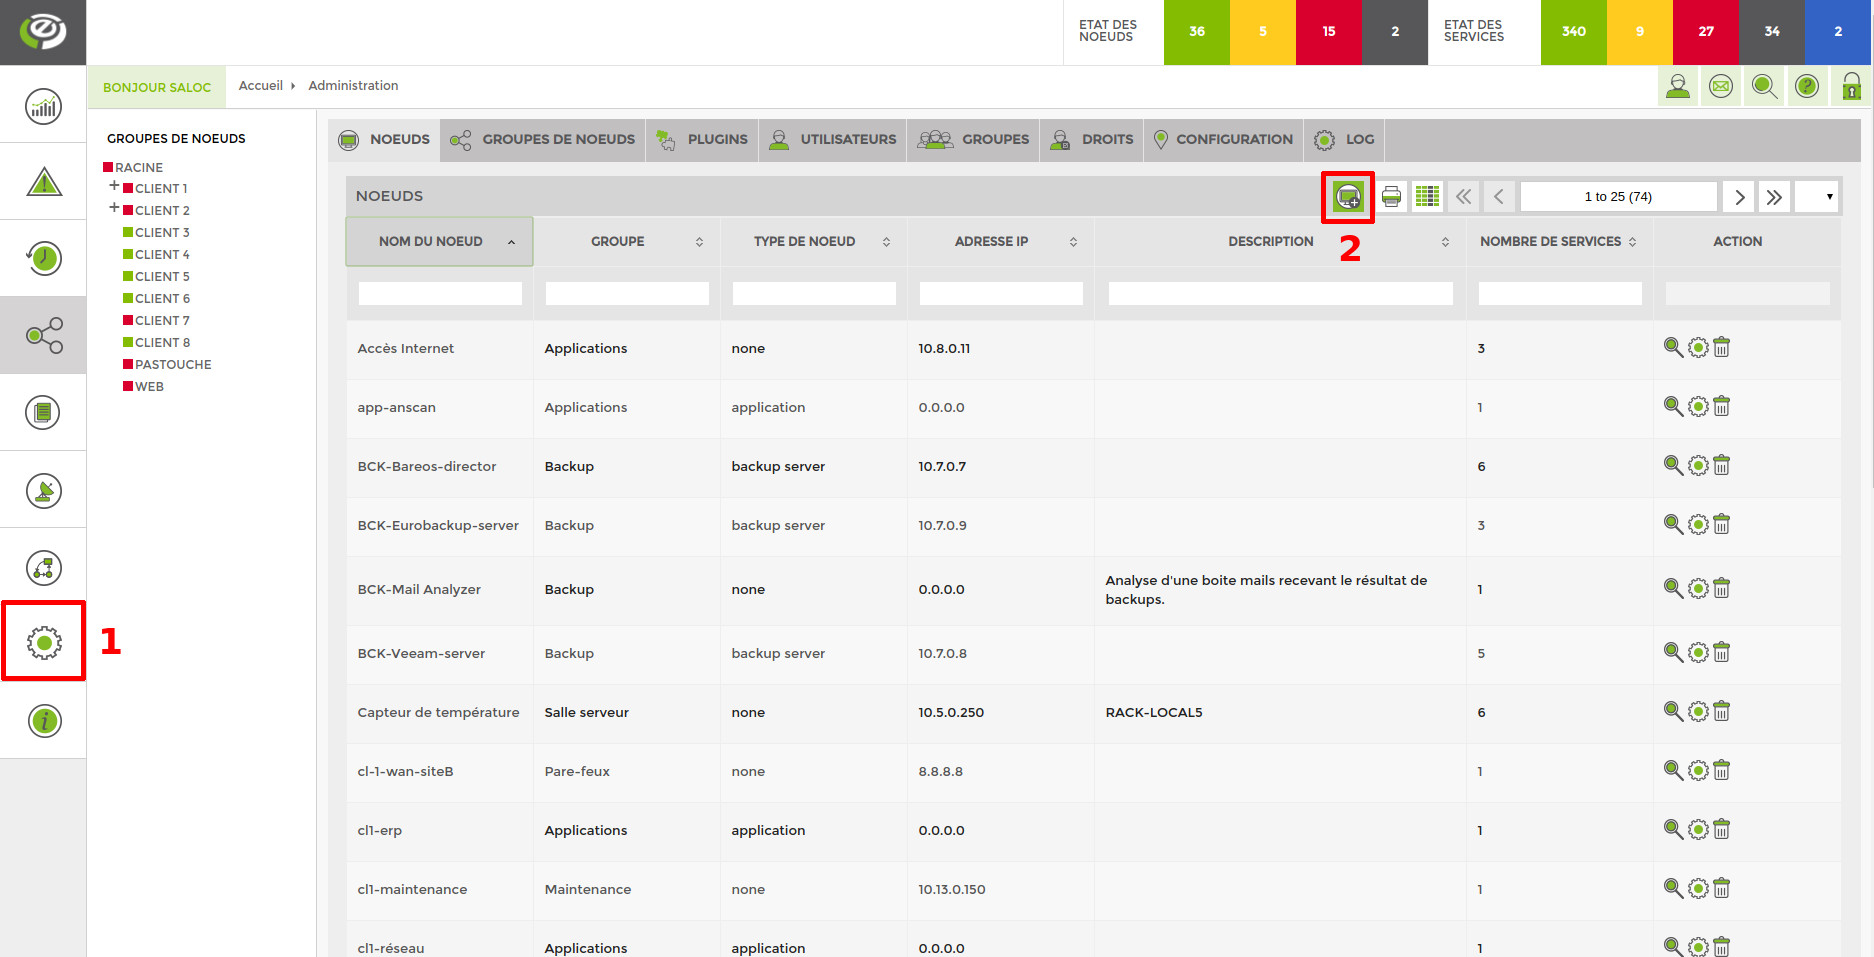
The following page appears:
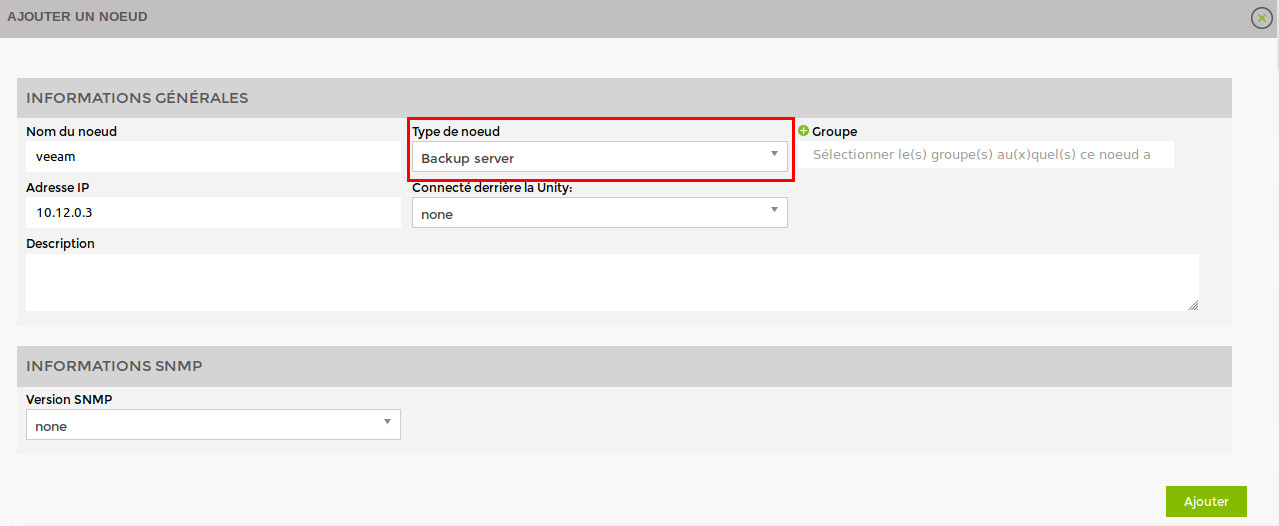
Specify the name, IP address and group in which the node should appear. The most important thing is to indicate the type of node, such as “backup server”. A configuration page will appear, asking you to configure the driver. Select the “veeam - db” driver and a menu will appear below it. Click on “SQL Authentication” and enter your database connection parameters.
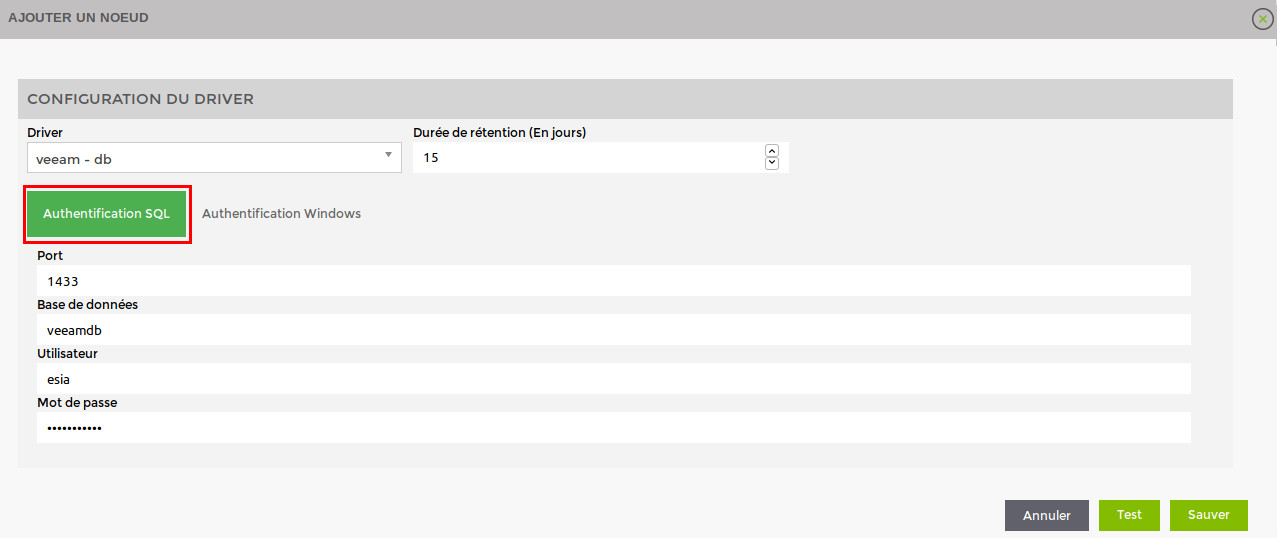
Once you have filled in the details, click on 'Test' to validate your user parameters. If the test is OK, you can save it.
You now need to wait 15 to 30 minutes for synchronisation to take place. Once synchronisation is complete, you can start monitoring your backups. You can continue the tutorial by following this link: Activate back-up monitoring