Replacing a Unity
To replace a Unity, start by following the same steps as for adding a new Unity:
Plug the Unity into the network you wish to monitor.
Wait for the ESIA server to link your box to your interface (between 30s and 2min).
When the box is linked to your server, a notification appears in the top left-hand corner, as shown below.
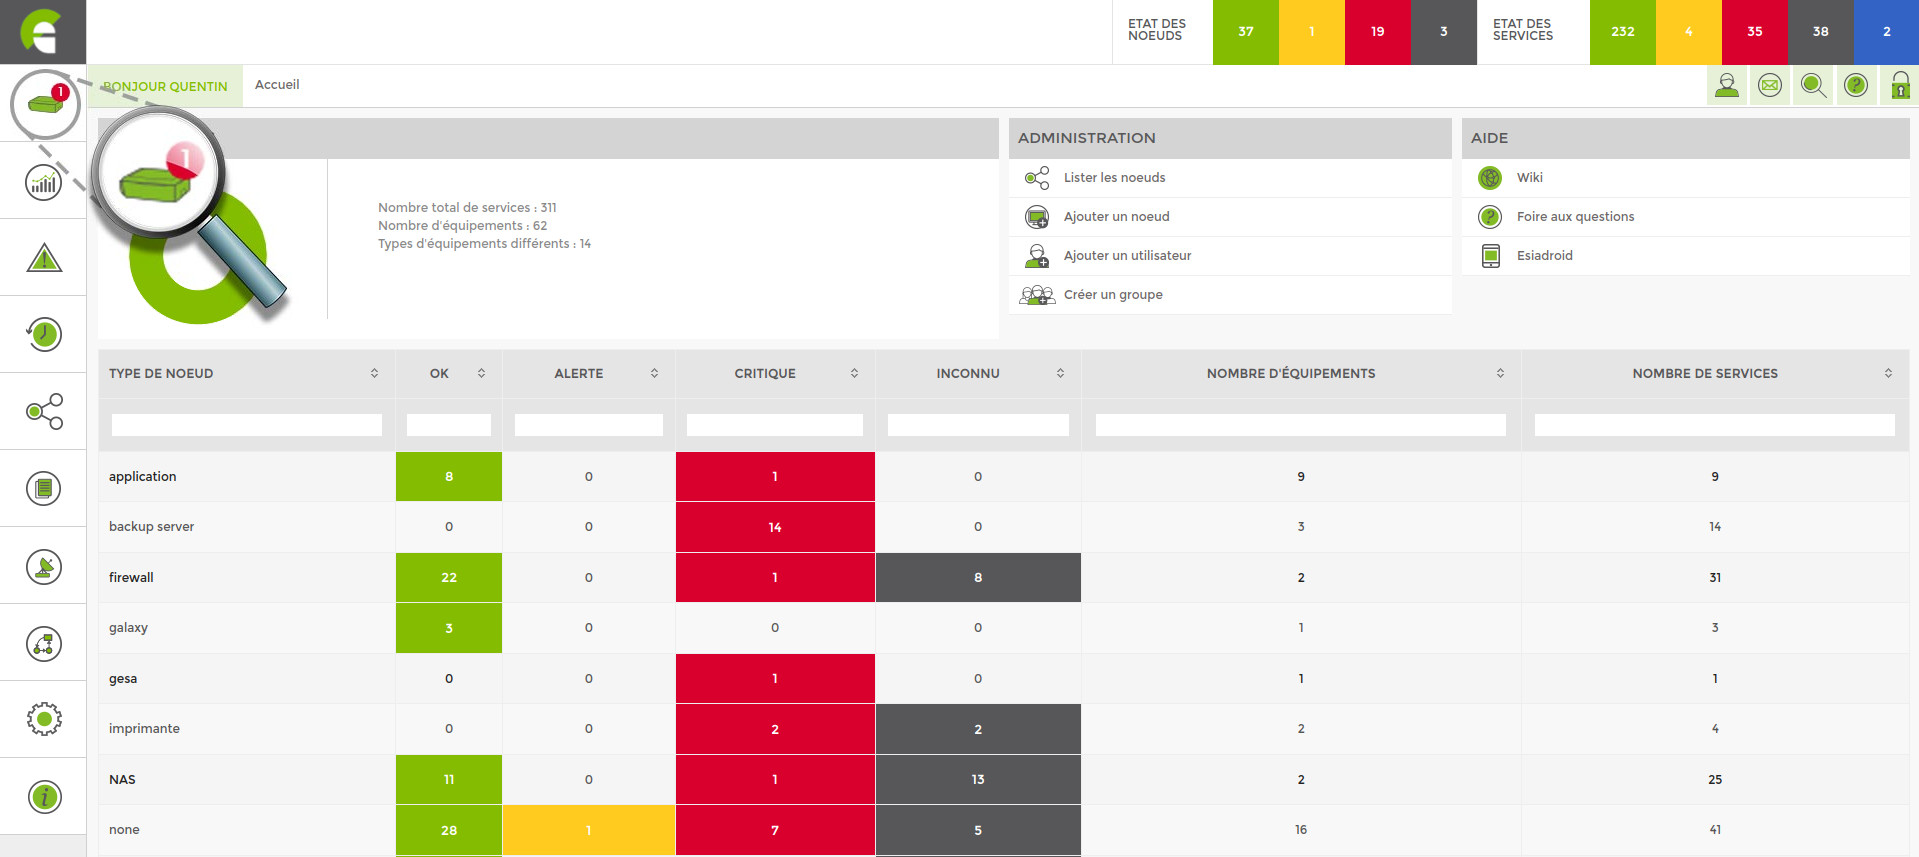
Click on it to access the Add Unity Device page.

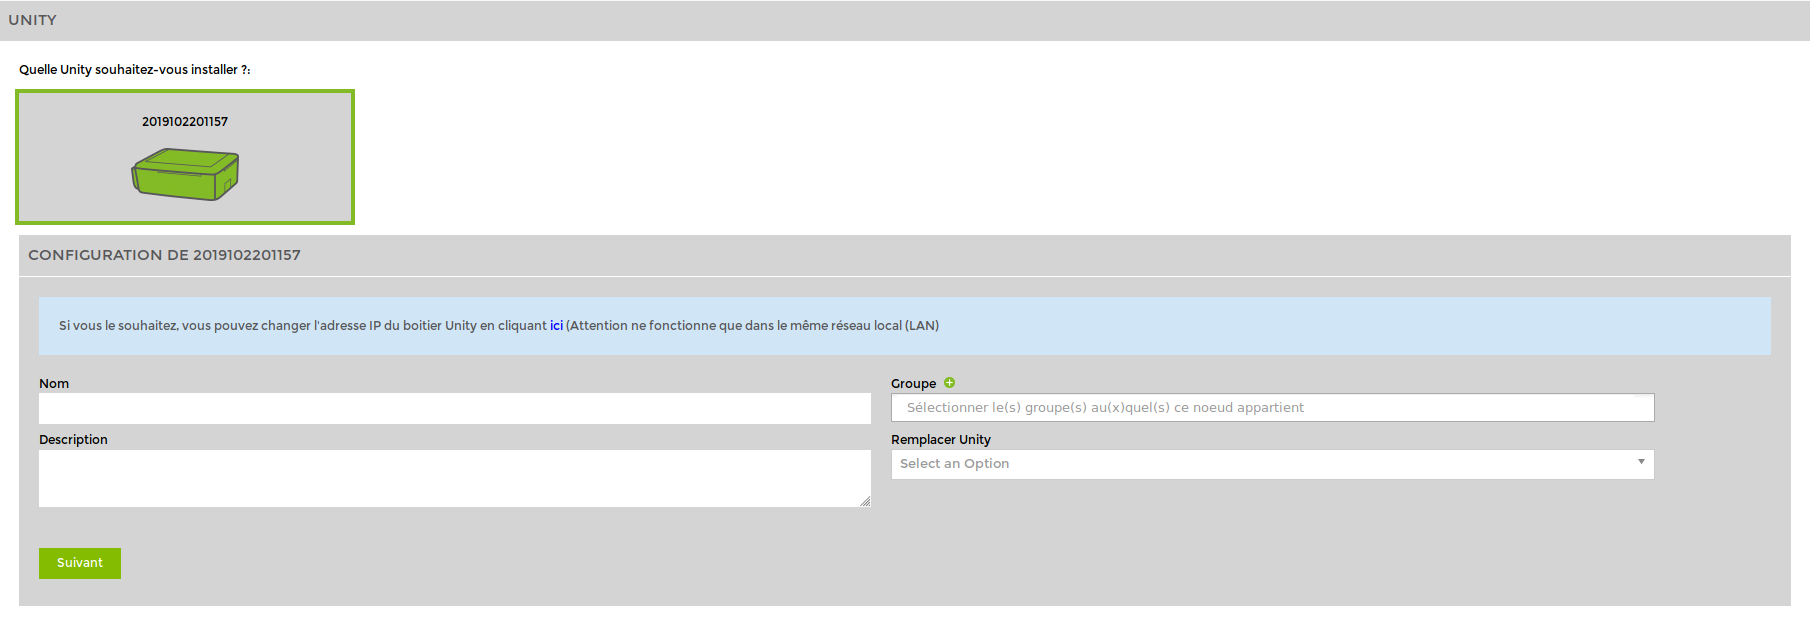
Click on the Unity you wish to add.
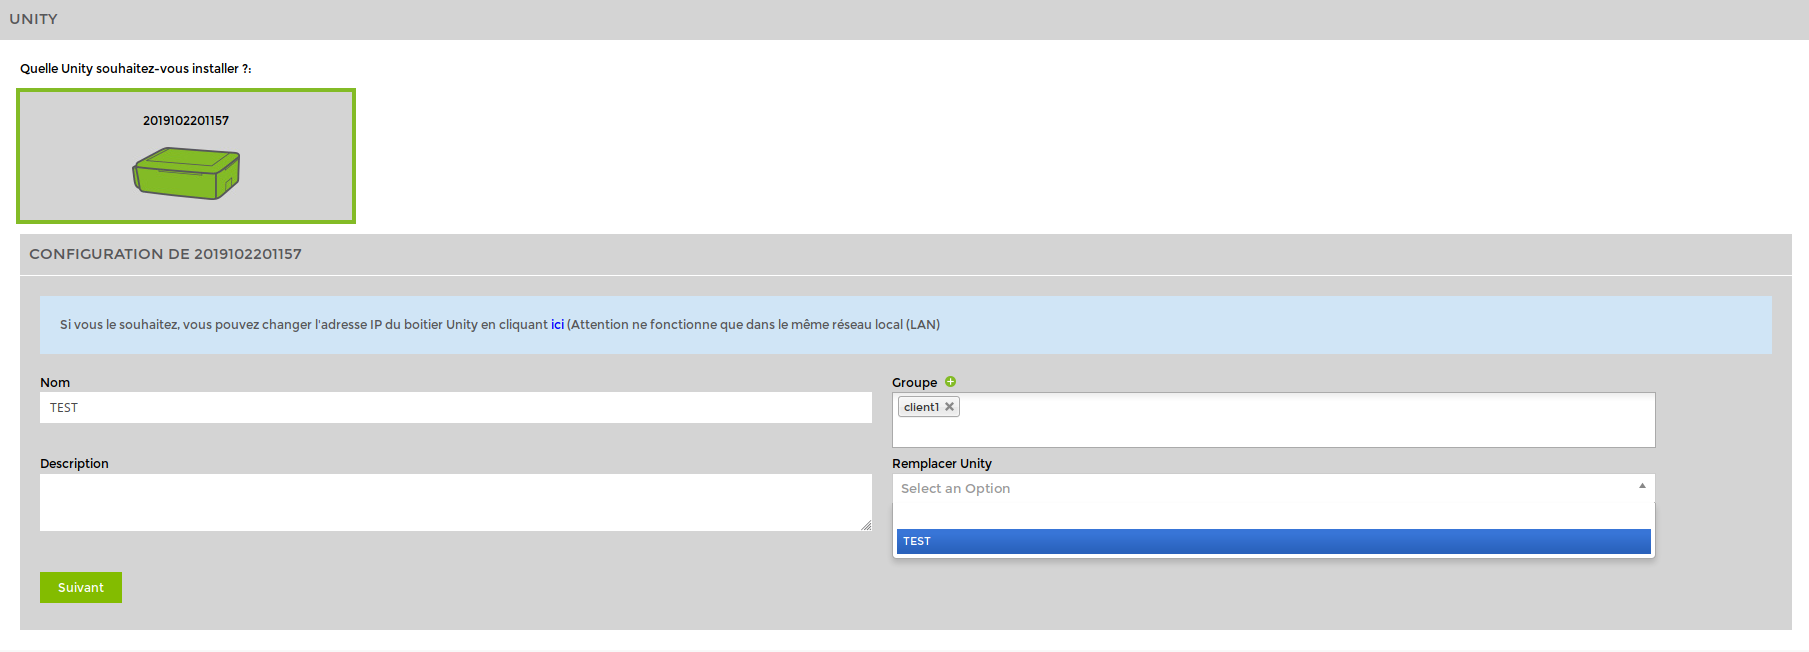
Give it a name (the new name must be different from the name of the Unity to be replaced but can be changed after replacement via the node modification page).
Add a description if required and link it to a group.
Click on “Replace Unity”. In the list, select the old Unity to be replaced by this one. Then click on “Next”.
All the nodes that were linked to the old Unity are now linked to the new one.