Table of Contents
Virtualised GESA upgrade - Debian 10 to Debian 11
Introduction
The upgrade process may take some time, your services depending on this GESA could go to Unknown status during this upgrade.
If you have SSH access to your Esia server and you wish, you can disable the alerting system during the GESA update. (see this step in the chapter Pre-update preparation)
The rest of the tutorial deals with :
- 2. Prerequisites Necessary to start the update.
- 3. Updating process Steps required to complete the update.
- 4. Configuration Configuration: Configuration of the new features introduced by the update.
- 5. Cleanup To recover disk space after the update.
It is highly recommended, if not necessary, to have read this tutorial at least 1 time in its entirety before starting the production update.
ℹ️ This update concerns :
- Unity virtuelle(x86)
- Svalinn virtuelle(x86)
- Svalinn physique(x86)
Prerequisites
Before starting the update, all of the following points must be met:
- Have an internet connection to download the update packages.
- Make a snapshot of the VM beforehand in order to quickly return to the previous state in the event of MAJOR problems.
Update steps
Pre-update preparation
Take a snapshot of the VM
So that you can come back quickly in the event of a complete crash.
Disable the alerting system on the Esia server (Optional)
To avoid receiving false positives during the update.
Connect using SSH root on your Esia server and type :
- copy
chmod -x /usr/local/esia/plugins/alerting/*
Update
Updating works like this:
- Modify the package source file to indicate that you are switching to bullseye (command sed)
- Update the system database containing the list of packages (command apt update)
- Update the system (command apt dist-upgrade)
Prepare the update :
Check the source apt file using the following command:
- copy
cat /etc/apt/sources.list
You should get the following lines:
deb http://deb.debian.org/debian buster main contrib non-free
deb-src http://deb.debian.org/debian buster main contrib non-free
deb http://stable.repository.esia-sa.com/esia buster contrib non-free
If necessary, edit the file with the nano command (ctrl + o to save and ctrl +x to exit).
- copy
nano /etc/apt/sources.list
We are now going to replace all the busters with bullseye and update the list of packages.
- copy
sed -i s/buster/bullseye/g /etc/apt/sources.list
sed -i s#bullseye\/updates#bullseye-security#g /etc/apt/sources.list
apt update
Example
root@unity-x86:~# sed -i s/buster/bullseye/g /etc/apt/sources.list
root@unity-x86:~# sed -i s#bullseye\/updates#bullseye-security#g /etc/apt/sources.list
root@unity-x86:~# apt update
Get:1 http://security.debian.org/debian-security bullseye-security InRelease [48.4 kB]
Hit:2 http://stable.repository.esia-sa.com/esia bullseye InRelease
Hit:3 http://deb.debian.org/debian bullseye InRelease
Get:4 http://security.debian.org/debian-security bullseye-security/main Sources [159 kB]
Get:5 http://security.debian.org/debian-security bullseye-security/main amd64 Packages [256 kB]
Get:6 http://security.debian.org/debian-security bullseye-security/main Translation-en [165 kB]
Fetched 628 kB in 1s (903 kB/s)
Reading package lists... Done
Building dependency tree
Reading state information... Done
415 packages can be upgraded. Run 'apt list --upgradable' to see them.
root@unity-x86:~#
Check the current state of your system:
Check the system disk space using the command below:
- copy
df -h |grep -v tmpfs|grep -v udev|grep -v /boot
Example:
root@unity-x86:~# df -h |grep -v tmpfs|grep -v udev|grep -v /boot
Filesystem Size Used Avail Use% Mounted on
/dev/mapper/debian--buster--vg-root 15G 1.7G 13G 12% /
root@unity-x86:~#
Running the update :
To download the GESA + OS update
- copy
apt -d dist-upgrade
Before confirming, check that you have enough disk space:
Then run the following command to apply and configure the packages:
- copy
apt dist-upgrade
In the example below, 392 MB + 935 MB will be required during installation.
498 upgraded, 148 newly installed, 5 to remove and 0 not upgraded.
Need to get 0 B/323 MB of archives.
After this operation, 652 MB of additional disk space will be used.
Do you want to continue? [Y/n]
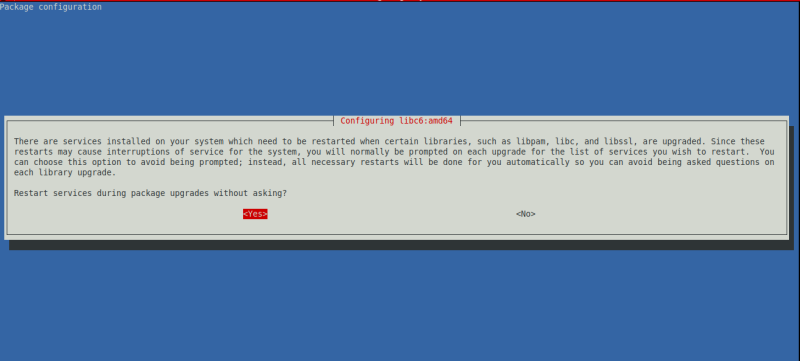
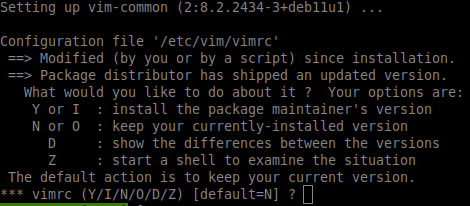
- For all questions, leave the default answer.
- If there is a question about GRUBit's important not to make a mistake and to check the correct the correct VM boot disk. Otherwise it might not boot anymore.
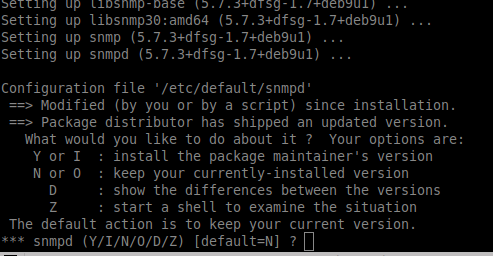
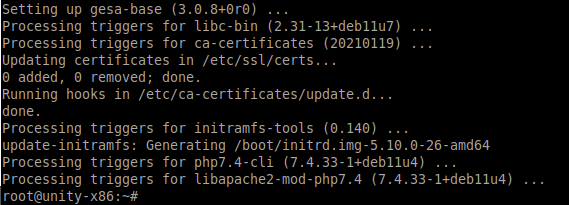
Examples of questions asked
The default answer is always 'N', so just press ENTER.
Post-update tasks
Remove old Debian buster packages
This step is necessary, in addition to saving disk space, keeping old versions of packages could :
- Cause bugs in Esia
- Cause problems in future updates.
It is therefore strongly recommended that you carry out this step even if your Esia is now working correctly. In addition, it also helps to highlight problems/bugs that could occur later at random.
- copy
apt autoremove
Confirm deletion.
Purge old GESA buster packages
These packages have been replaced and are no longer in use. They have been removed with the command apt autoremove command in the previous step, but their configuration must now be removed.
! WarningRead the following note before executing the command.
- copy
apt purge gesa-ecatp-plugins gesa-watchdog
! Warningbefore confirming, check that (as below) only these 2 packages will be deleted.
root@unity-x86:~# apt purge gesa-ecatp-plugins gesa-watchdog
Reading package lists... Done
Building dependency tree... Done
Reading state information... Done
The following packages will be REMOVED:
  gesa-ecatp-plugins* gesa-watchdog*
0 upgraded, 0 newly installed, 2 to remove and 0 not upgraded.
After this operation, 0 B of additional disk space will be used.
Do you want to continue? [Y/n]
Confirm packet purge.
Essential tasks at the end of the update
Check if your VM restarts
Restart your VM and check that the restart works. A configuration error in GRUB or in the system update could cause the VM to stop booting. Or the ECATP connection to the Esia server does not restart automatically.
To reboot cleanly, enter the following command:
- copy
reboot
Check the status of your services
Log on to your Esia to check that the services linked to this GESA are working properly.
Check for new alerts
If there are new services in error, check that they are on nodes linked to the GESA concerned.
If some of your plugins no longer work after the update. (In this case, contact our support)
Reactivate the alert system
If you had deactivated alerting at step Preparing the pre-update step, don't forget to reactivate it on the Esia server (using SSH root). Otherwise, you can skip this step.
Activation :
- copy
chmod +x /usr/local/esia/plugins/alerting/*
Check if it is activated :
- copy
ls --color -l /usr/local/esia/plugins/alerting/*
In the examples below, the green colour indicates that the scripts are executable. They are therefore activated.
Examples :
Configuration
esia user configuration (optional)
Each GESA, whether physical or virtual, now has a new web interface. This interface is accessible via the IP of the GESA in http.
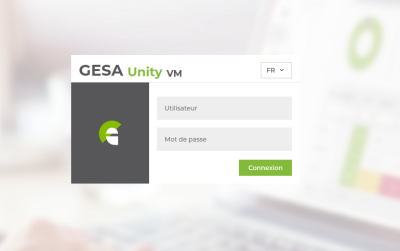
You log in with a user who can access both the command line and the web interface. Remember that it is the same user for the command line and the web.
Here are the default credentials:
- User : esia
- Password: gesa gesa
If this user esia was present on the OS before the update, the previous password will not have been changed and will have to be used instead of the default password.
No other SSH user will be able to connect to the web interface.
If you wish to change the password for this esia user, there are two possible methods:
On the command line
Type the following command:
- copy
passwd esia
Enter your new password and confirm it:
root@unity-x86:~# passwd esia
New password:
Retype new password:
passwd: password updated successfully
root@unity-x86:~#
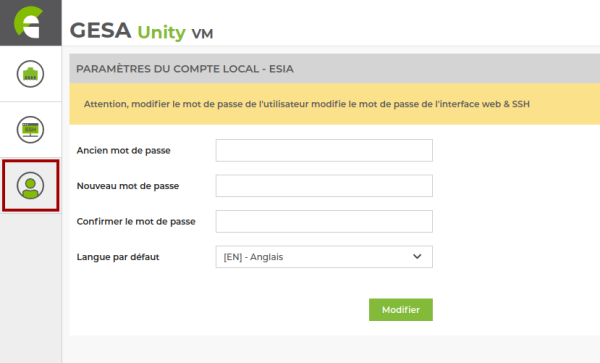
Via the web interface
Clean up
You can now delete the snapshot

