Table of Contents
Configuring SNMP on D-Link switches
Introduction
In order to supervise this type of equipment, you need to provide Esia with a community that has read-only SNMP V1/V2c access. We therefore need to start by configuring SNMP on this equipment.
To do this, you first need to enter the IP address of the switch in the URL of your browser. Then authenticate yourself.
It is then possible and necessary to activate SNMP. By default, it offers SNMP access in V1/V2c for the 'public' (read-only access) and 'private' (read and write) communities. public' (read-only access) and 'private' (read and write) communities. As a reminder, only read-only access is required for Esia. Depending on the range of the switch, the views used in the default community may be more or less restrictive.
Depending on the range, switch configuration differs little, but the following elements may differ:
- The design of the management interface
- The location of the SNMP administration pages in the menu tree.
- The presence or absence of additional SNMP options.
- The default settings for views and other parameters may differ.
Don't forget to save your configuration once it's working properly.
This tutorial has been tested with the following switches:
DGS-12XX series
Menu
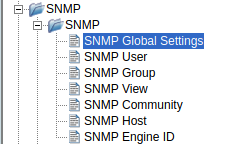
Go to « SNMP ⇒ SNMP ».
The configuration pages of interest are :
- SNMP Global Settings: To enable SNMP (which is disabled by default).
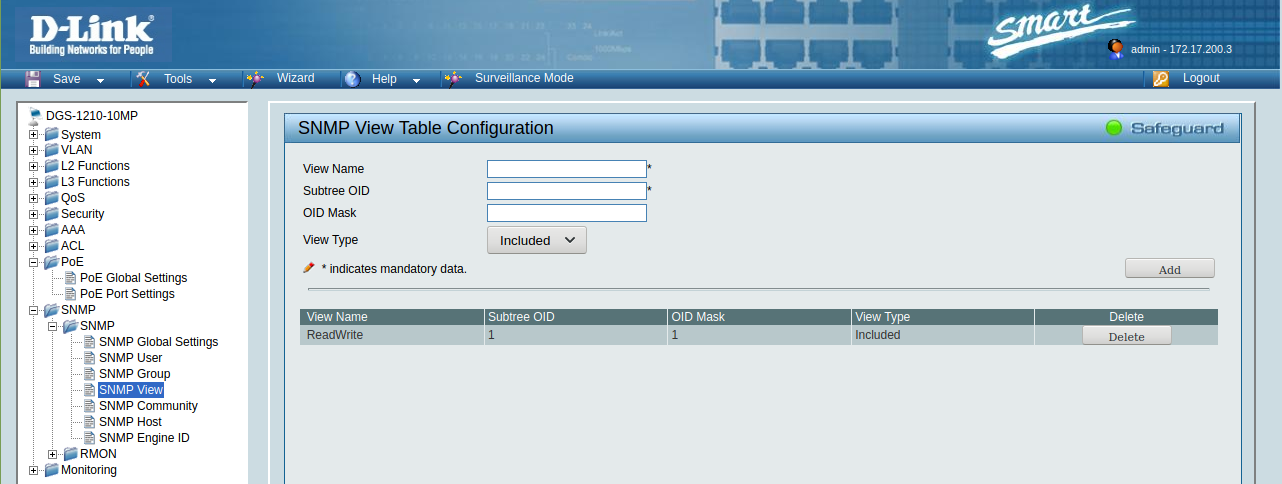
- SNMP View Table Configuration: To configure rules for SNMP views and therefore control access to the various SNMP OIDs.
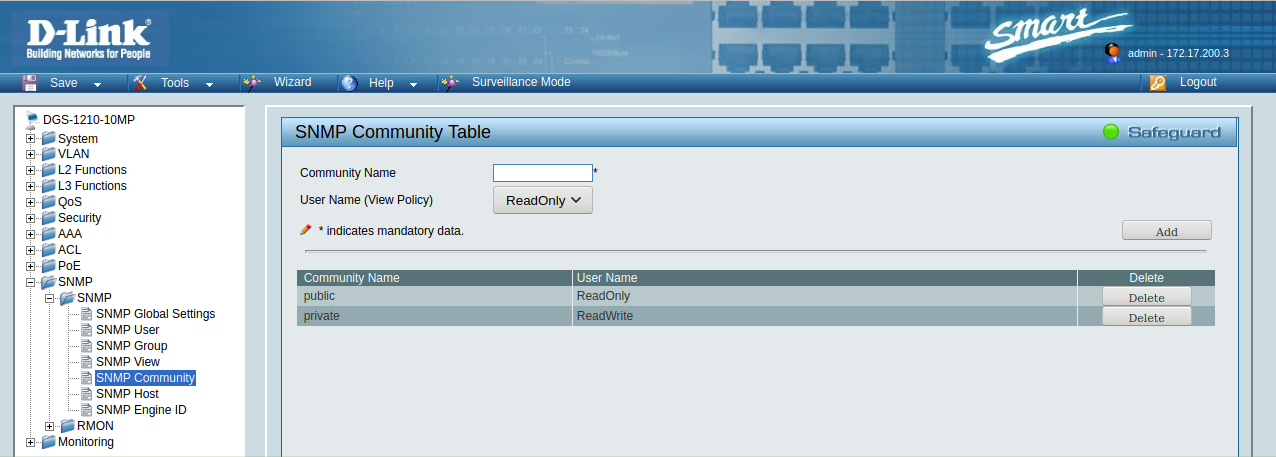
- SNMP Community Table: Binds community names to SNMP users.
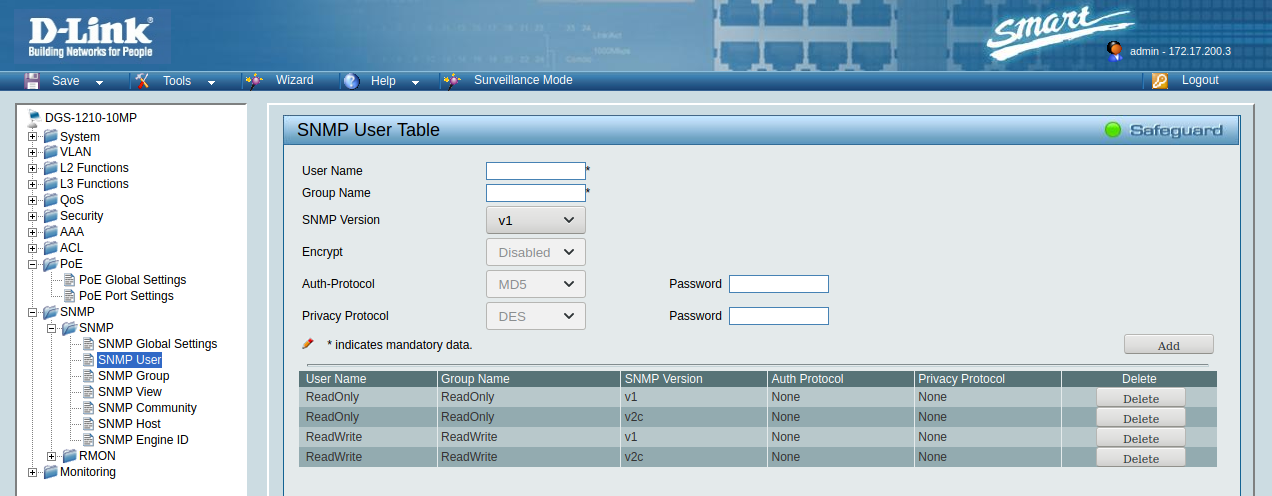
- SNMP User Table: Configures SNMP users, who are linked to an SNMP group.
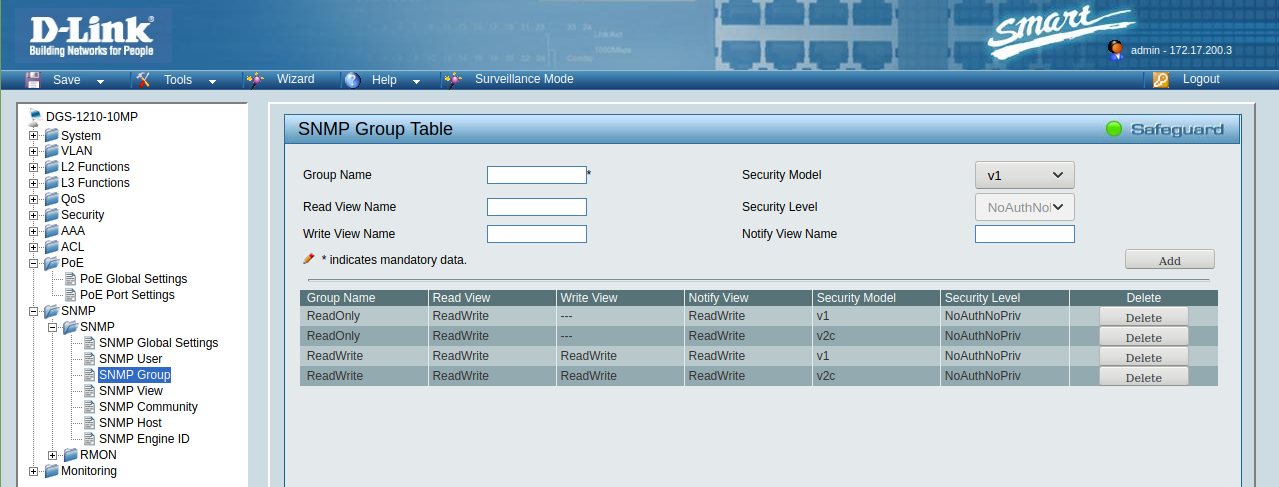
- SNMP Group Table: Configure SNMP groups and link views to them for SNMP read (what we are interested in), write and notification actions.
The last 2 pages (User and Group) are present on all switches. They are dedicated to SNMPv3 configuration, which is not required for Esia, but these pages are necessary for SNMPv2 in some switches (DGS-1210 for example) in order to link an SNMPv2 community to a particular view.
Enable SNMP on the switch
Tick the 'Enabled' box and then the 'Apply' button. Your Esia can now access the switch via SNMP via the 'public' community.
Your switch can now be monitored by Esia. The rest of this tutorial is useful if your switch is not configured by default or if you wish to make more detailed settings. In particular, it is advisable to change the name of the community (see below).
Configuring a view
You can configure different views in your switch by adding rules. You need at least one rule to create a view and access defined OIDs. The rule parameters are :
- View name: Name of the view that will have this rule.
- Subtree OID: The tree of OIDs to include or exclude.
- View Type: Choose whether to include or exclude the branch of OIDs specified above.
As you can see from the screenshots below, a view called ReadWrite is already configured with all the OIDs.
Configuring an SNMP community
The parameters are :
- Community Name: The name of the community
- User Name (View Policy): The SNMP user. Necessary for linking views. You therefore need to browse the SNMP User and Group configuration pages.
- The community used by default, 'public', is linked to the 'ReadOnly' user. It can be used for Esia access. You can therefore use this community, but it is preferable to create your own community and link it to the 'ReadOnly' user.
Setting up an SNMP group
Allows you to create user groups and link them to views corresponding to a particular SNMP action. The parameters of a group are :
- Group Name: Name of the user group
- Read View Name: The view to be used for read operations (for Esia, a view with few restrictions is required).
- Write View Name: The view to be used for write operations (Not required in Esia).
- Notify View Name: The view to be used for SNMP traps (not required in Esia).
- Security Model: V2c is preferable for Esia.
You can leave the default D-Link settings.
Configuring an SNMP user
To create SNMP users, it is then possible to assign a community to these user(s). The parameters are :
- User Name: Name of the user
- Group Name: Group to which you wish to link the user
- SNMP Version: Choose V2c
The 'ReadOnly' user shown above is sufficient in Esia.
DGS-15XX, DGS-31XX, DGS-36XX, DXS-34XX, DXS-36XX series
The firmware of the following switches is identical, so the tutorial is compatible: DGS-1250/1510/1520/3630/DXS-3400/DXS-3610
Menu
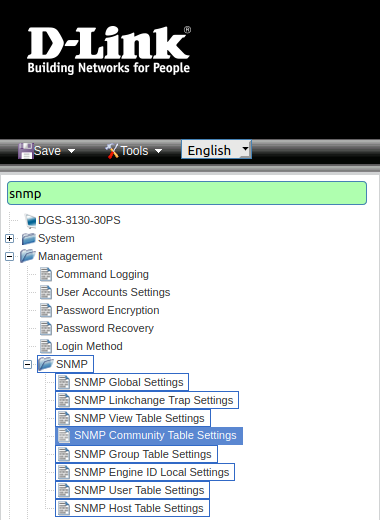
- Go to « Management ⇒ SNMP ».
- Or, more easily, enter 'SNMP' in the search bar.
The configuration pages of interest are :
- SNMP Global Settings: to enable SNMP (which is disabled by default).
- SNMP View Table Configuration: to configure rules for SNMP views and thus control access to the various SNMP OIDs.
- SNMP Community Table: Binds community names to SNMP users.
- SNMP User Table: Only for SNMPv3.
- SNMP Group Table: For SNMPv3 only.
Enable SNMP on the switch
Tick the 'Enabled' box and then the 'Apply' button. Your Esia can now access the switch via SNMP via the 'public' community.
Your switch can now be monitored by Esia. The rest of this tutorial is useful if your switch is not configured by default or if you wish to make more detailed settings. In particular, it is advisable to change the name of the community (see below).
Configuring a view
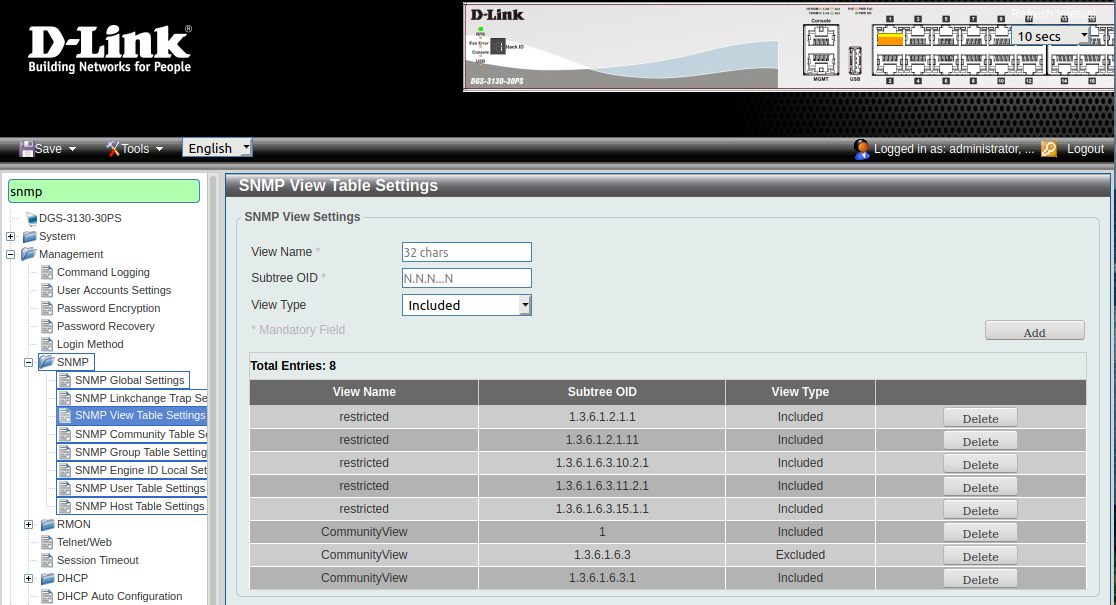
You can configure different views in your switch by adding rules. You need at least one rule to create a view and access defined OIDs. The rule parameters are :
- View name: Name of the view that will have this rule.
- Subtree OID: The tree of OIDs to include or exclude.
- View Type: Choose whether to include or exclude the branch of OIDs specified above.
As you can see from the screenshots below, by default, 2 views are offered 'restricted' and 'CommunityView'. These 2 views are both restricted in OIDs.
You can use the default view 'CommunityView'. This is restrictive with regard to OID 1.3.6.1.6.3 (snmpModules) but these OIDs are not used in Esia (and therefore not necessary).
If you still want to be able to access all the OIDs on these switches, you can either :
- Remove the exclusion rule for oid 1.3.6.1.6.3 for 'CommunityView'.
- Create a new view with the following parameters
- Subtree OID: 1
- View Type: Included
Configure an SNMP community
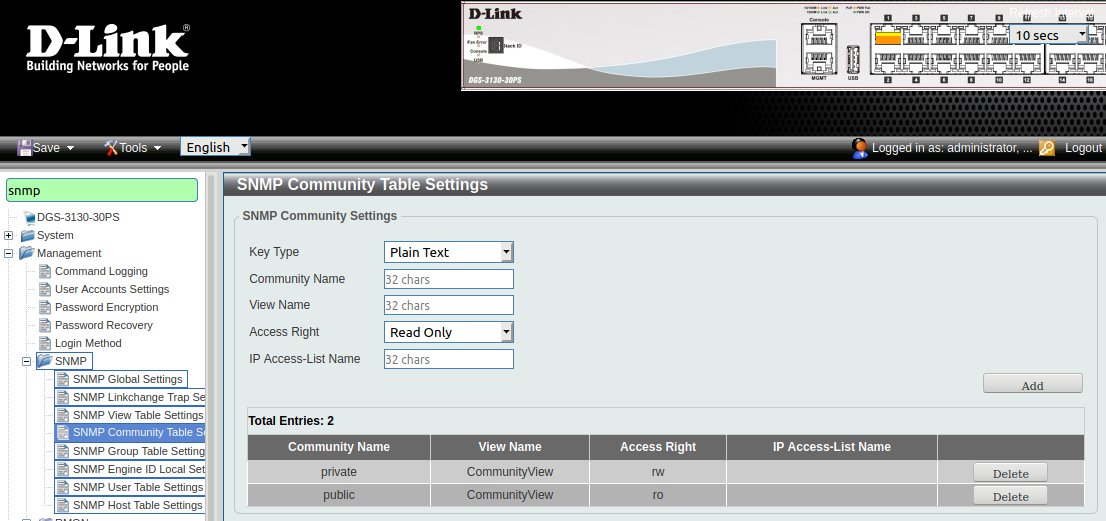
The parameters are :
- Community Name: The name of the community
- View Name: The view to be used.
- Access Right: Read-only (sufficient for Esia) or Read-Write
- IP Access-List Name: Only available on stackable switches, this option allows you to restrict the IPs that can access the switch via SNMP. For greater security, you can enter the IP address of Esia or Unity.
You enter the view to be used directly in View Name. You do not have to go through a user and a user group as is the case for other D-LINK switches.
The 'public' community uses the 'CommunityView' view by default. By default, this view is restricted for oid 1.3.6.1.6.3 (snmpModules) which is not used by Esia. You can therefore use this community, but it is preferable to create a new community using this view.

