SNMP activation on EMC DataDomain SAN

This tutorial has been made available to the entire Esia community thanks to the contribution of our partner Rcarré.
Their website: https://www.rcarre.com
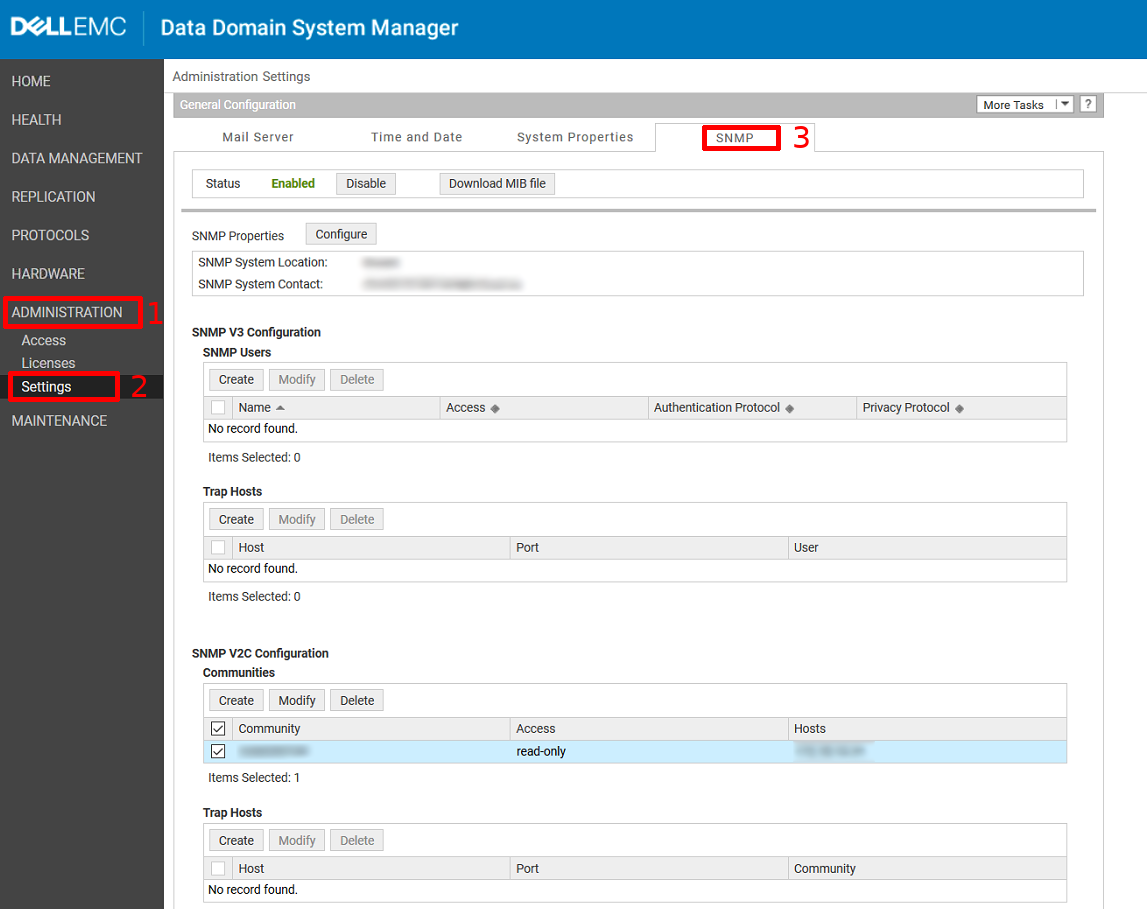
Once connected to your SAN, click on “Administration”, then on “Settings” and the last tab on the right is the SNMP tab, click on it.
The following menu will appear
Check that “Status” is set to Enabled. You can configure the SNMP properties (contact & location). The SNMPv2 or V3 configuration is shown below.
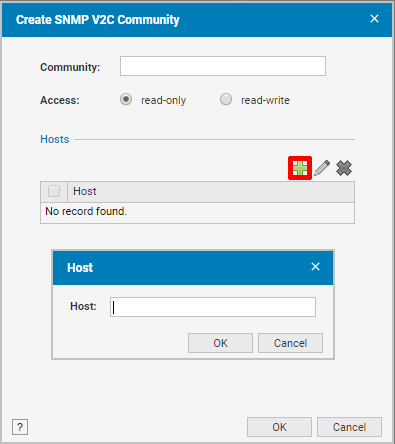
For version 2, you can click on “create” in the right section. A pop-up will appear, indicate the community in “read-only”. Then click on the “+”, just below “Hosts” and enter the IP of your Unity/Esia Server.
Then click OK to close the “Host” pop-up and “OK” to apply the community.
You can now add the “default_gesa_datadomain” and “default_snmp_datadomain” patterns.


