Table of Contents
SNMP activation on a WatchGuard firewall
Via the WEB interface
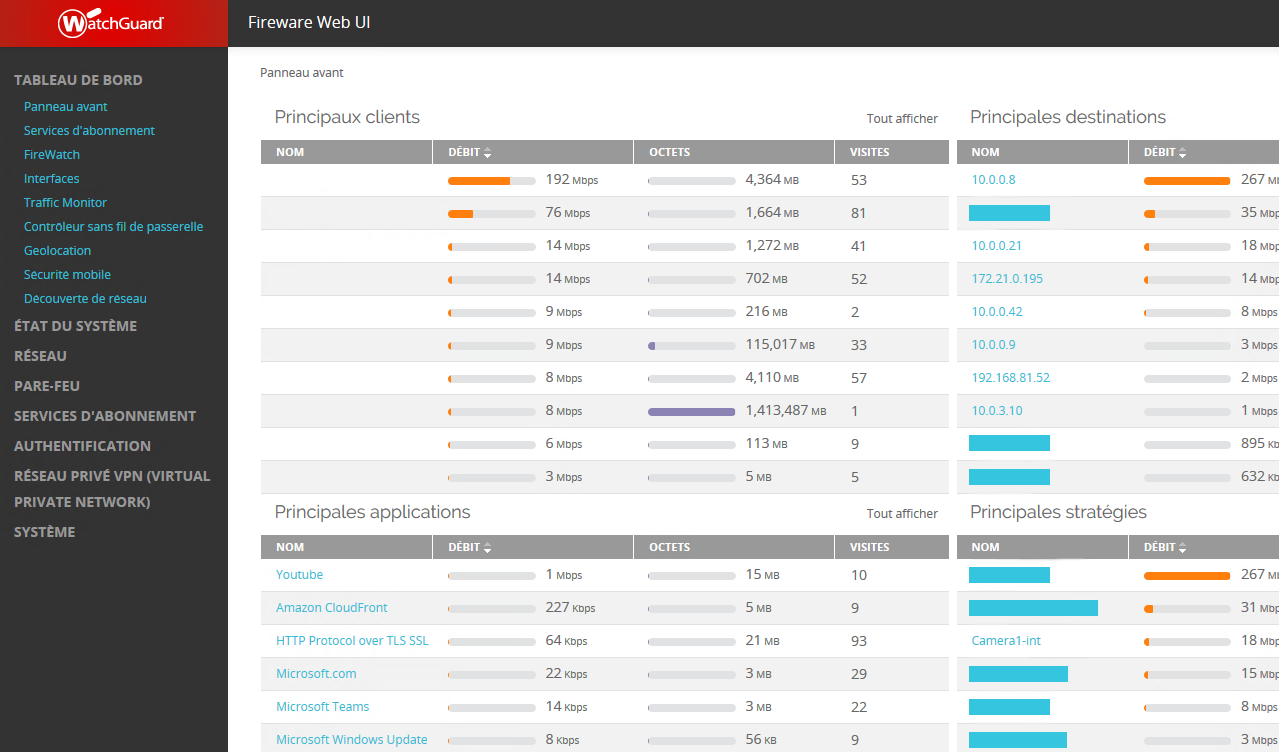
Once you have logged in, you will be taken to the firewall dashboard as shown in the image below.
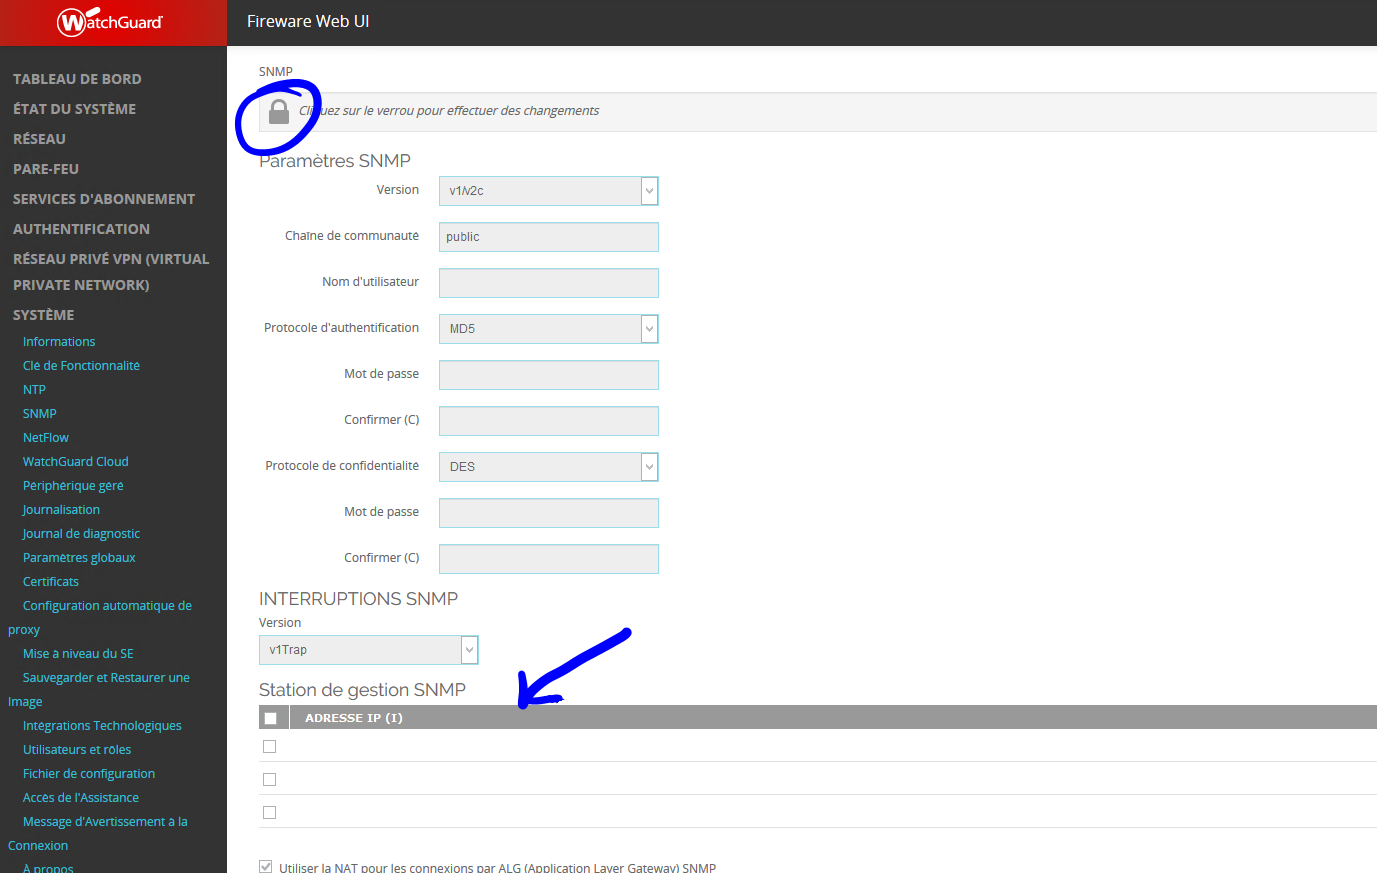
Click on “System” and then on “SNMP” to go to the SNMP configuration page. As shown below:
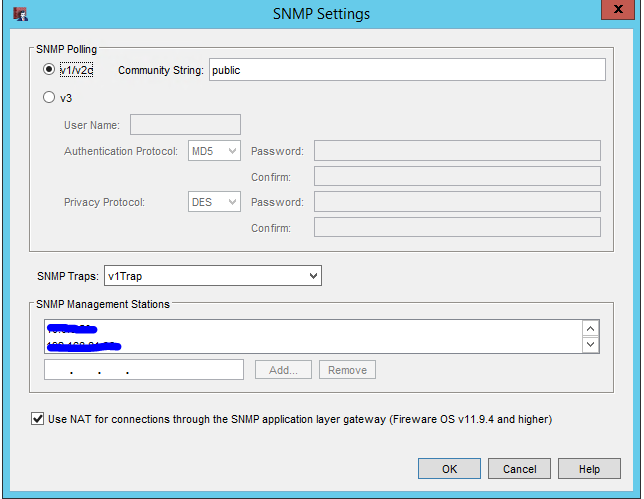
Click on “Padlock” at the top left to unlock the configuration page and then enter the information you need (community, SNMP version (if v3 authentication), etc.).
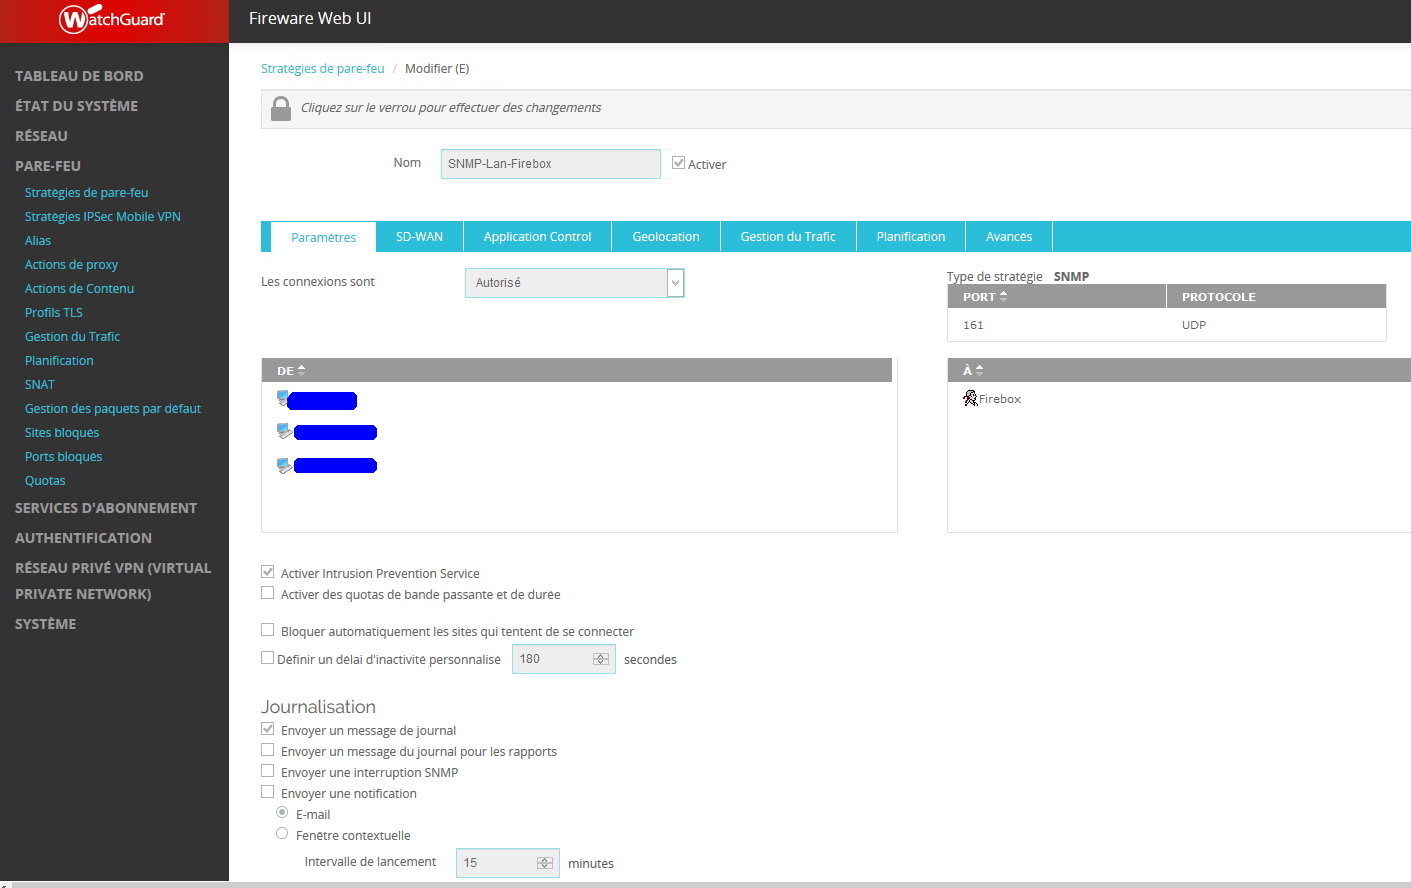
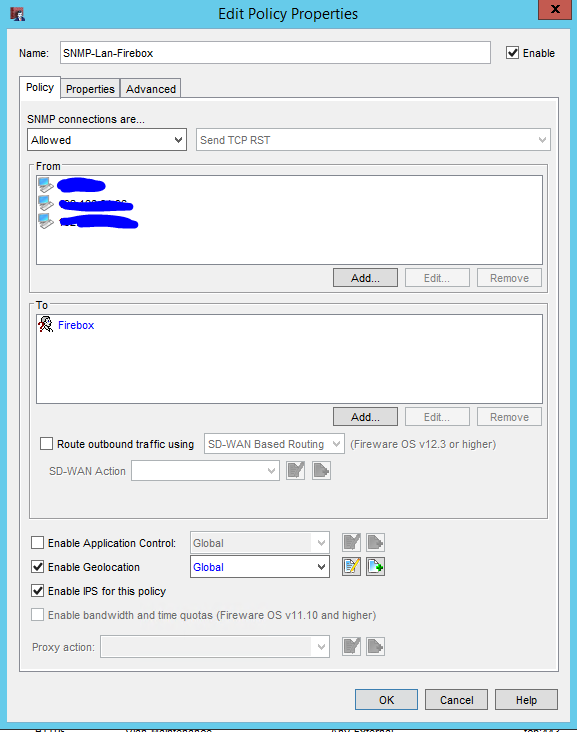
If you are using TRAP, you must also enter the addresses of authorised servers. Once this function has been validated, a NAT rule will be created:
In the DE field: enter the IP addresses of the monitoring server(s)
Save the configuration.
SNMP is now activated on your WatchGuard firewall.

