Table of Contents
Alerts table and widget
To access the alerts table, click on the “Alerts” menu on the left. A large table will appear as shown below.
- Access buttons
- tablesorter“: search fields by column (see “Keywords in search fields”)
- List of errors affected by priority (see chapter).
- Displays acknowledged errors

Hidden columns
By default, certain columns are not displayed in order to limit the size of each line and adapt to all screen sizes.
If required, you can display the columns that are hidden by default using the 'Show/hide columns' button at the top right. See the image below in the red box:

The menu appears just below, uncheck the “Auto” box to be able to select the columns you want to show or hide.
The following columns are hidden by default:
- Node description
- Technical name of the service
- Error message
Keywords in search fields
You can do a basic search, such as filtering on groups containing the letters “serv”. You'll get a display like this.
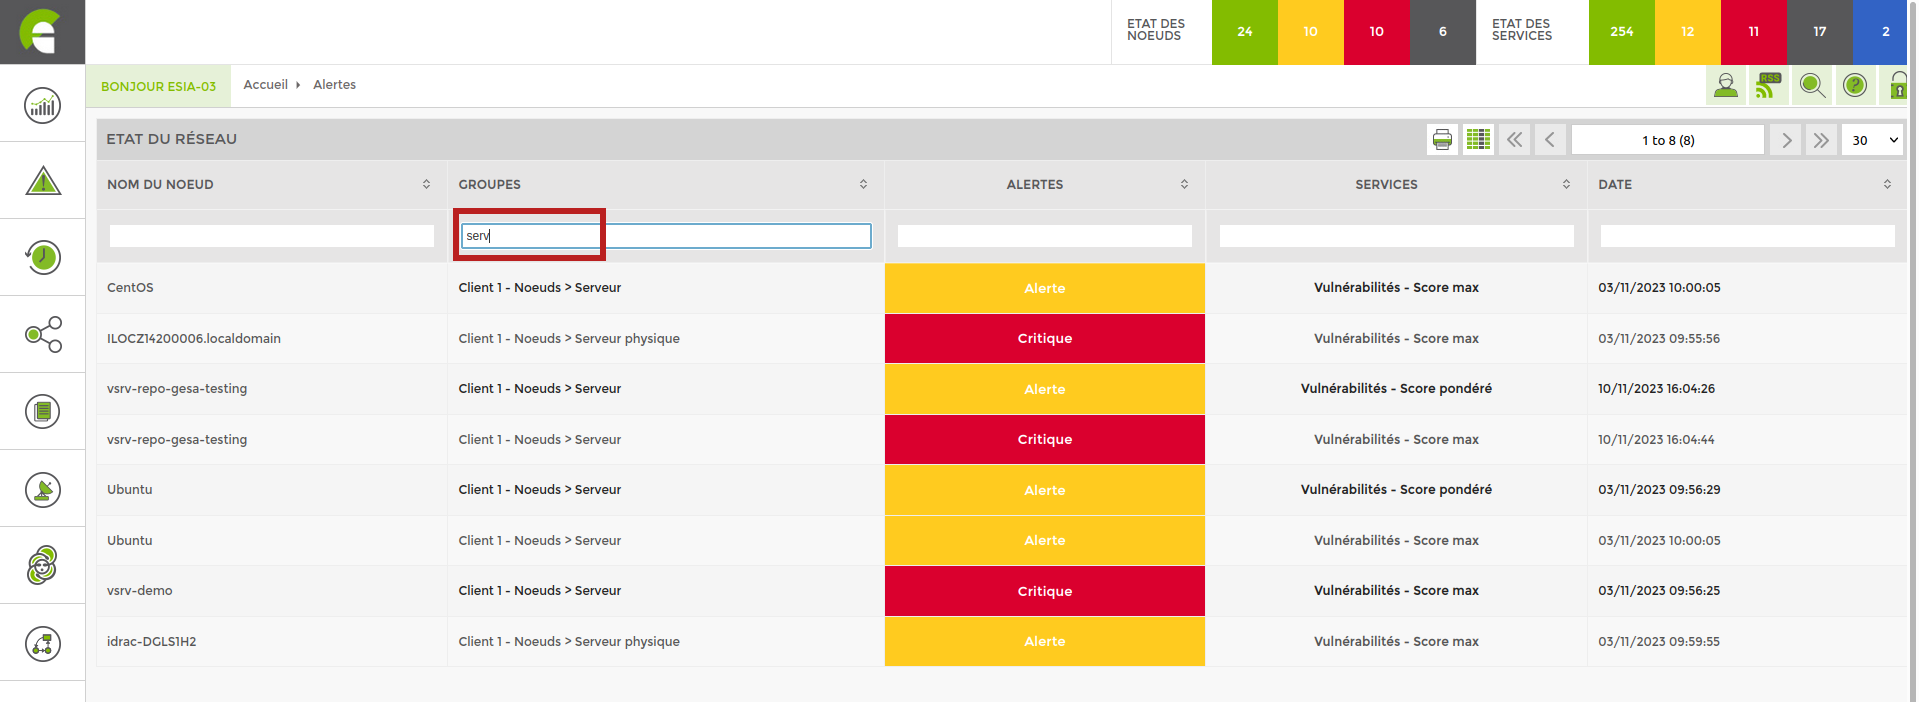
Existing feature on versions higher than 3.2.5.
But there are keywords that allow you to either configure your dashboard widget or refine your search. Here is the list of keywords:
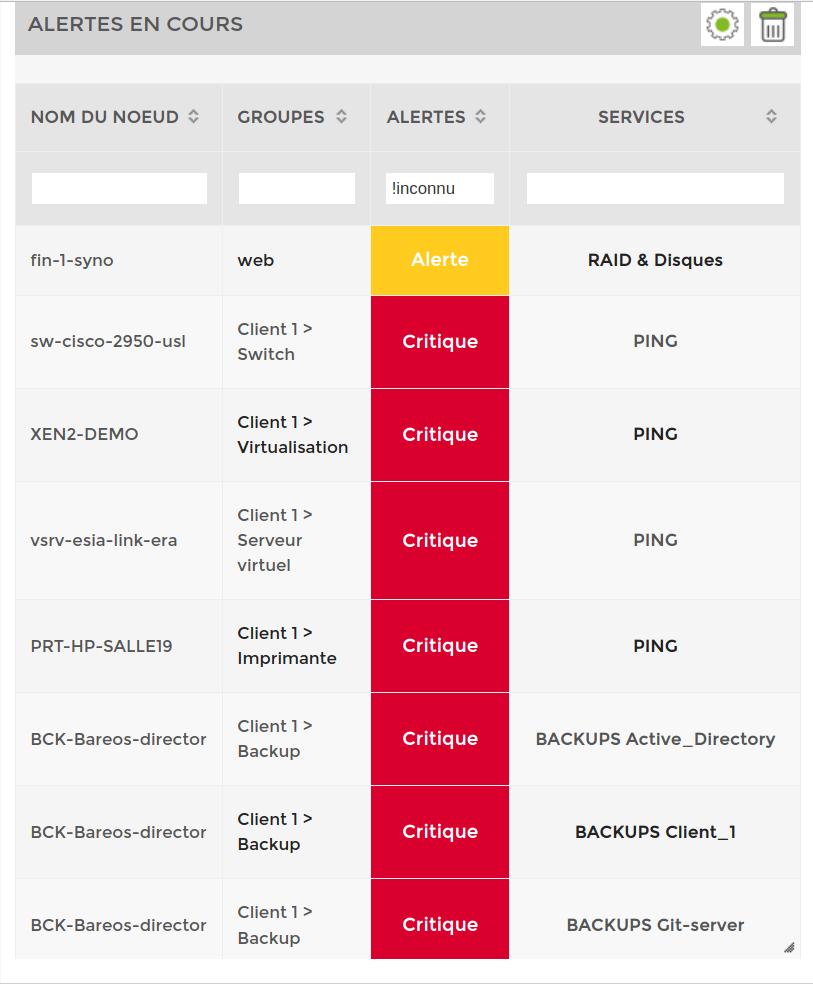
- ”!“ allows you to make a “logical NO”. For example, if I want to filter all alerts by eliminating unknowns. I would write ”!unknown“ in my filter.
- &&” is used to make a logical “AND”. For example, if I want to display nodes in error containing both the letters “srv” and “win”. I would write “srv&&win”.
- “|| ” is used to make a “logical OR”. For example, if I want to display the nodes in error in the VOIP and telephone groups, I would write “VOIP|| té”.
The screen with “srv&&win”:

The screen with “VOIP|| té”:

Use on a dashboard widget
Here is an example on a “Current Alerts” dashboard widget. There is a filter section on the right. I'm going to filter the alerts by eliminating unknown level errors. So I'm going to indicate !unknown in the alerts filter. As shown below.

Once saved, you can see that the filter has been added to your dashboard widget.
Error prioritisation
By default, the table displays errors according to the priority of each service. There are 7 levels available (as in the OSI model). This enables errors to be sorted automatically. Level 1 is the most critical.
By default, for the Windows or Linux supervision pattern, service priorities are prioritised in this way.
- PING (CHECK_ICMP): level 1
- CPU (CHECK_SNMP_LOAD): level 2
- RAM (CHECK_SNMP_WINDOWS_MEM): level 3
- Disk space (CHECK_SNMP_WINDOWS_STORAGE): level 3
This basic nomenclature can be explained as follows: If the ping does not respond, the node is unreachable, so there is no point in displaying the rest. If the CPU load is 100%, it is normal for SNMP requests to fail and the problem being dealt with is the CPU load. If SNMP is not configured, only the CPU line is displayed. It is therefore not necessary to display the other errors, which would be duplicates.
Example: my Houston server which has a PING problem (noted the use of a search filter  ).
).

If I click on it, I can see that there are 4 services in error. The ping + the 3 basic SNMP services. In the example below, the “Processor” service has been acknowledged.
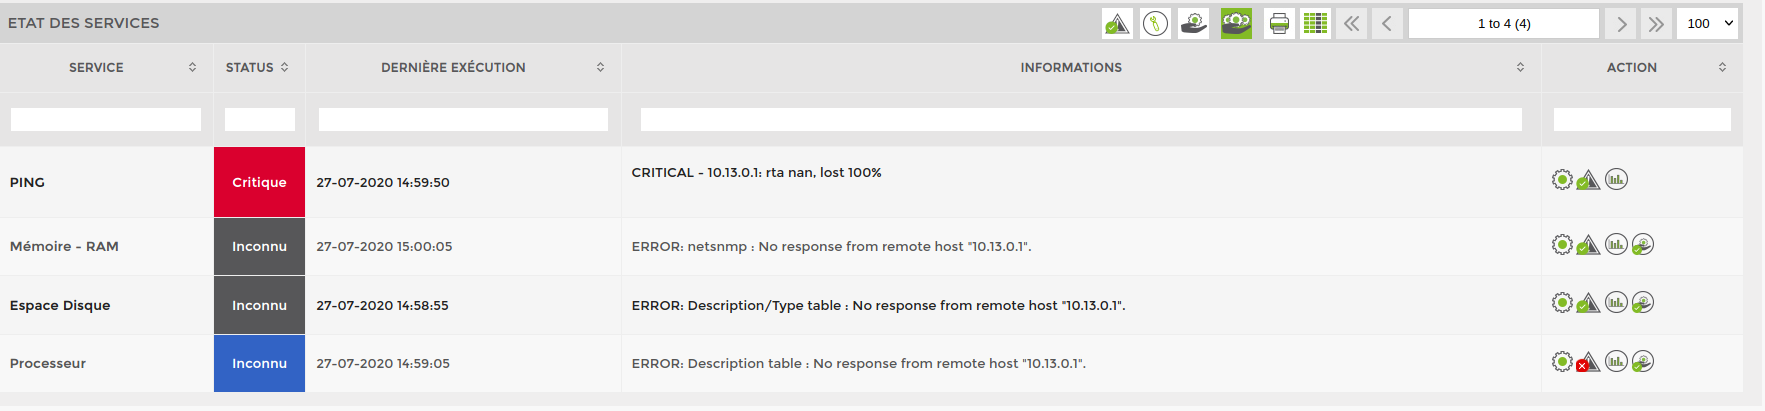
As Ping has the highest priority (1 by default), the alert table has eliminated all higher-level errors.
If you want to change the priority of services on a node, you can use the following tutorial as a guide: Applying services to your nodes
Case study: an ESIA server
Let's take a classic Esia server, we have a hardware-related part which will be supervised by the Linux pattern which has basic service priorities like this:
- PING (CHECK_ICMP): level 1
- CPU (CHECK_SNMP_LOAD): level 2
- RAM (CHECK_SNMP_LINUX_MEM): level 3
- Disk space (CHECK_SNMP_LINUX_STORAGE): level 3
I would add the service that tests disk IO (CHECK_SNMP_LINUX_IO). I would give it level 4 priority because if my IOs are saturated my database could be KO'd or my Apache server very slow. We therefore consider that the priority below 4 is due to a “hardware” problem.
For the software, here is the list of processes running on our server:
- EsiaDaemon
- PostgreSQL
- Apache2
I'm going to add the following services from the most critical to the least critical, or by redoing the dependency chain.
- Postgresql process (CHECK_SNMP_PROCESS_POSTGRESQL): level 5 if not running Apache and Esia are not functional.
- Apache2 process (CHECK_SNMP_PROCESS_Apache): level 6 if it is not running I cannot access a WEB page.
- EsiaDaemon process (CHECK_SNMP_PROCESS_esiaDaemon): level 6 no supervision if not running.
- HTTP: CHECK_HTTP / CHECK_HTTPS: level 7 attempts a connection to the web interface and checks that I have a return code of 200. So the DB connection and PHP are working perfectly.
So as soon as I have an error on my server, I already have a diagnosis just by reading the first line in my dashboard.
In the end, here's a list of all the services with their respective priorities.
- PING (CHECK_ICMP): level 1
- CPU (CHECK_SNMP_LOAD): level 2
- RAM (CHECK_SNMP_LINUX_MEM): level 3
- Disk space (CHECK_SNMP_LINUX_STORAGE): level 3
- Disk IO (CHECK_SNMP_LINUX_IO): level 4
- Postgresql process (CHECK_SNMP_PROCESS_POSTGRESQL): level 5
- Apache2 process (CHECK_SNMP_PROCESS_Apache): level 6
- EsiaDaemon process (CHECK_SNMP_PROCESS_esiaDaemon): level 6
- HTTP (CHECK_HTTP): level 7