Table of Contents
Enabling WMI on Windows Server 2012 via GPO
Here's how to enable WMI via GPOs on an Active Directory
User & group creation
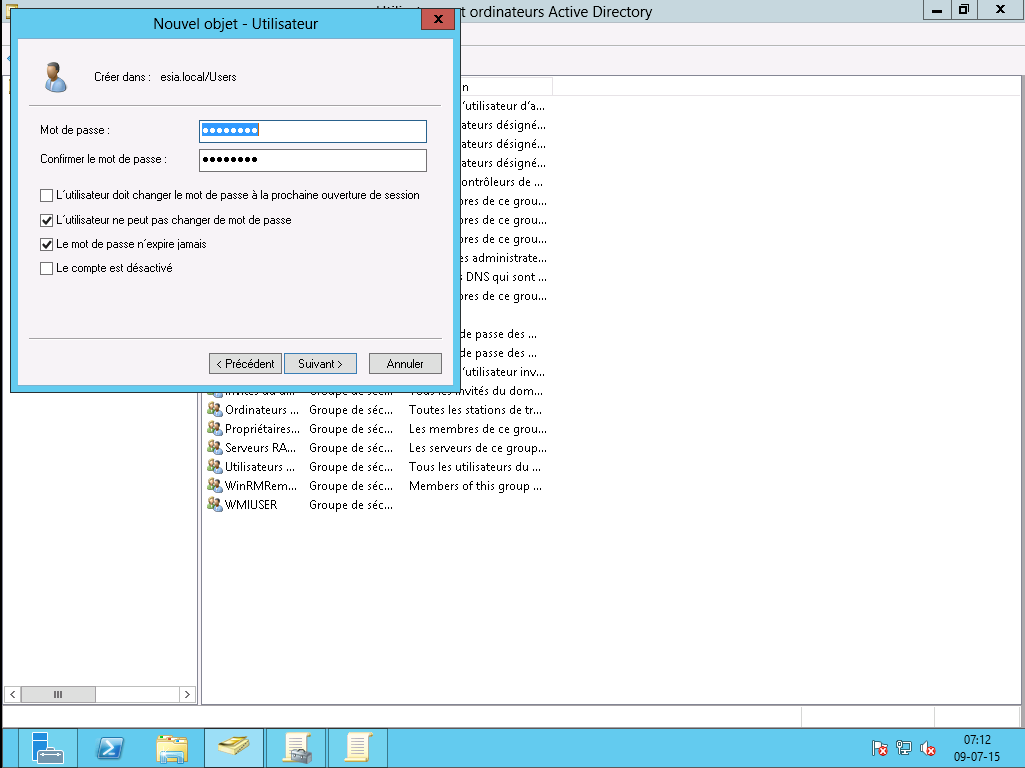
Create a user (here: “ wmiesia ”) with the password : Wmic2015 (in this tutorial). Don't forget to select “the password never expires” and “the user cannot change the password”.

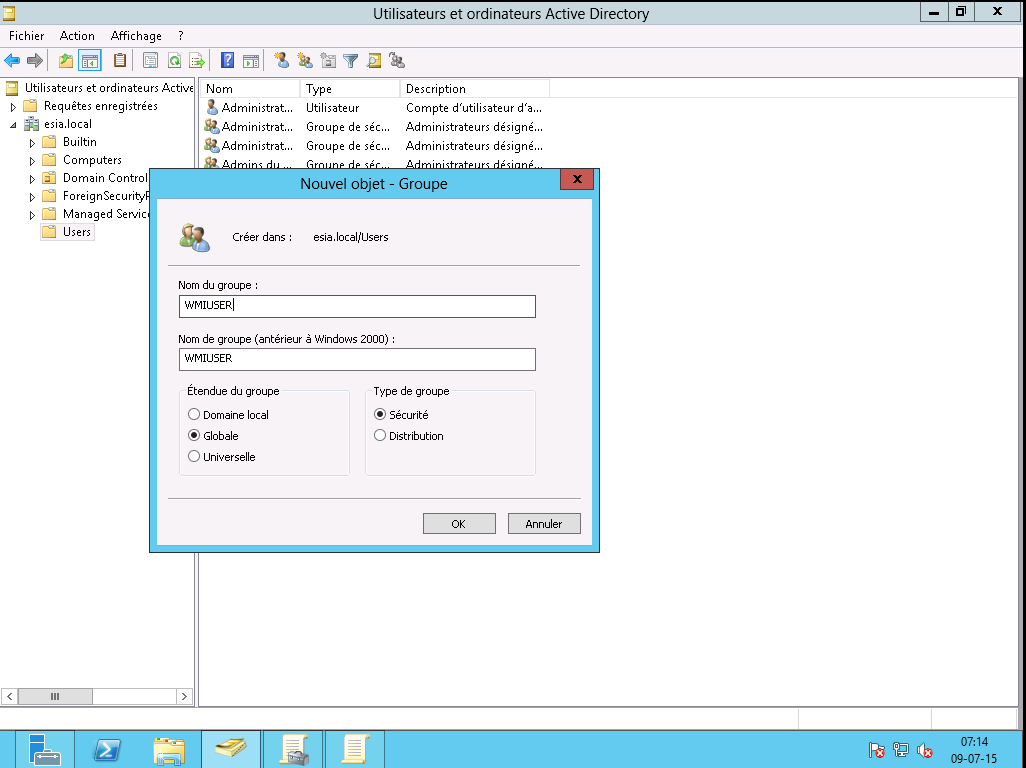
Create a “WMIUSER” group with a global domain and “security” as the group type.
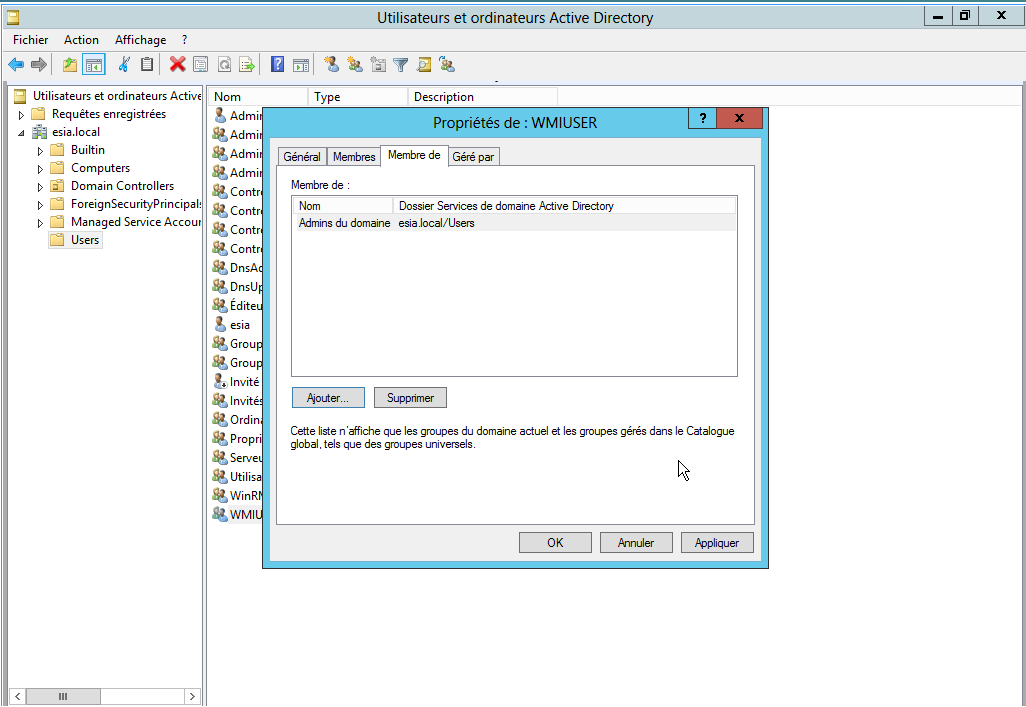
Right-click on the Esia user and go to the “Member of” tab and add it to the WMIUSER group. Set the WMIUSER group as the main group and delete it from the “Domain user” group.
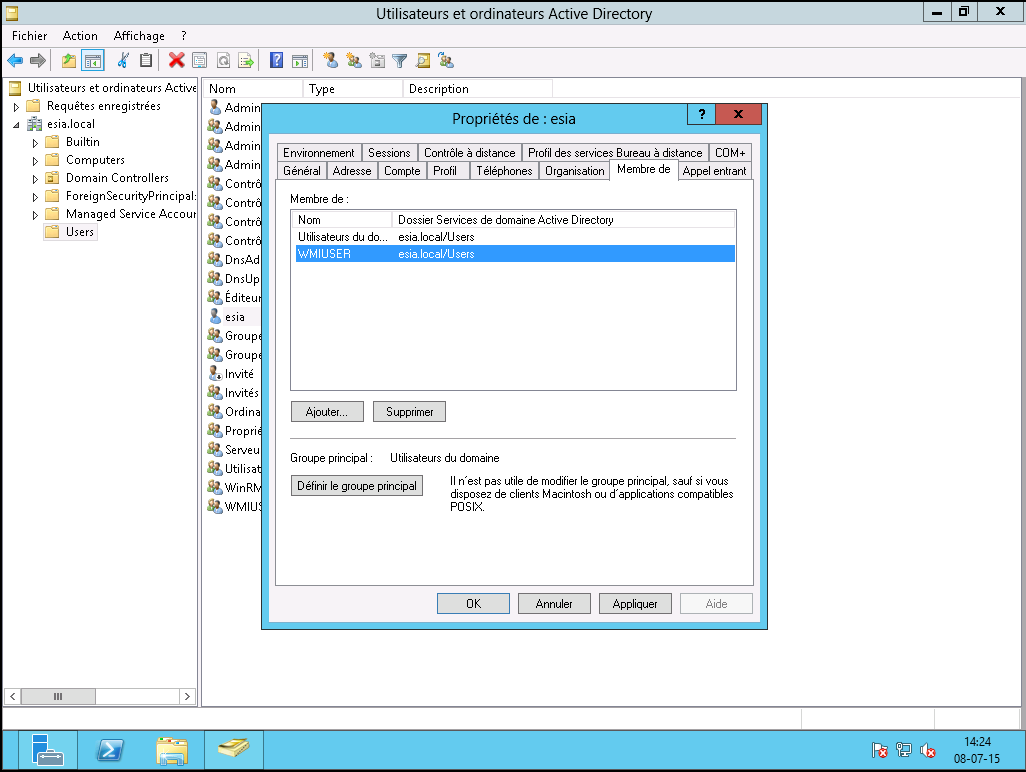
You should now have :

You now have 2 options. Add the WMIUSER group to the “Domain AdminsAdd the WMIUSER group to the “Domain Admins” group, but this is not secure, or perform a manipulation on each machine to authorise a non-administrator user to connect.
Adding the WMIUSER group as an administrator
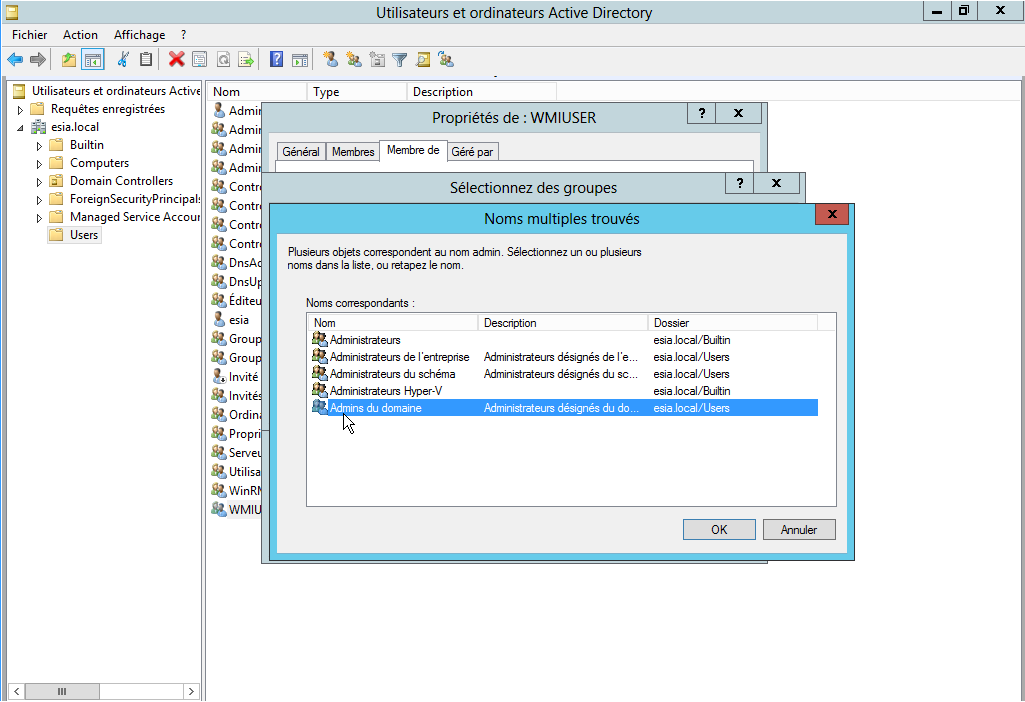
To add the WMIUSER group to the “Domain Admins” group, right-click on it and go to “Properties”. Then go to the “Member of” tab and click “Add”.
Type “admin” then click on “Check names”.

Select “domain admin” and click OK.
Finally, click OK.
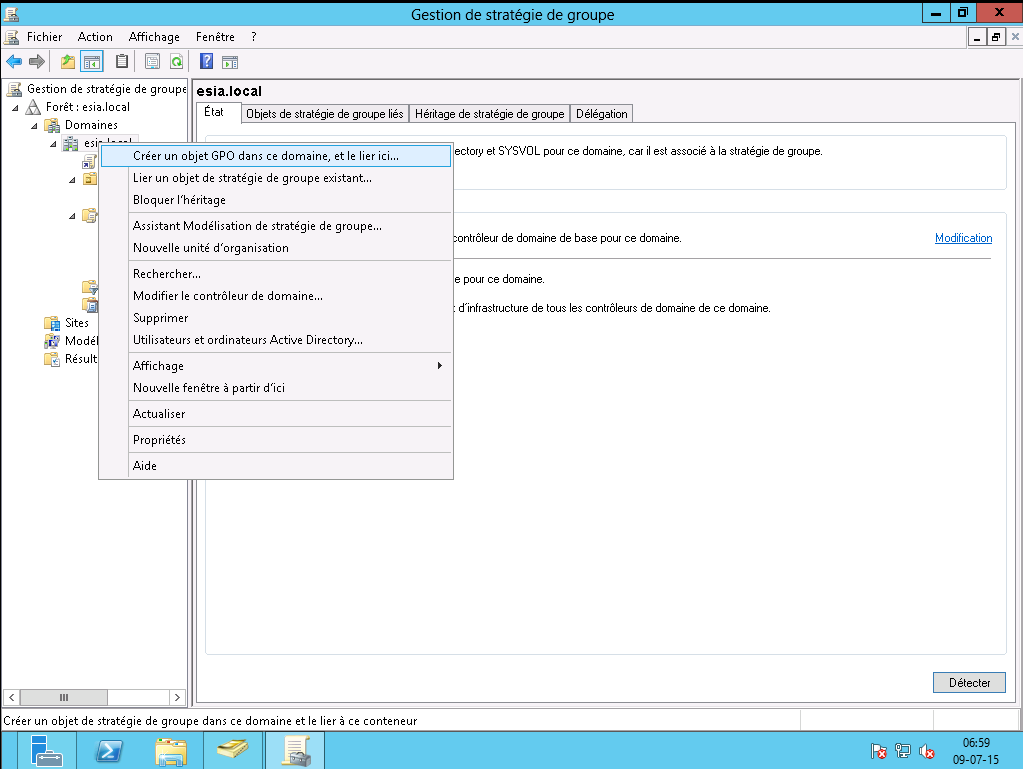
Creating the GPO (Groups Policies Objects)
Open the “Group Policy Manager” of your Active Directory. Right-click on your domain and create a new GPO (here: WMIACCESS)
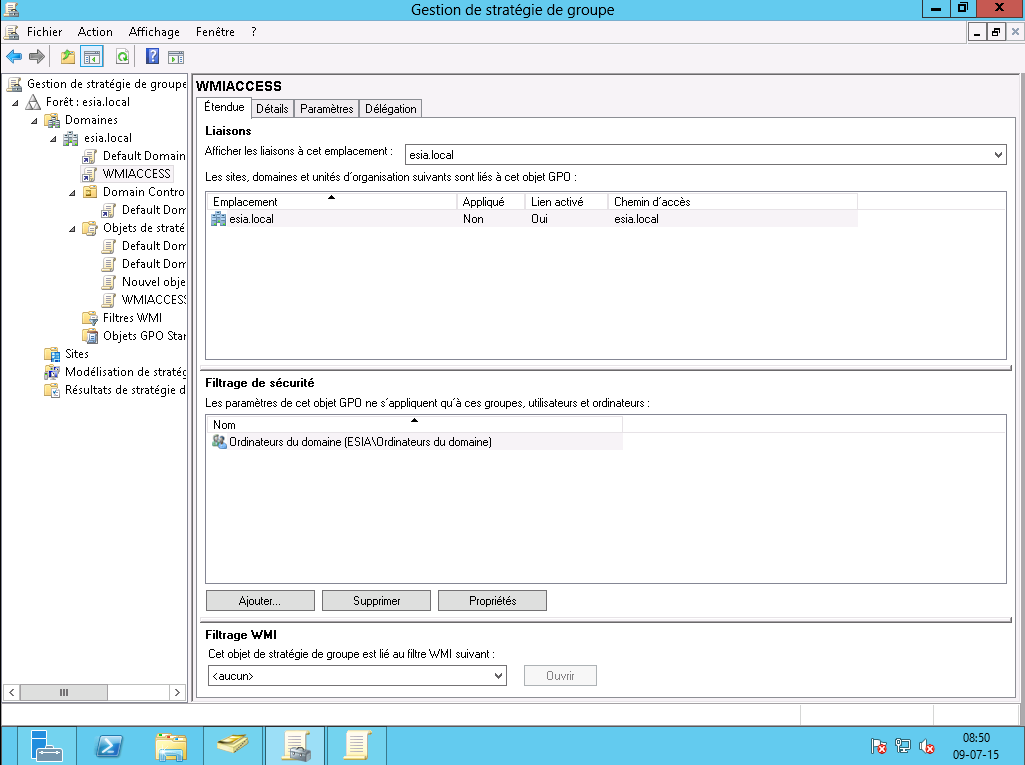
In the security filters, delete “authenticated users” and add “domain computers”.
In the settings tab, right-click and then select “modify settings”. In Computer configuration → Policies → Windows settings → Security settings → Local policies → Security option

Double-click on “DCOM: Computer start-up restrictions in SDDL format”. Then select the “Define this security parameter” box and click on “Modify security”.
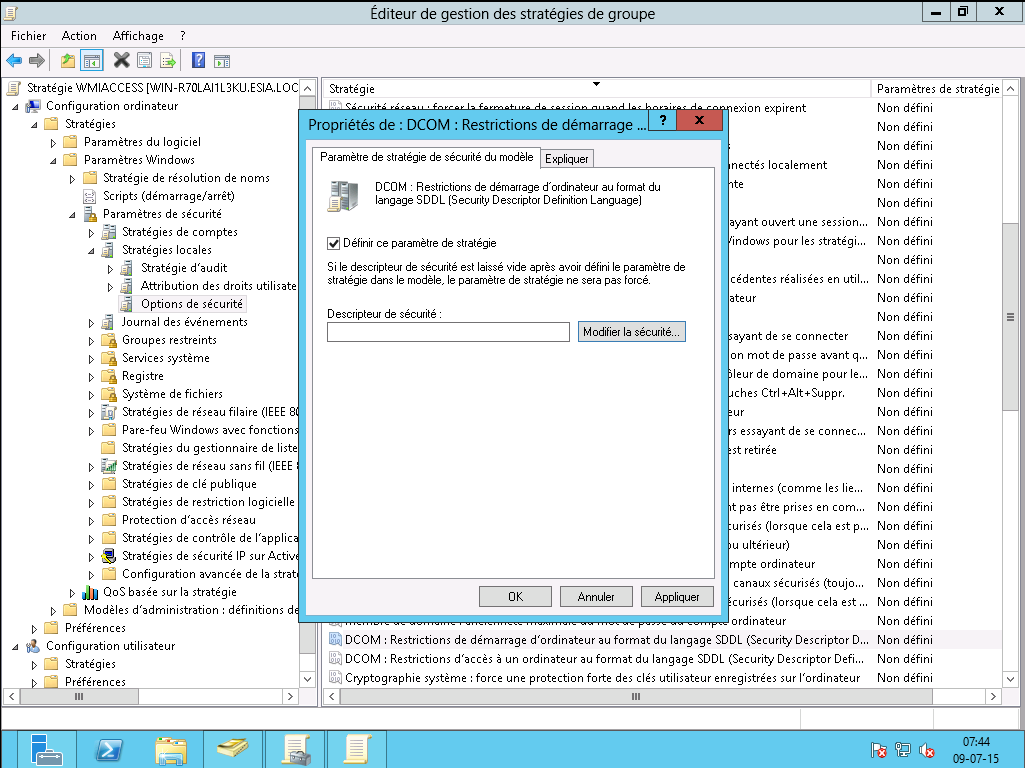
Click on “Add”, type WMIUSER (the name of your WMI management group). Then click OK.
Tick the “Local execution” and “Remote execution” boxes. Click OK and then OK again.

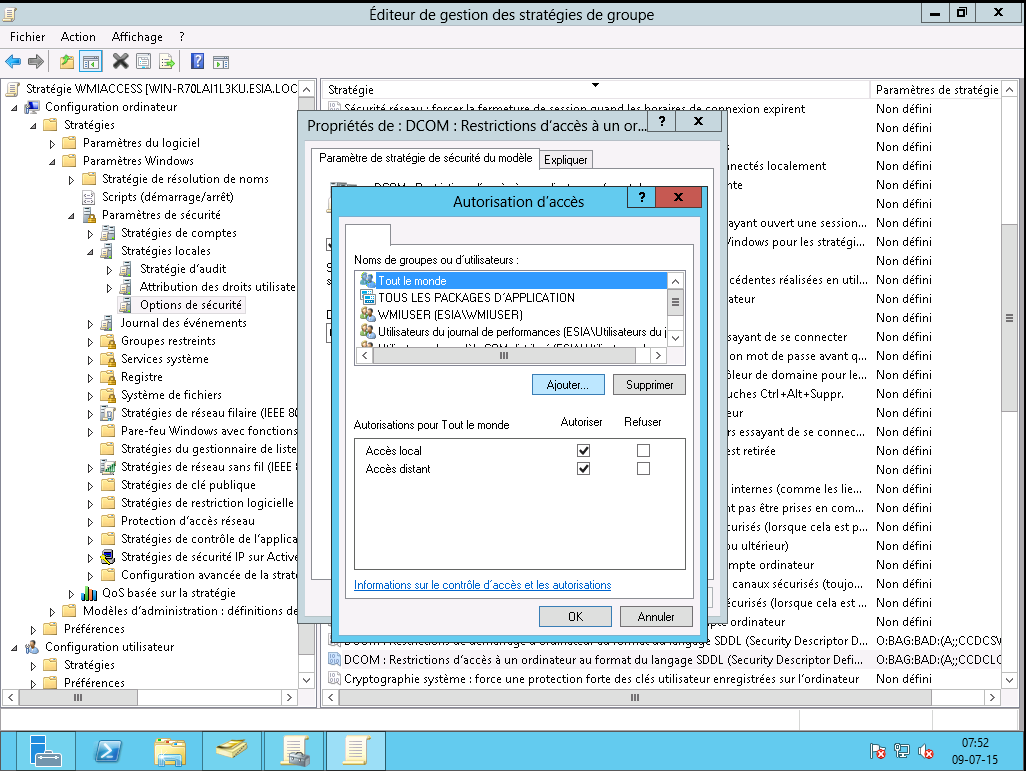
Double-click on “DCOM: Restrictions on access to a computer in the SDDL language format”. Then select the “Define this security parameter” box and click on “Modify security”.
Click on “Add”, type WMIUSER (the name of your WMI management group). Click on OK.
Tick the “Local Access” and “Remote Access” boxes. Click OK and then OK again.
Don't forget to run gpupdate /force
Configuring the Windows firewall
<HTML>
  <style>
      #configure_windows_firewall:after {content:"(If necessary)"; font-size:.75em; font-weight:500;}
  </style>
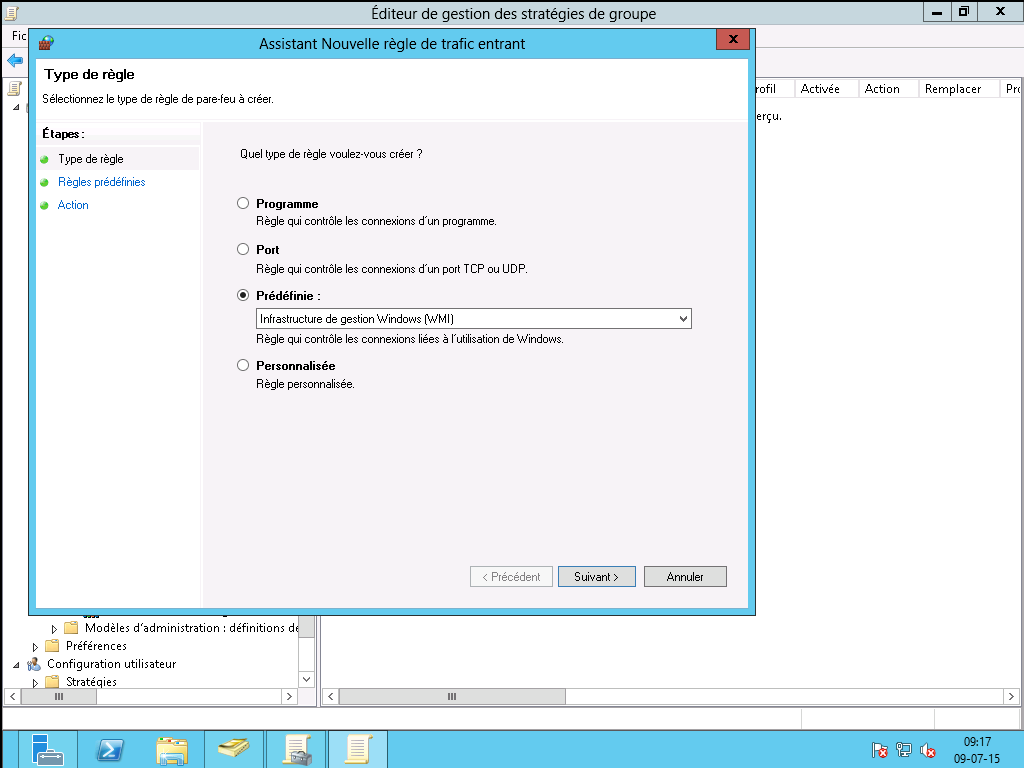
</HTML> In your GPO, go to Computer Configuration → Policies → Windows Settings → Security Settings → Windows Firewall with Advanced Security Features → Windows Firewall with Advanced Security Features → Incoming Traffic Rules.
Right-click to create a “New rule…”.

Select “Predefined” and choose “WMI Management Infrastructure”. Click Next.
3 basic rules will be created, click next.
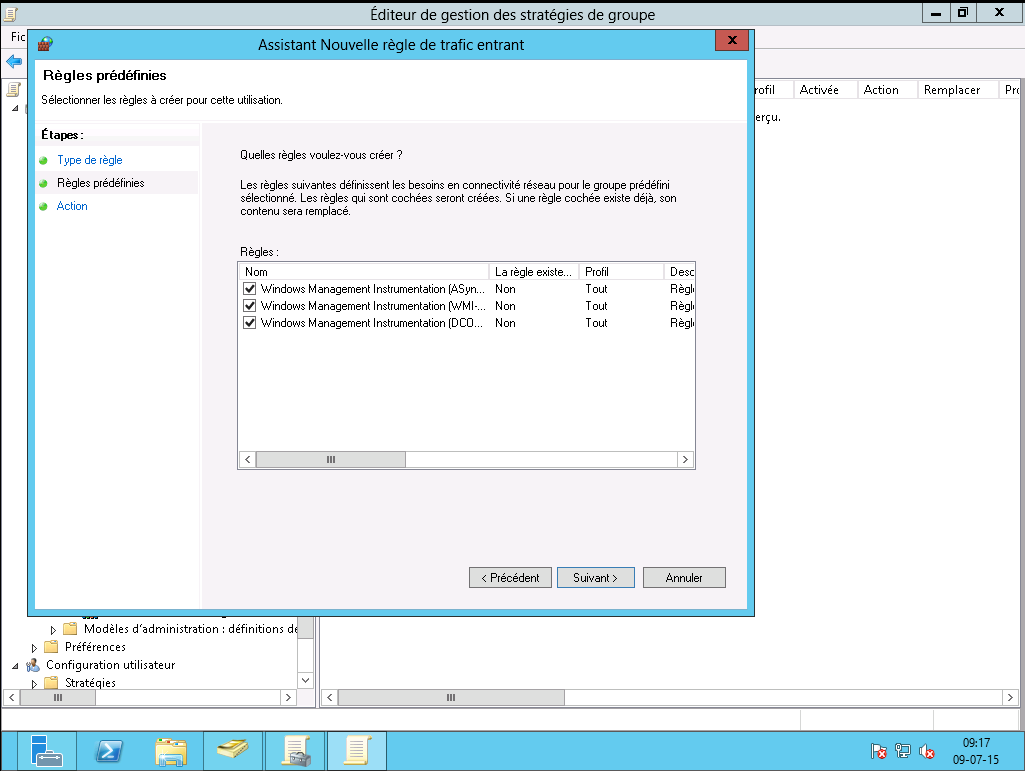
Leave “Allow connection” selected and click Finish.

Don't forget to run gpupdate /force
Add the WMIUSER group as a single user
<HTML>
  <style>
      #ajout_du_groupe_wmiuser_en_tant_que_simple_utilisateur:after {content:" (OPTION)"; font-size:.75em; font-weight:500;}
  </style>
</HTML> (! To be used on all machines)
This involves giving remote access rights to the user account that will be used by ESIA to access the WMI data. This operation must be carried out on each of the machines to be interrogated.
To do this :
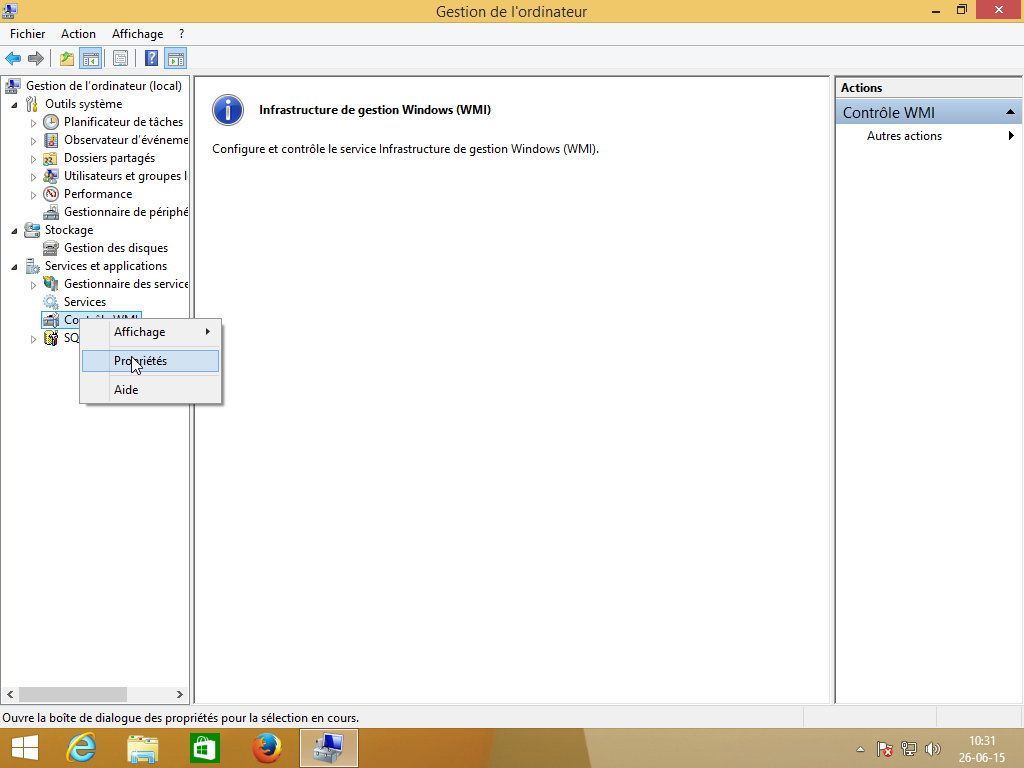
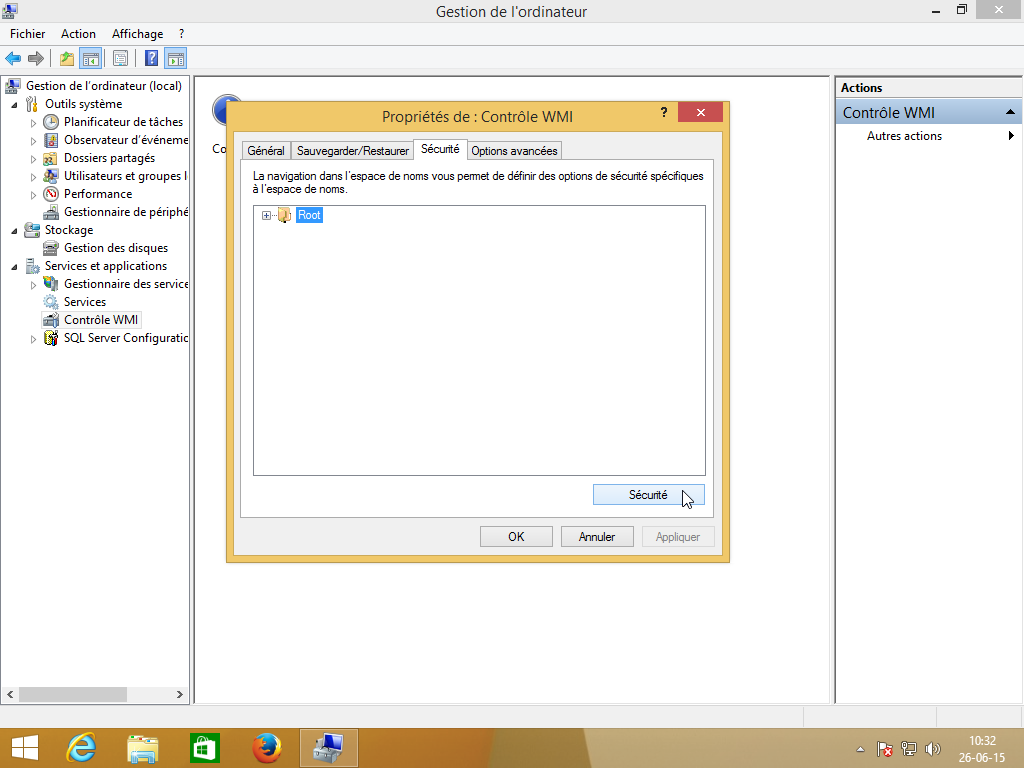
Go to “Computer Management” (or enter the command ”wmimgmt.msc “. Then scroll down to “Services and Applications” so that you can right-click on “WMI Control” and click on “Properties”.
In the “Security” tab of the “WMI Control Properties”, select the “Root” namespace and then click on “Security”: WMI Control”, select the “Root” namespace and then click on “Security”.
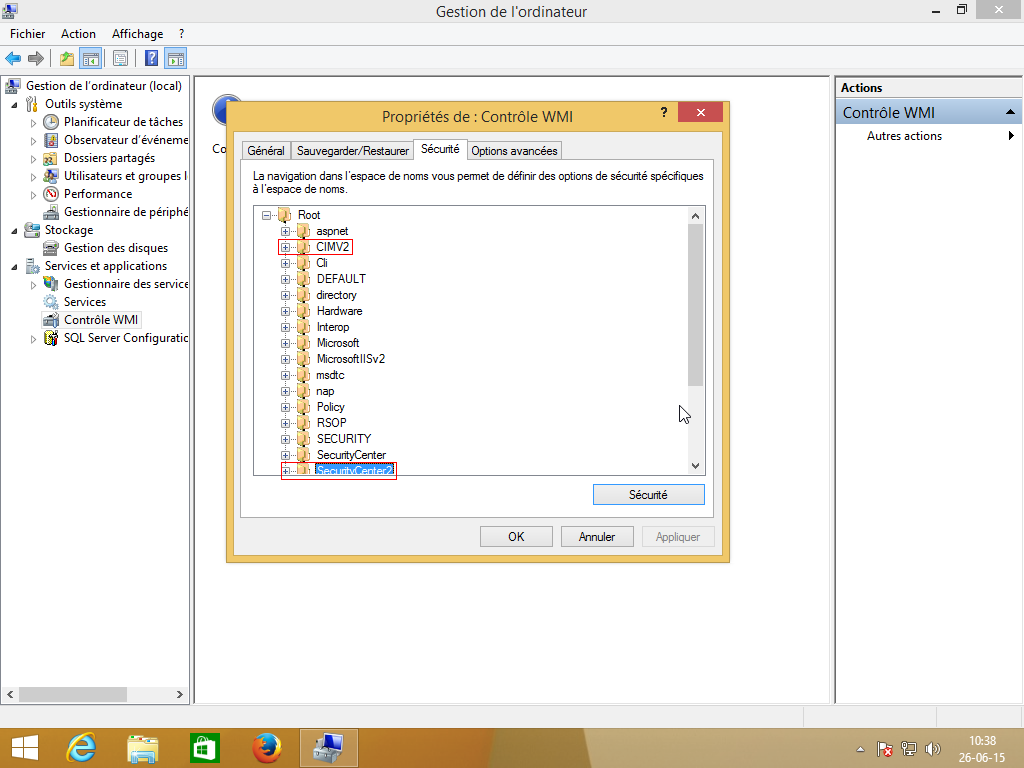
If you want to fine-tune security, the namespaces 'Root→CIMV2' and 'Root→SecurityCenter2' are those used by ESIA.
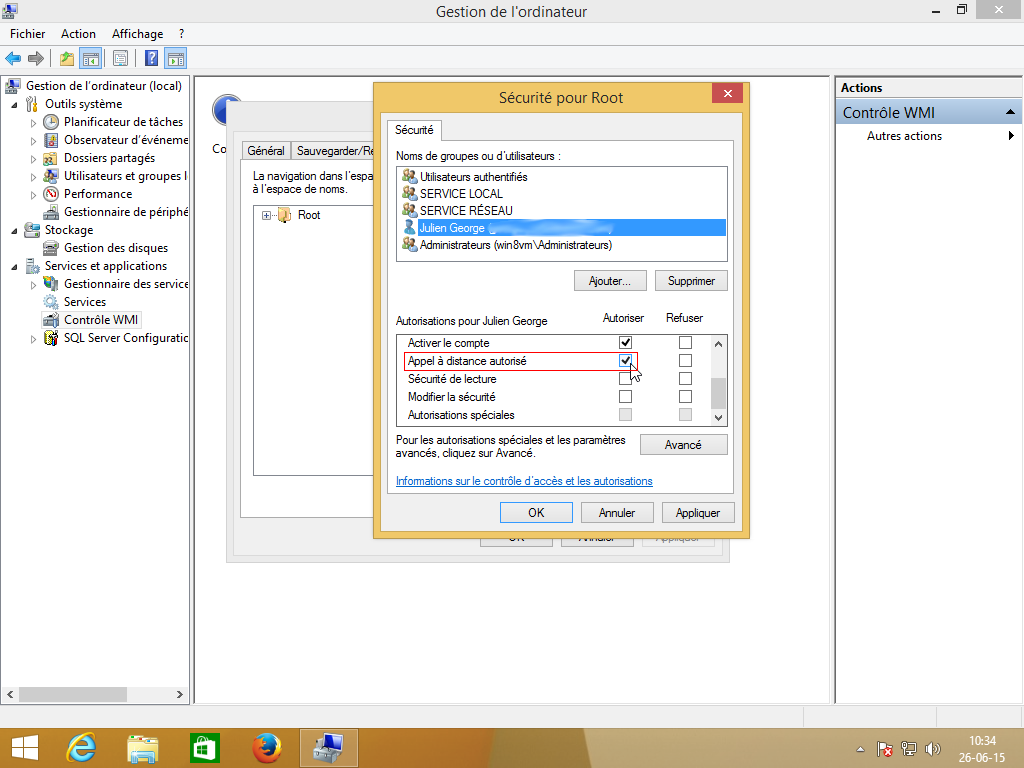
Select the user account that will be used for remote access and tick the “Authorise” boxes for “Enable account” and “Remote call authorised”, which are the 2 authorisations required.
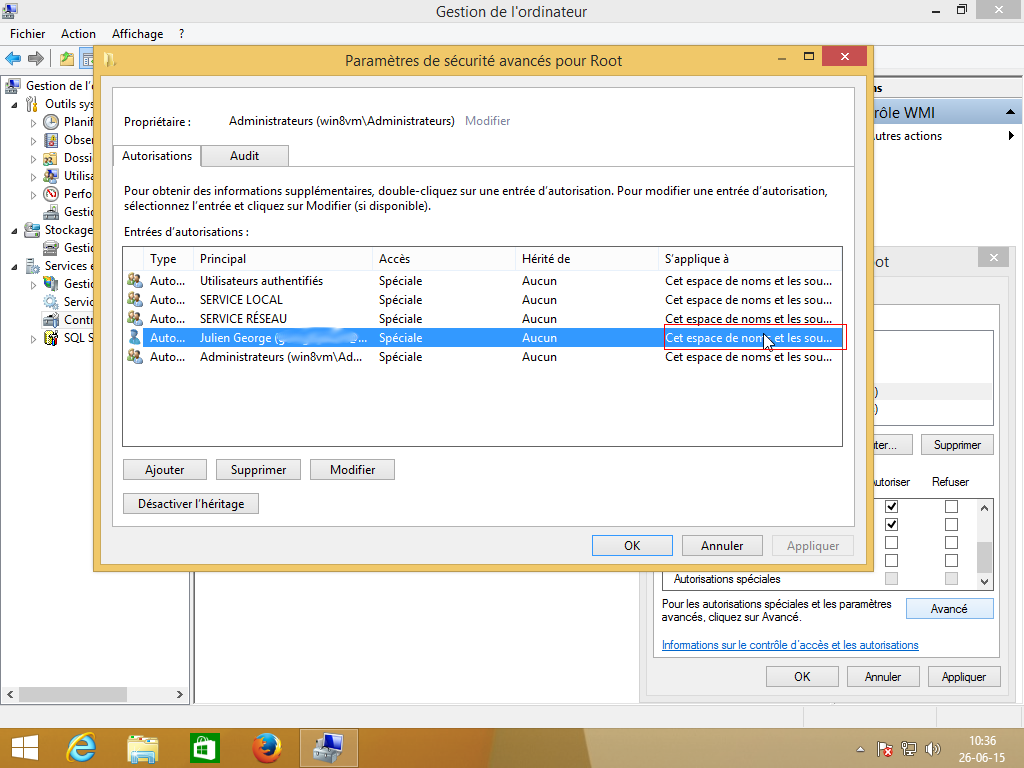
Check that the authorisations have been applied to the selected namespace and its sub-namespaces by clicking on “Advanced” to check the “Applies to” column.
That's it, WMI is now activated.