Table of Contents
SNMP activation for a Quest backup system
![]()
This tutorial has been made available to the entire Esia community thanks to the contribution of our partner Rcarré.
Their website: https://www.rcarre.com
Configuration on Quest
The tutorial is valid for versions 6.1.3 to 6.4. As Quest is SNMP-based, the system is natively integrated into Unity
Open your Quest backup management software and click on the cogwheel. In the menu that appears:
- Authorise “Handle incoming requests” by setting the field to “yes”.
- Indicate the SNMP community

Configuration on Esia
Esia Galaxy only
You need to activate the Esia backup webplugin. To do this, connect to the Esia server using ssh (Putty) and enter the following command as root: apt-get update && apt-get install esia-webp-backup
Add a backup node.
In your Esia interface, go to administration (the toothed road on the left) and then click on the “manually add node” button at the top right. As shown in the image below.
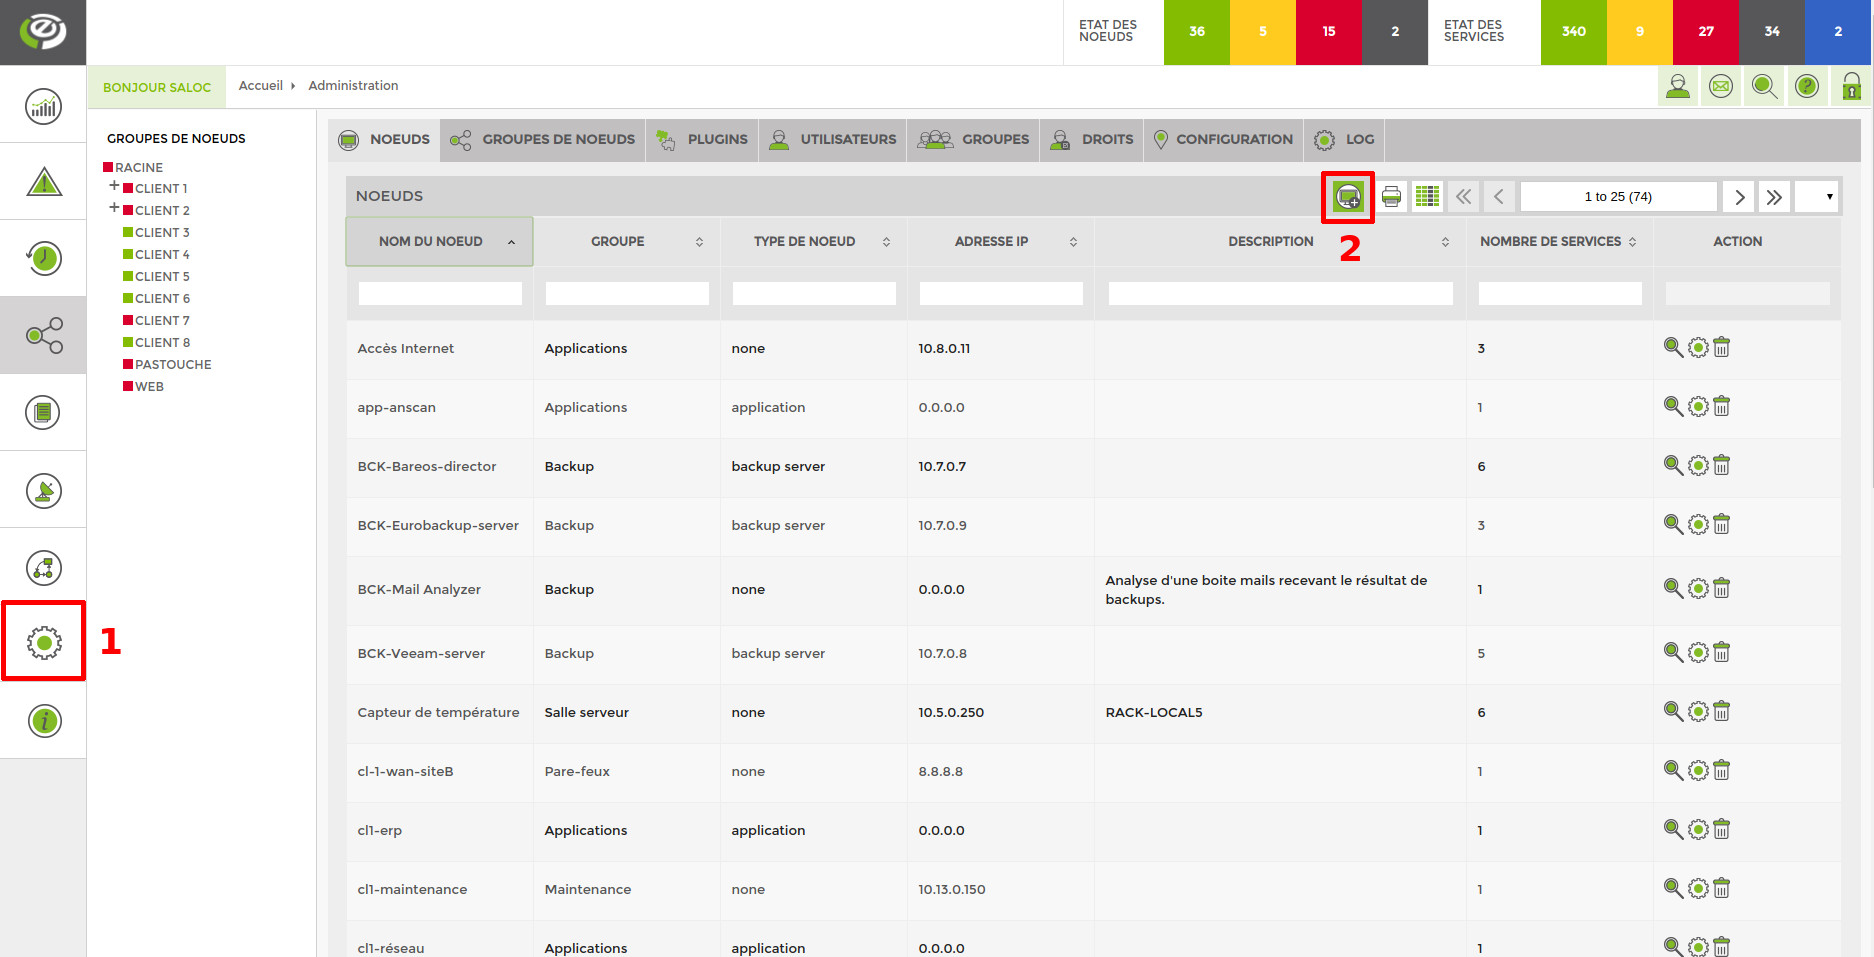
The following page appears:

Specify the name, IP address and group in which the node should appear. The most important thing is to indicate the type of node, such as “backup server”. A configuration page will appear, asking you to configure the driver.
Select the “apassure - SNMP” driver, a menu will appear below. Indicate the community you entered above and the connection port (8161 by default).

Once you have filled in the details, you can click on the “test” button to validate your settings. If the test is OK, you can save it.
You now need to wait 15 to 30 minutes for synchronisation to take place. Once synchronisation is complete, you can start monitoring your backups. You can continue the tutorial by following this link: Activate back-up monitoring