Table of Contents
Microsoft Office 365
We're going to look at how to create and retrieve the elements needed to create a link between your ESIA system and Microsoft Office365.
Creating the application
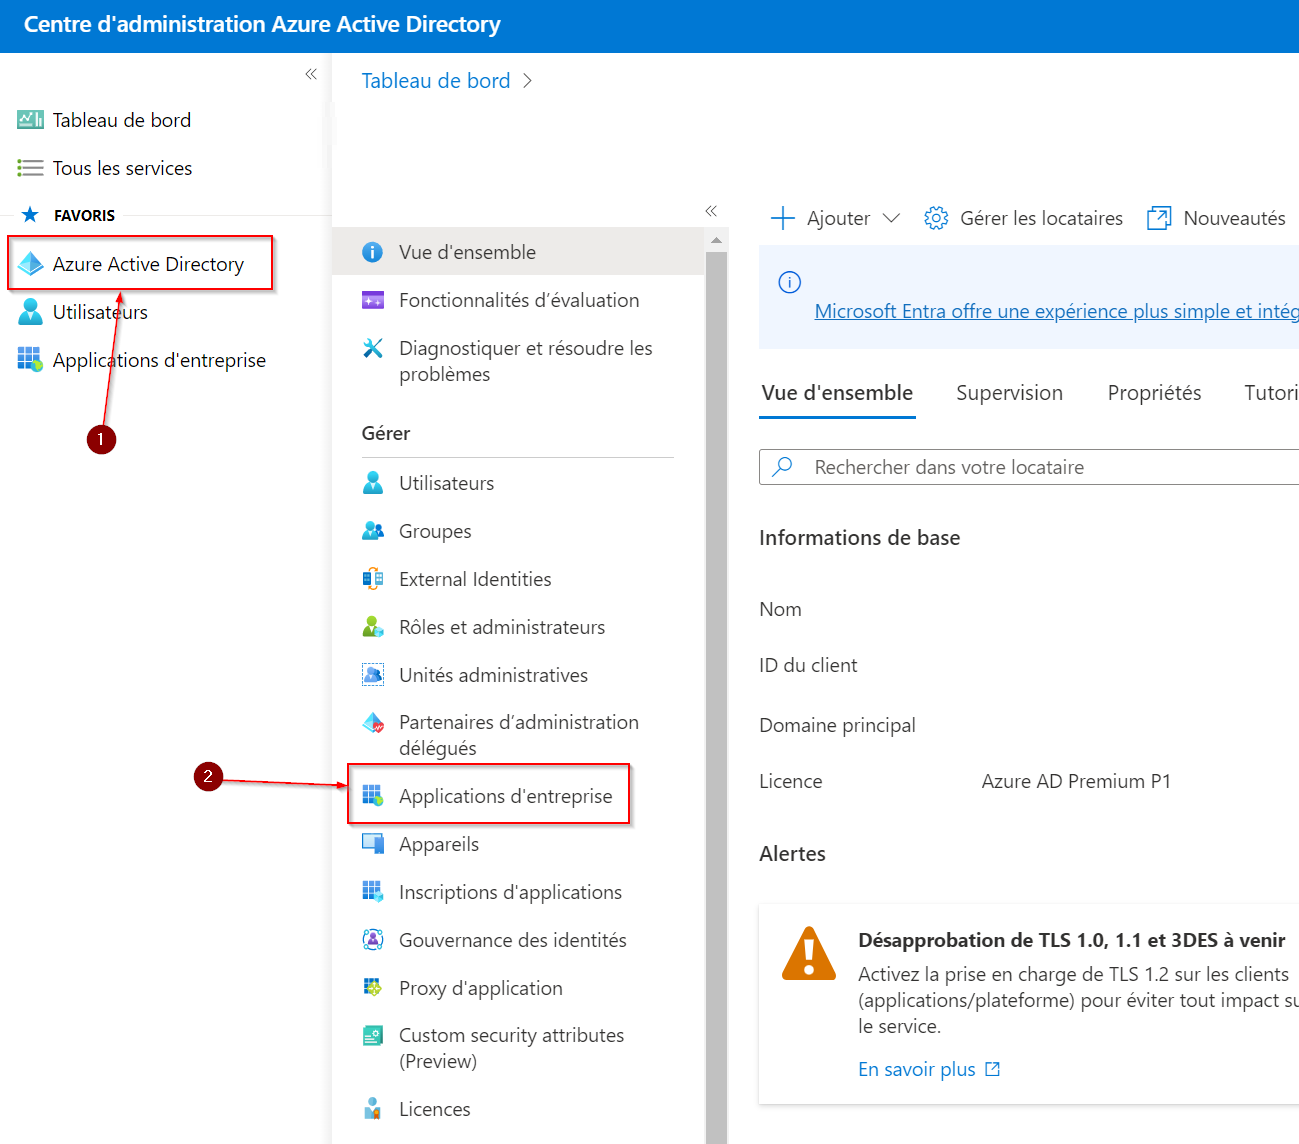
Once you have logged into your Azure Active Directory administration centre. Click on “Azure Active Directory” and then on “Enterprise Applications”.
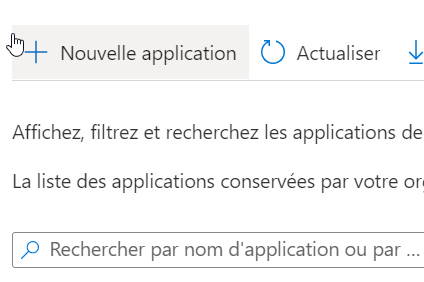
Then click on “New application”.
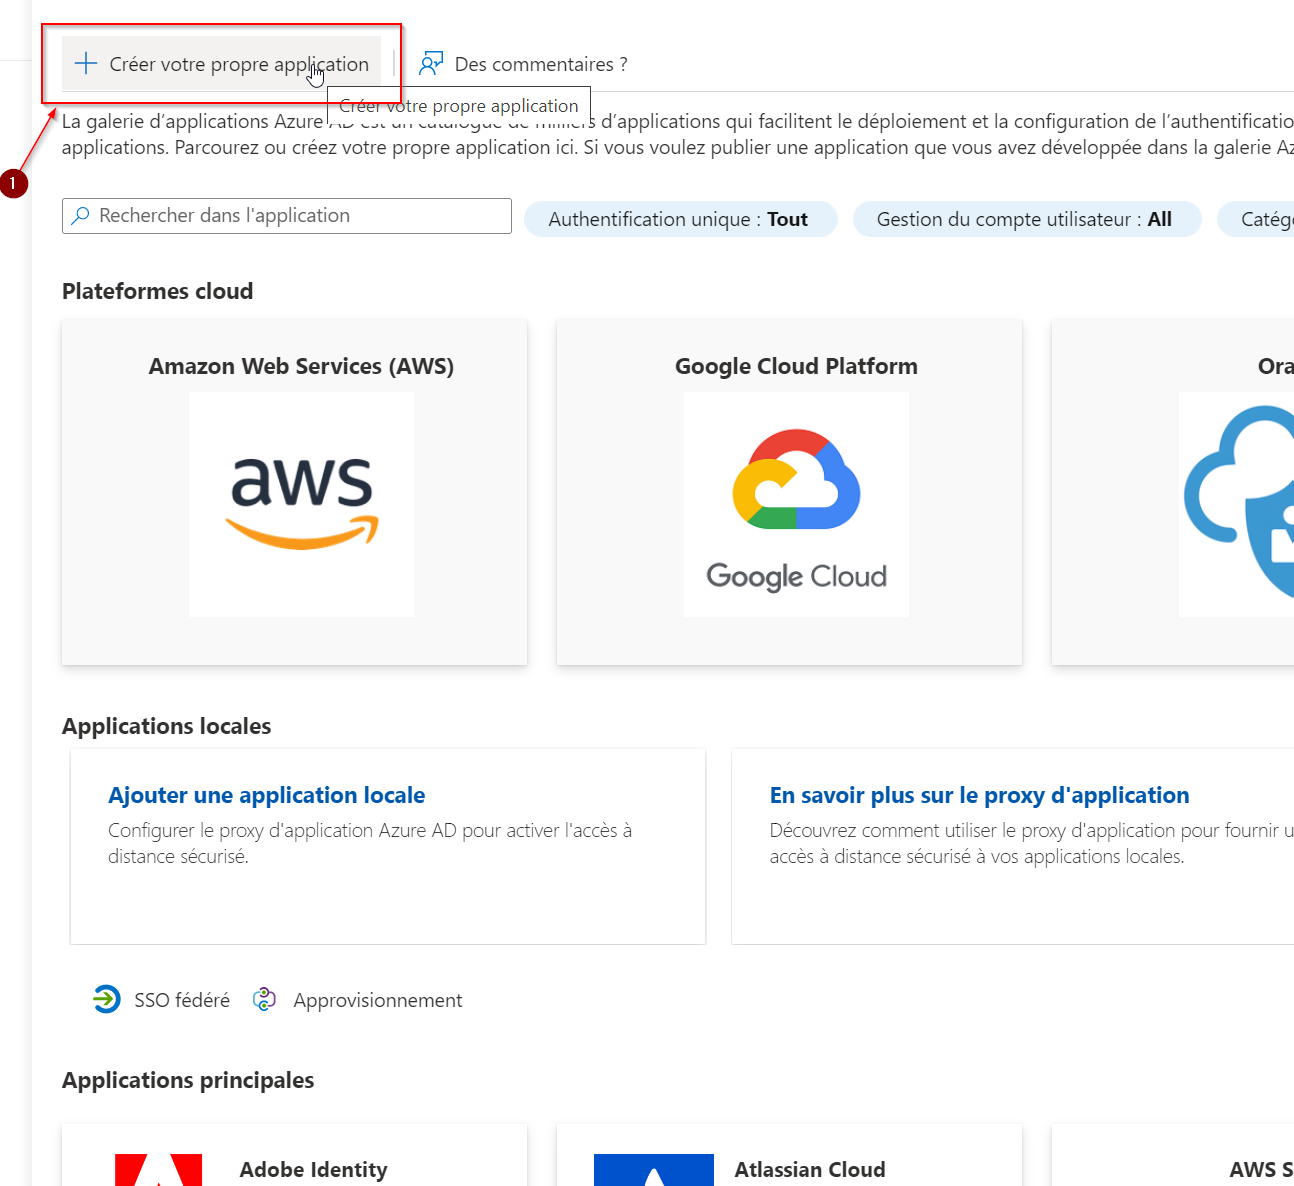
Now go to “Create your own application”.
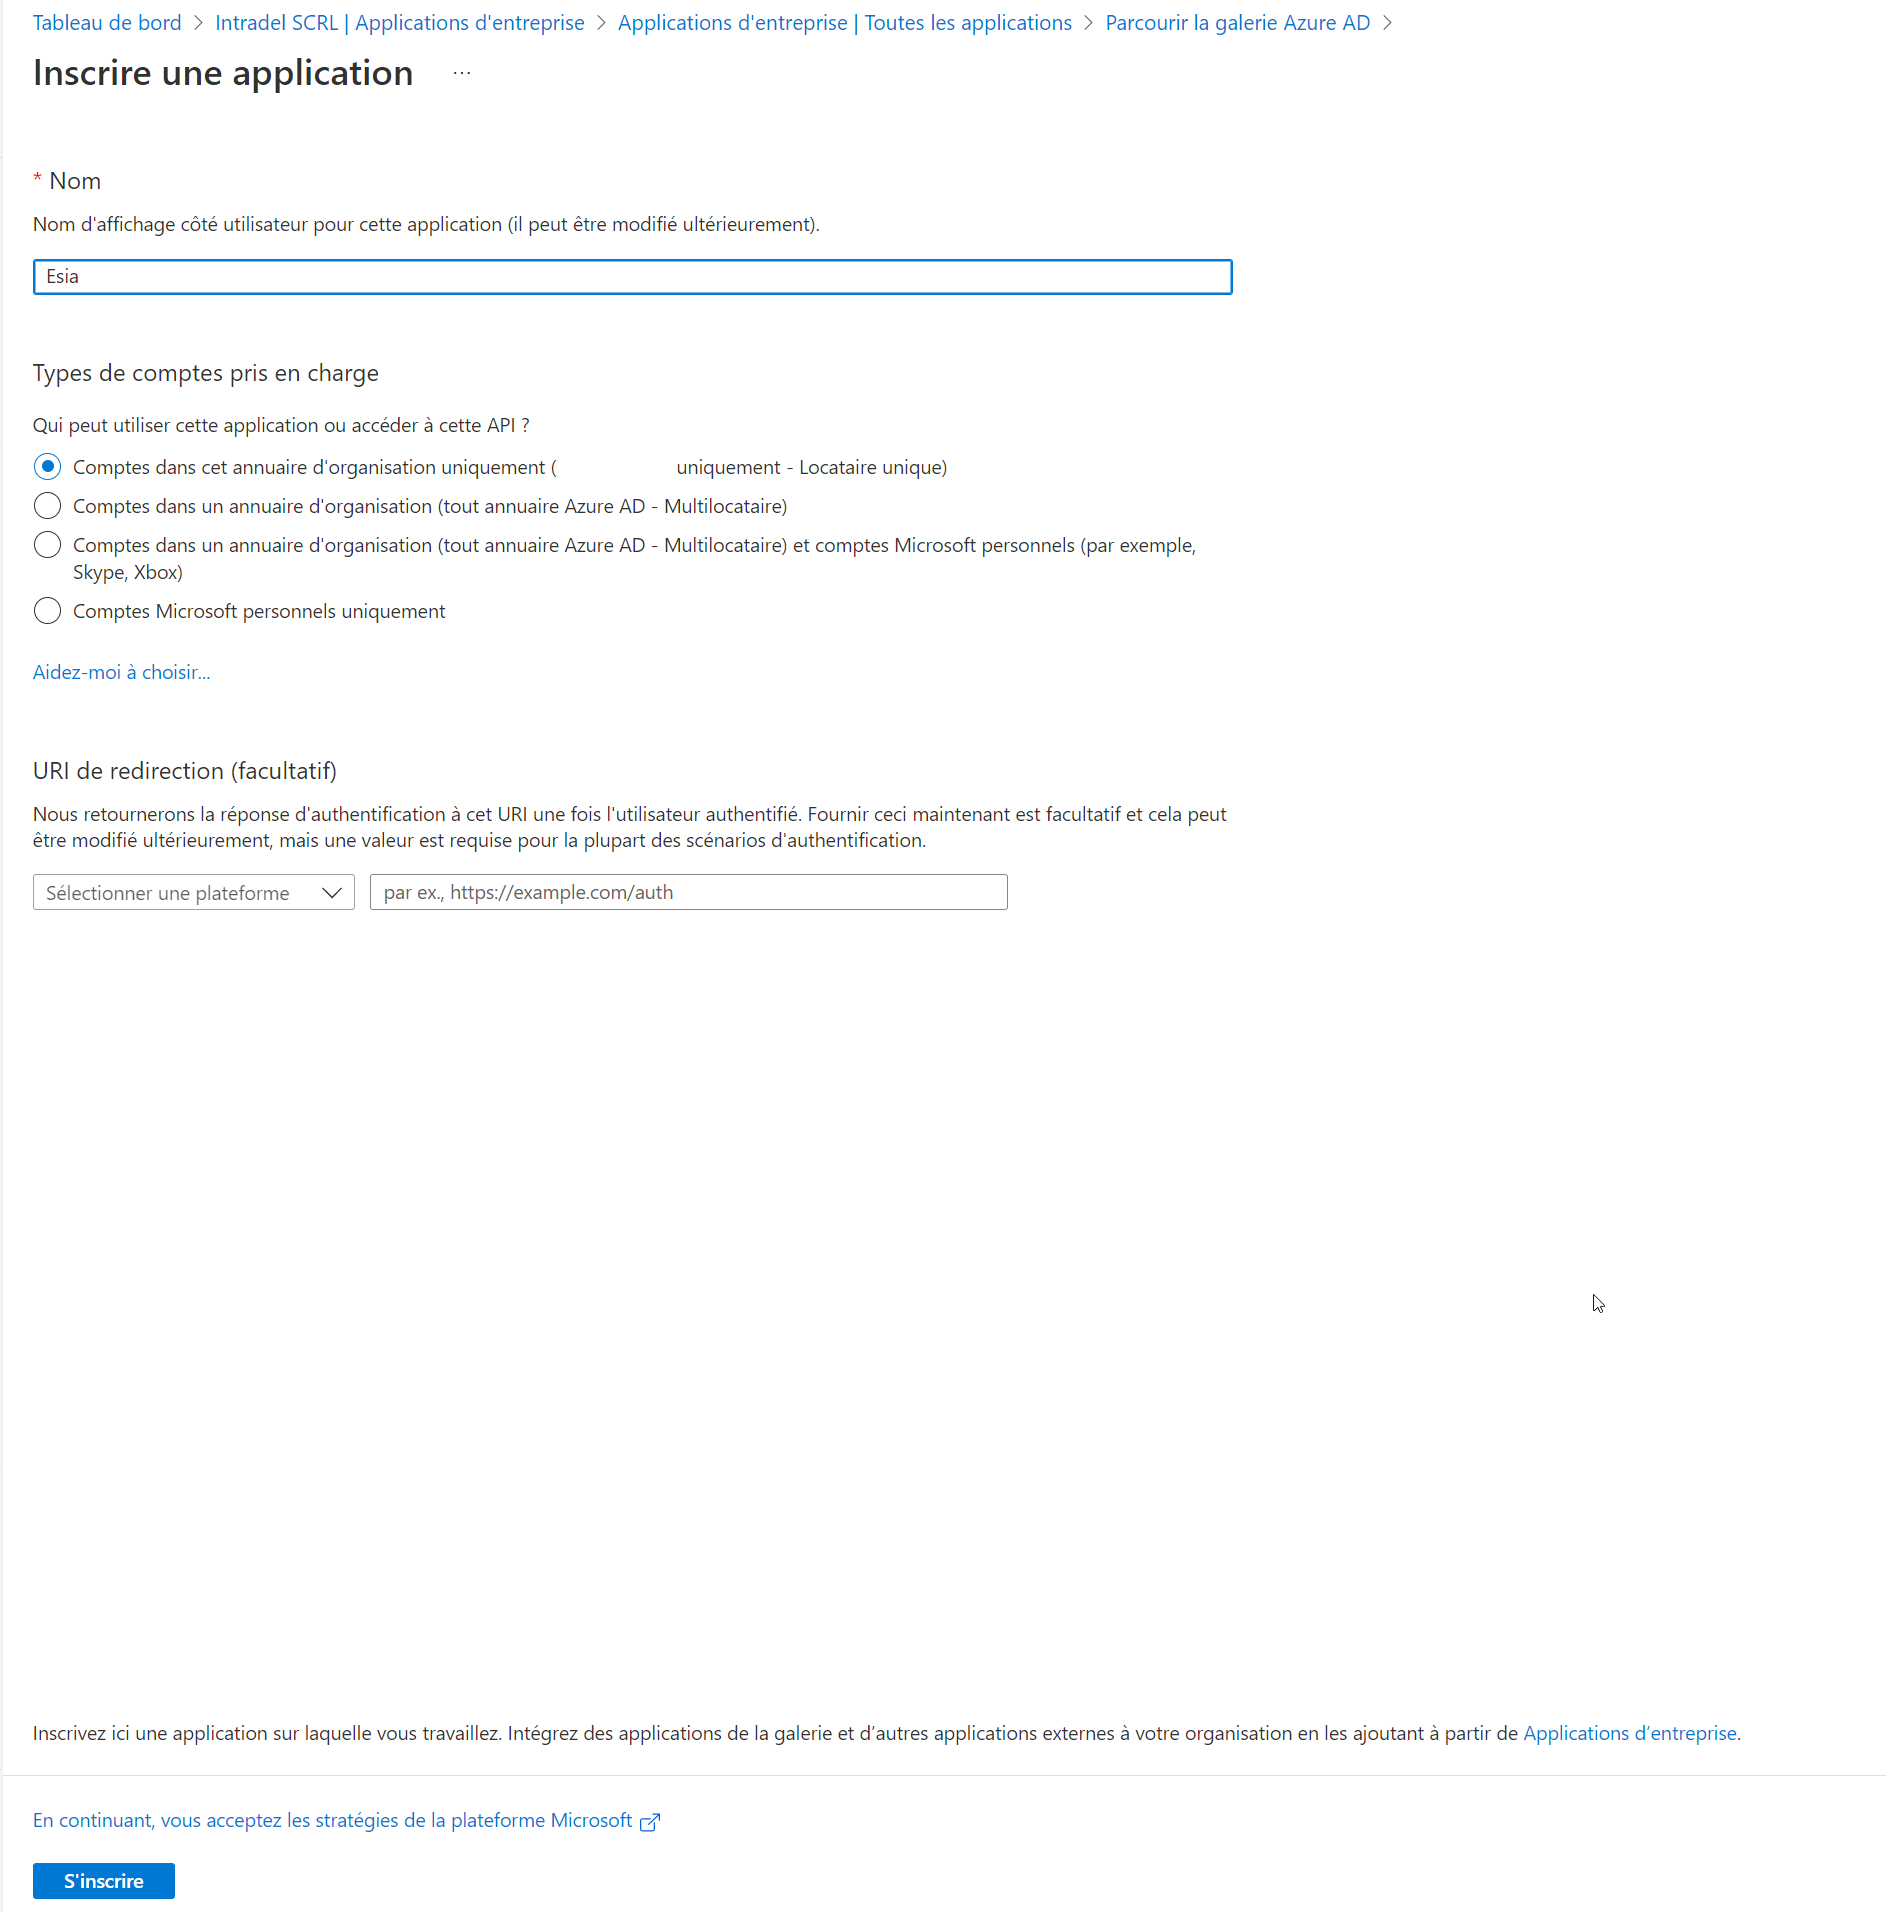
Enter the name of your application and tick the box “Register an application to integrate with Azure AD (app you are developing)”. Even if your interface is in French, this option is currently untranslated (10 October 2022).
Then click on “Create”.

Select the account type “Account in this organisation directory only (XXXXX only - Single tenant)”.
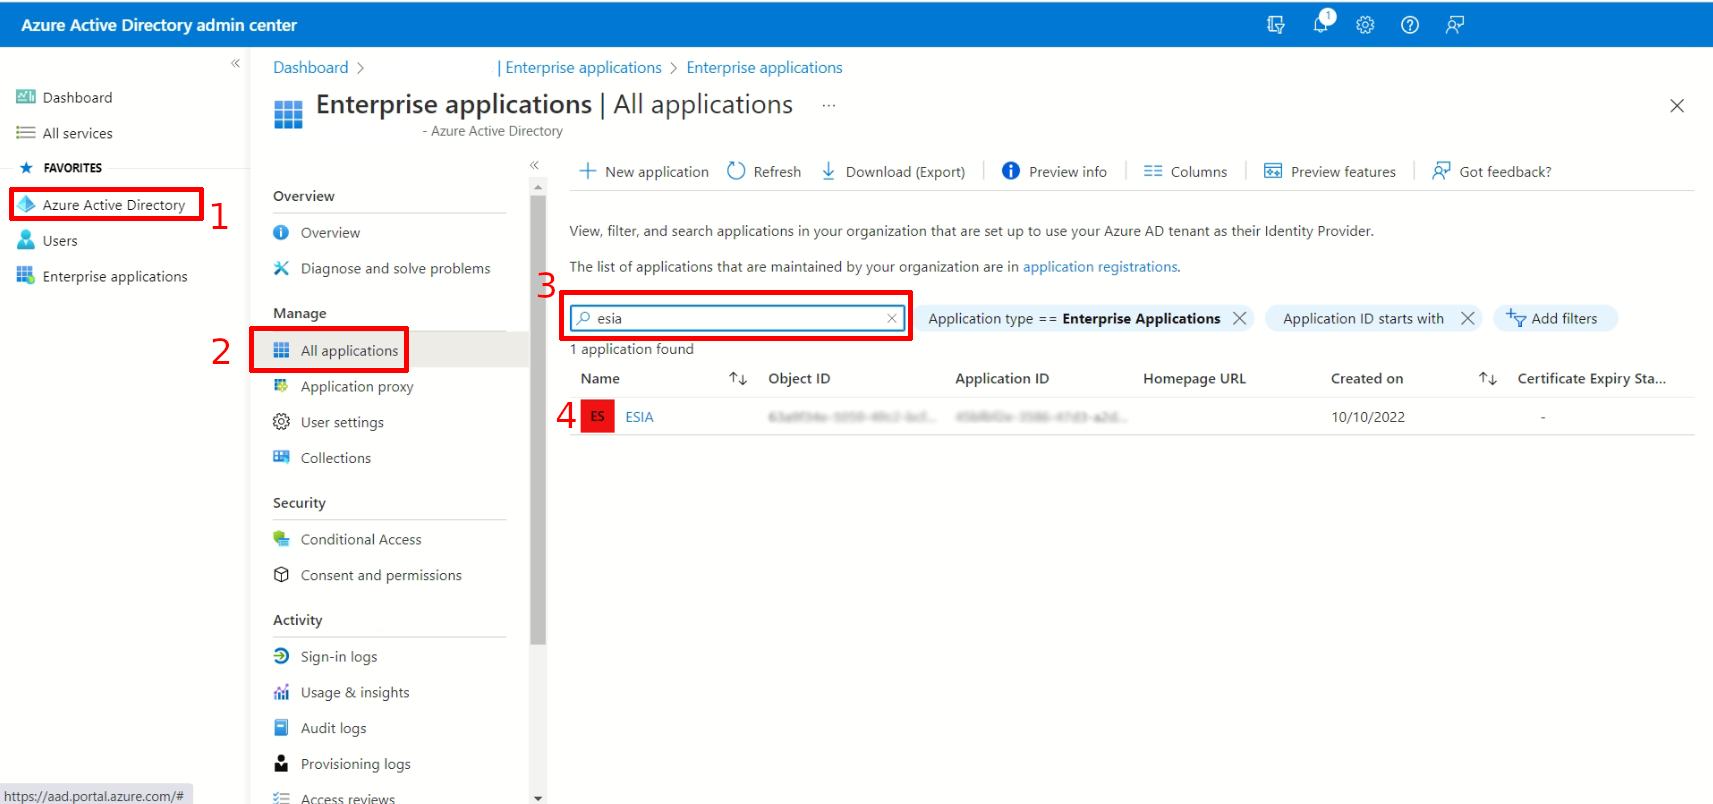
 Now you need to configure the application permissions. Click on “Azure Active Directory”, “All application”. In the search field, enter the name of the application (here: esia) and finally click on your application.
Authorisations
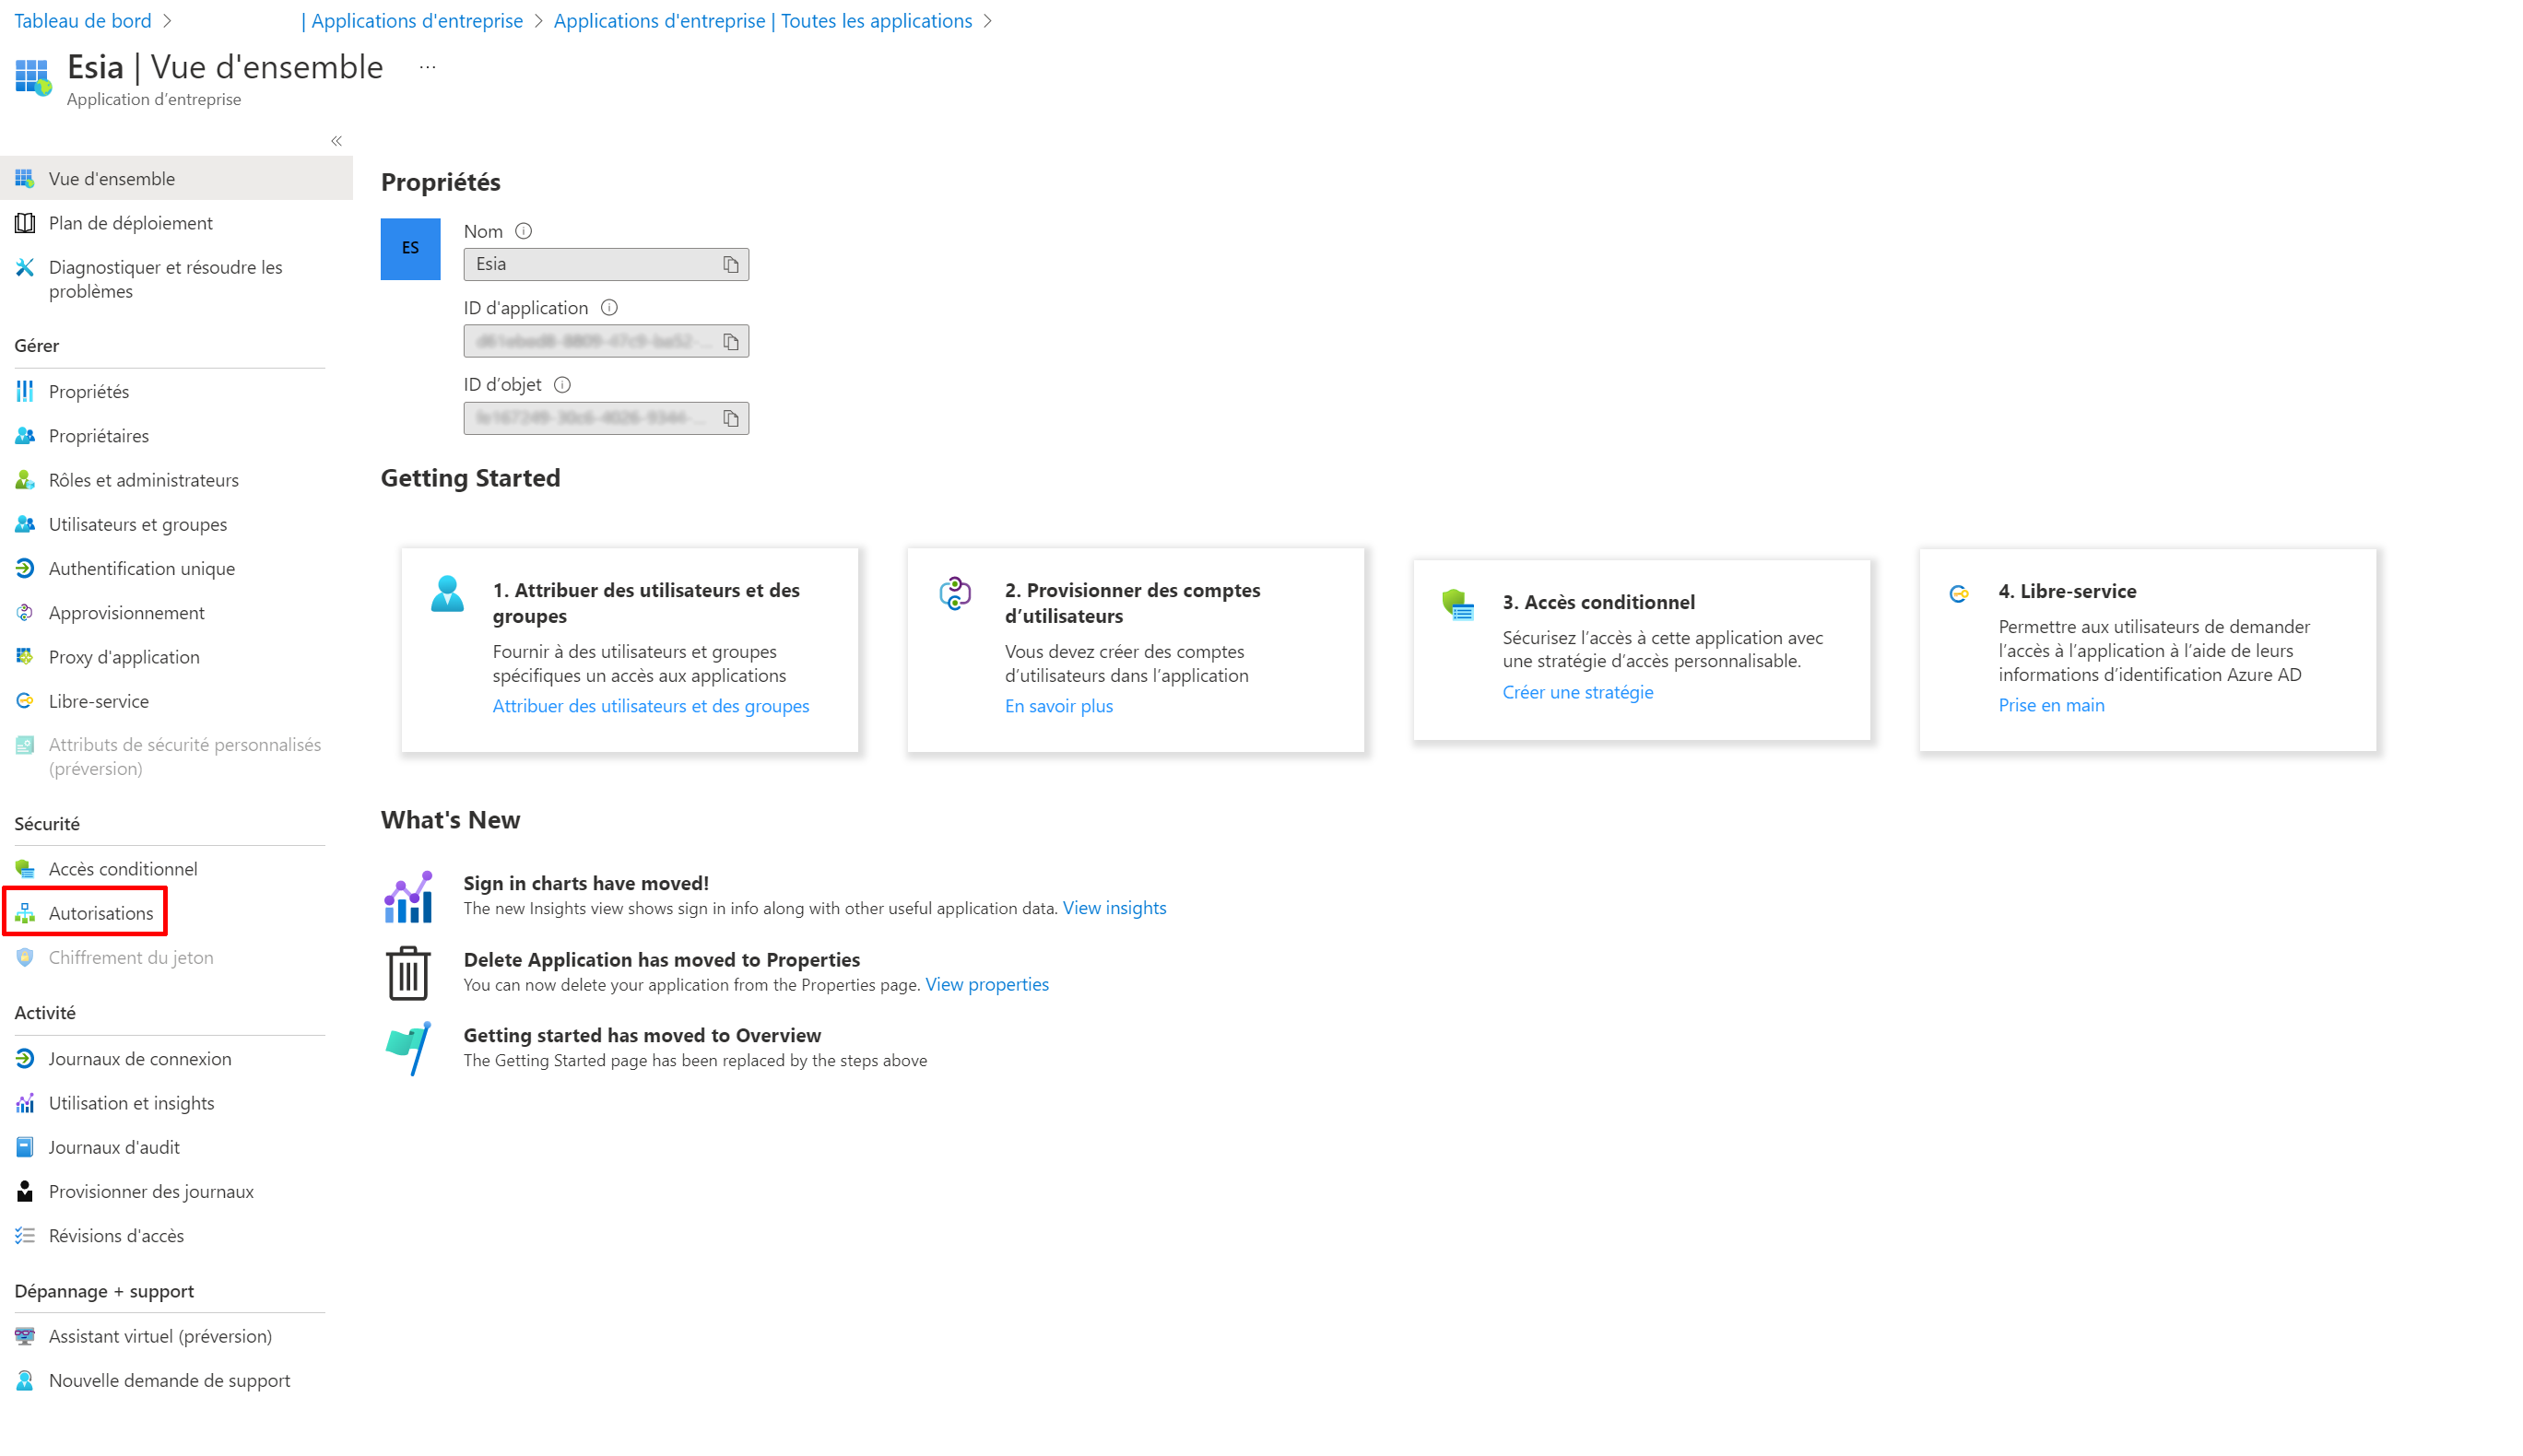
You are now in the application overview. Click on “Authorisations”.
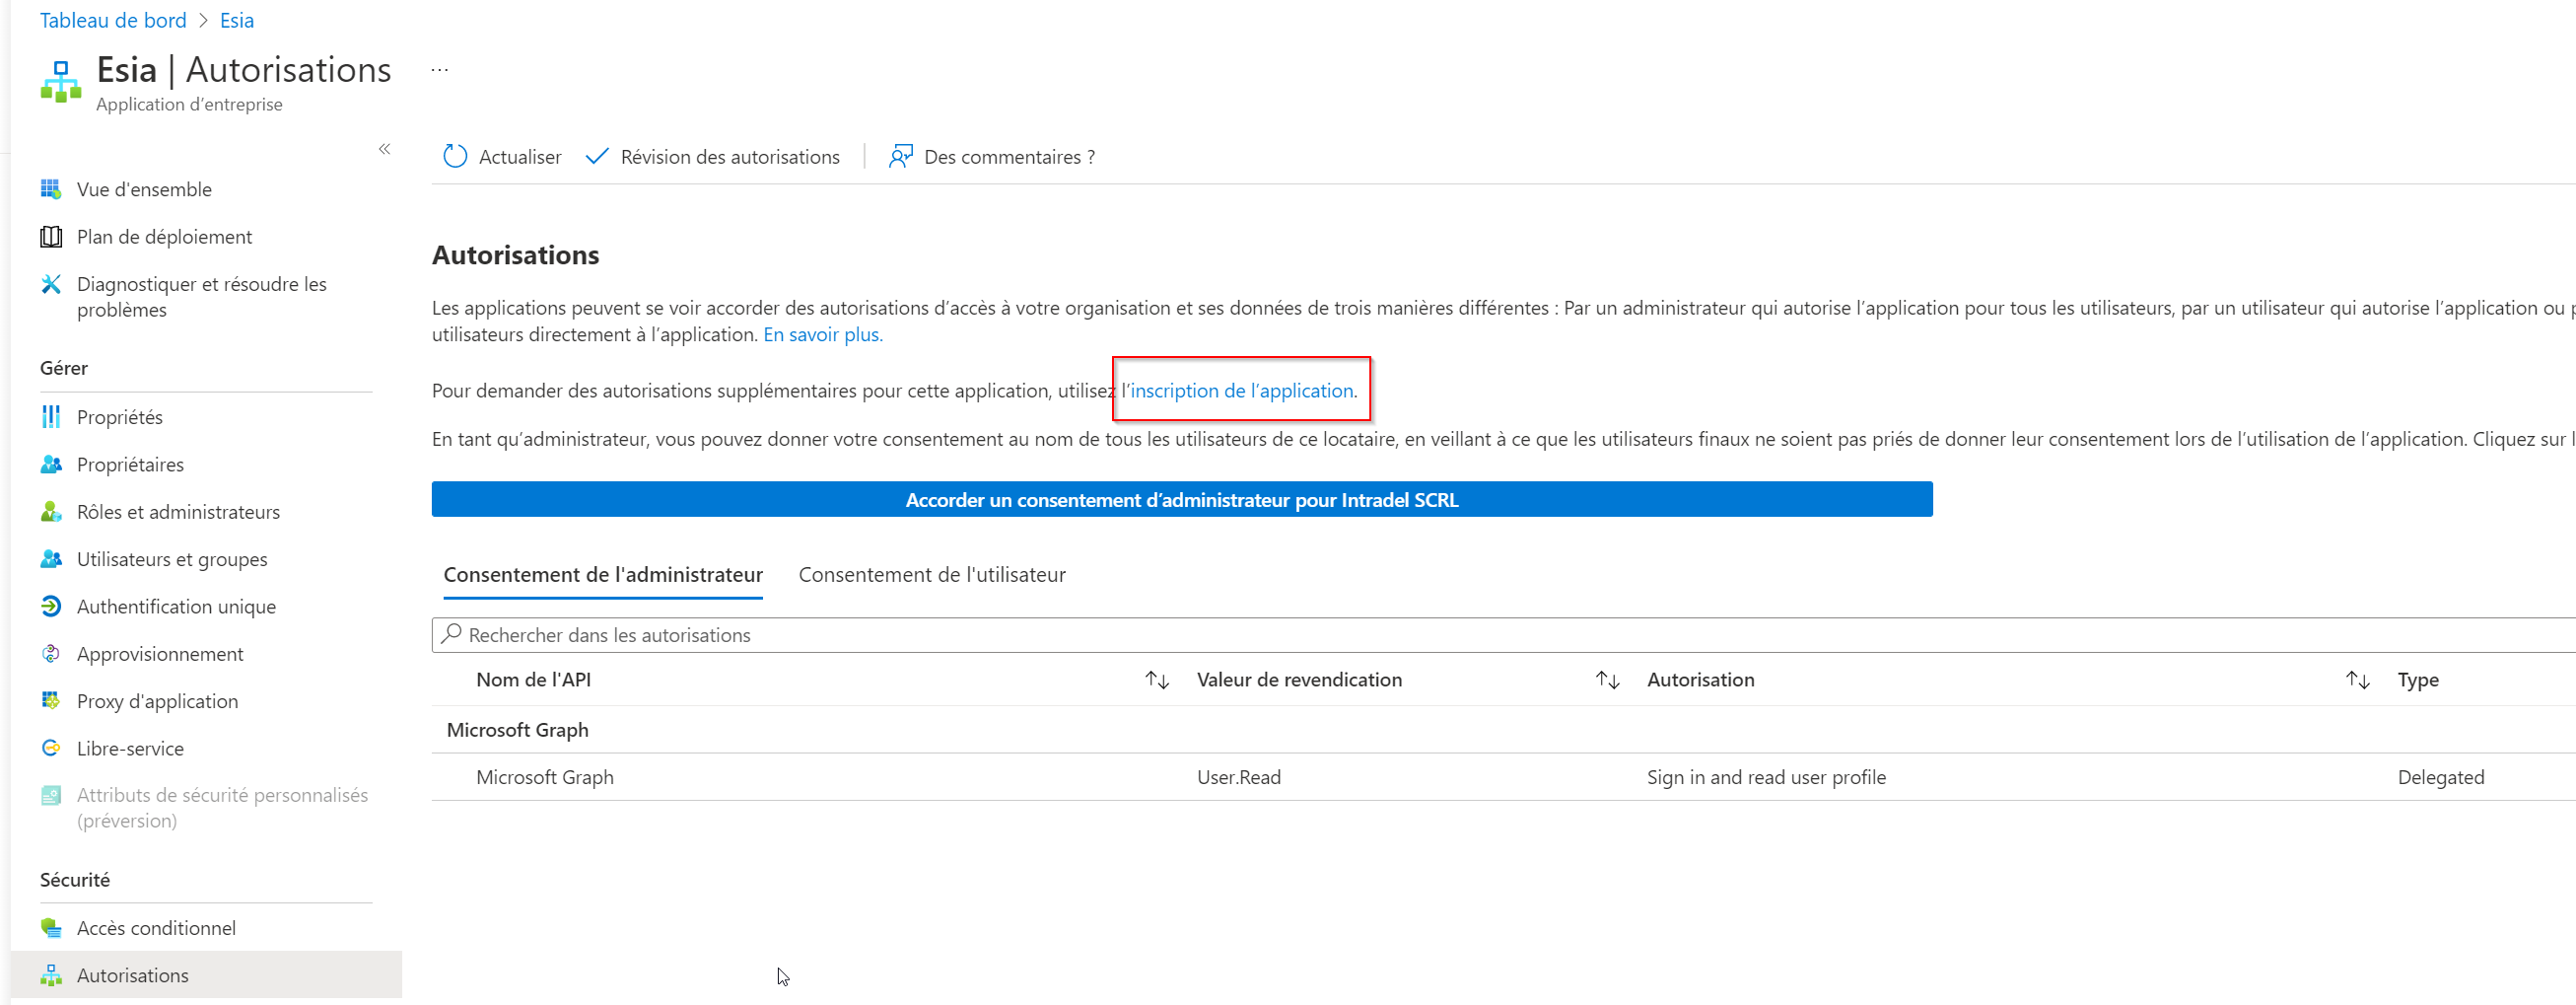
Now click on “Register the application” to give it the corresponding rights.
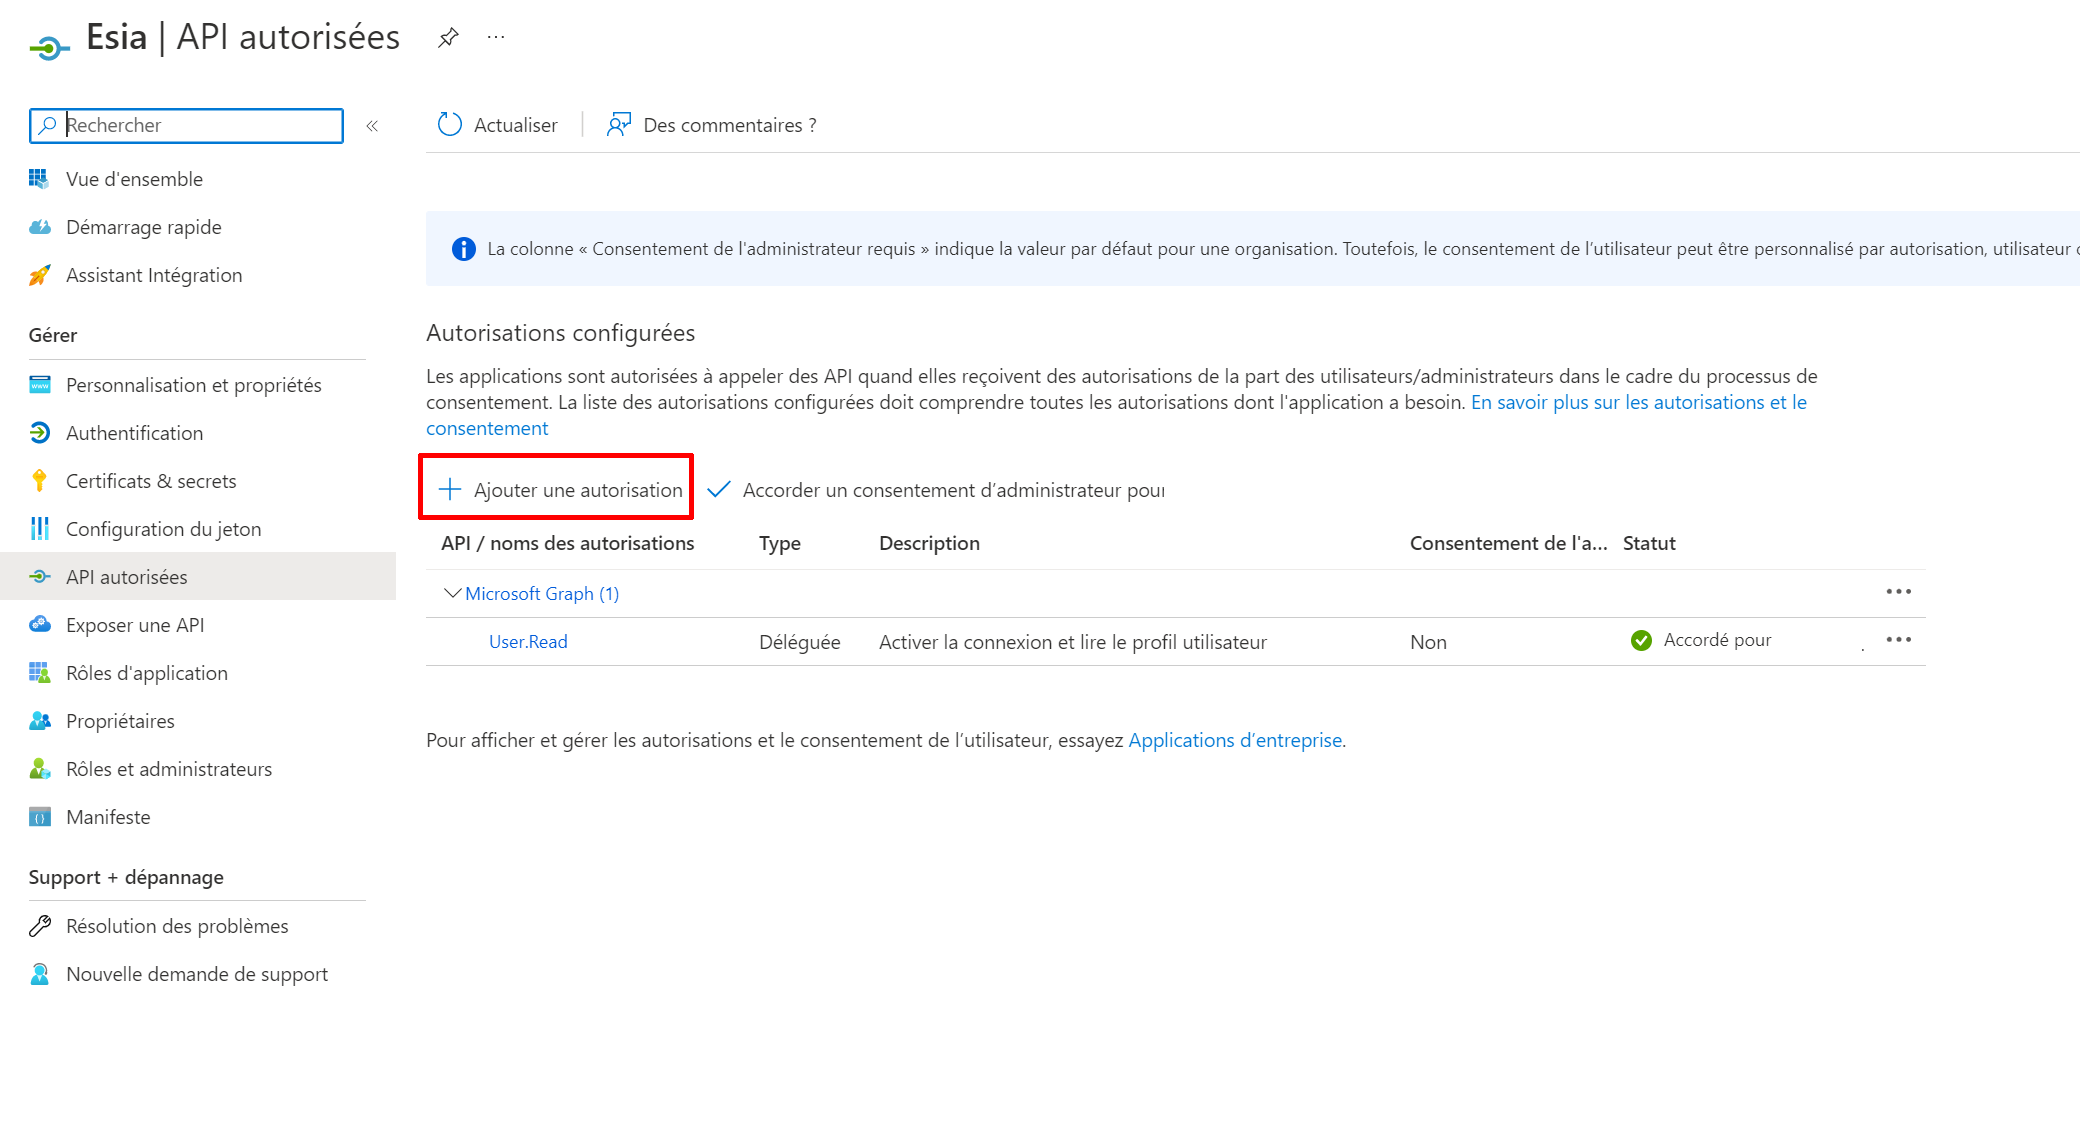
Click on “Add an authorisation”.
Select “Office 365 management APIs”.
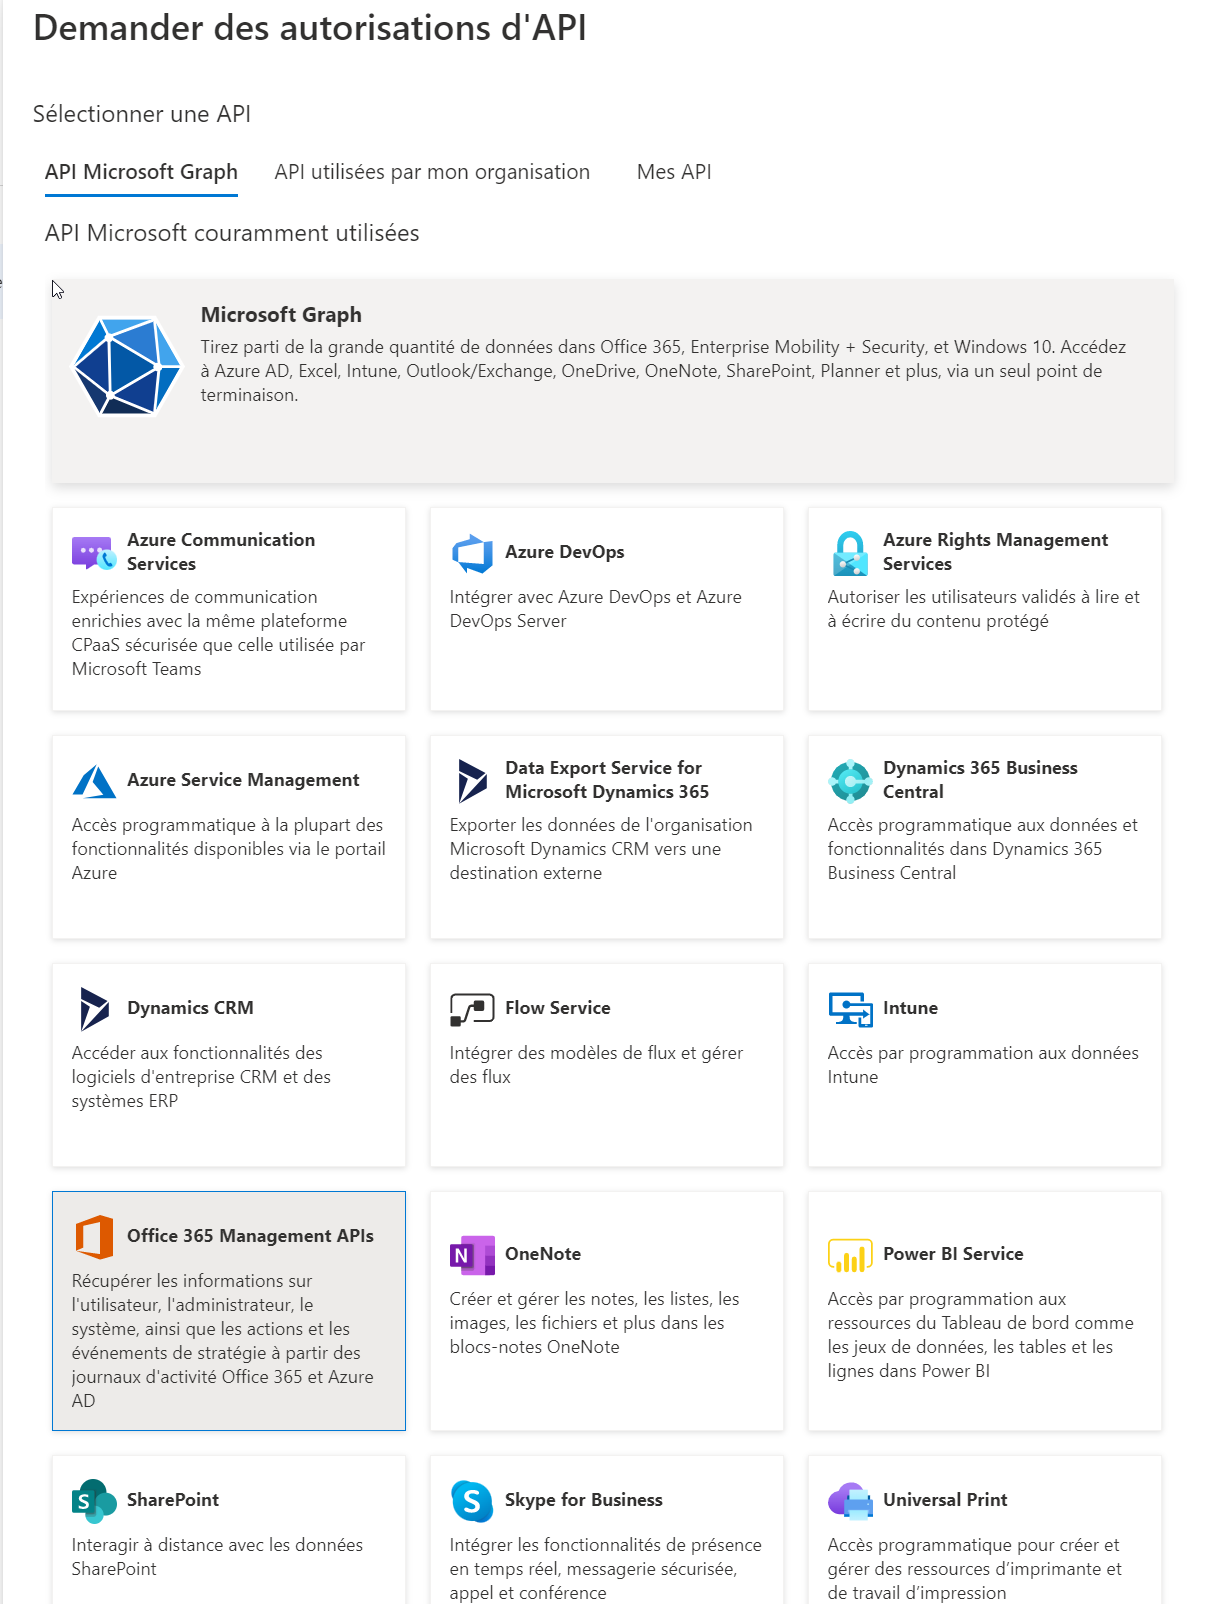
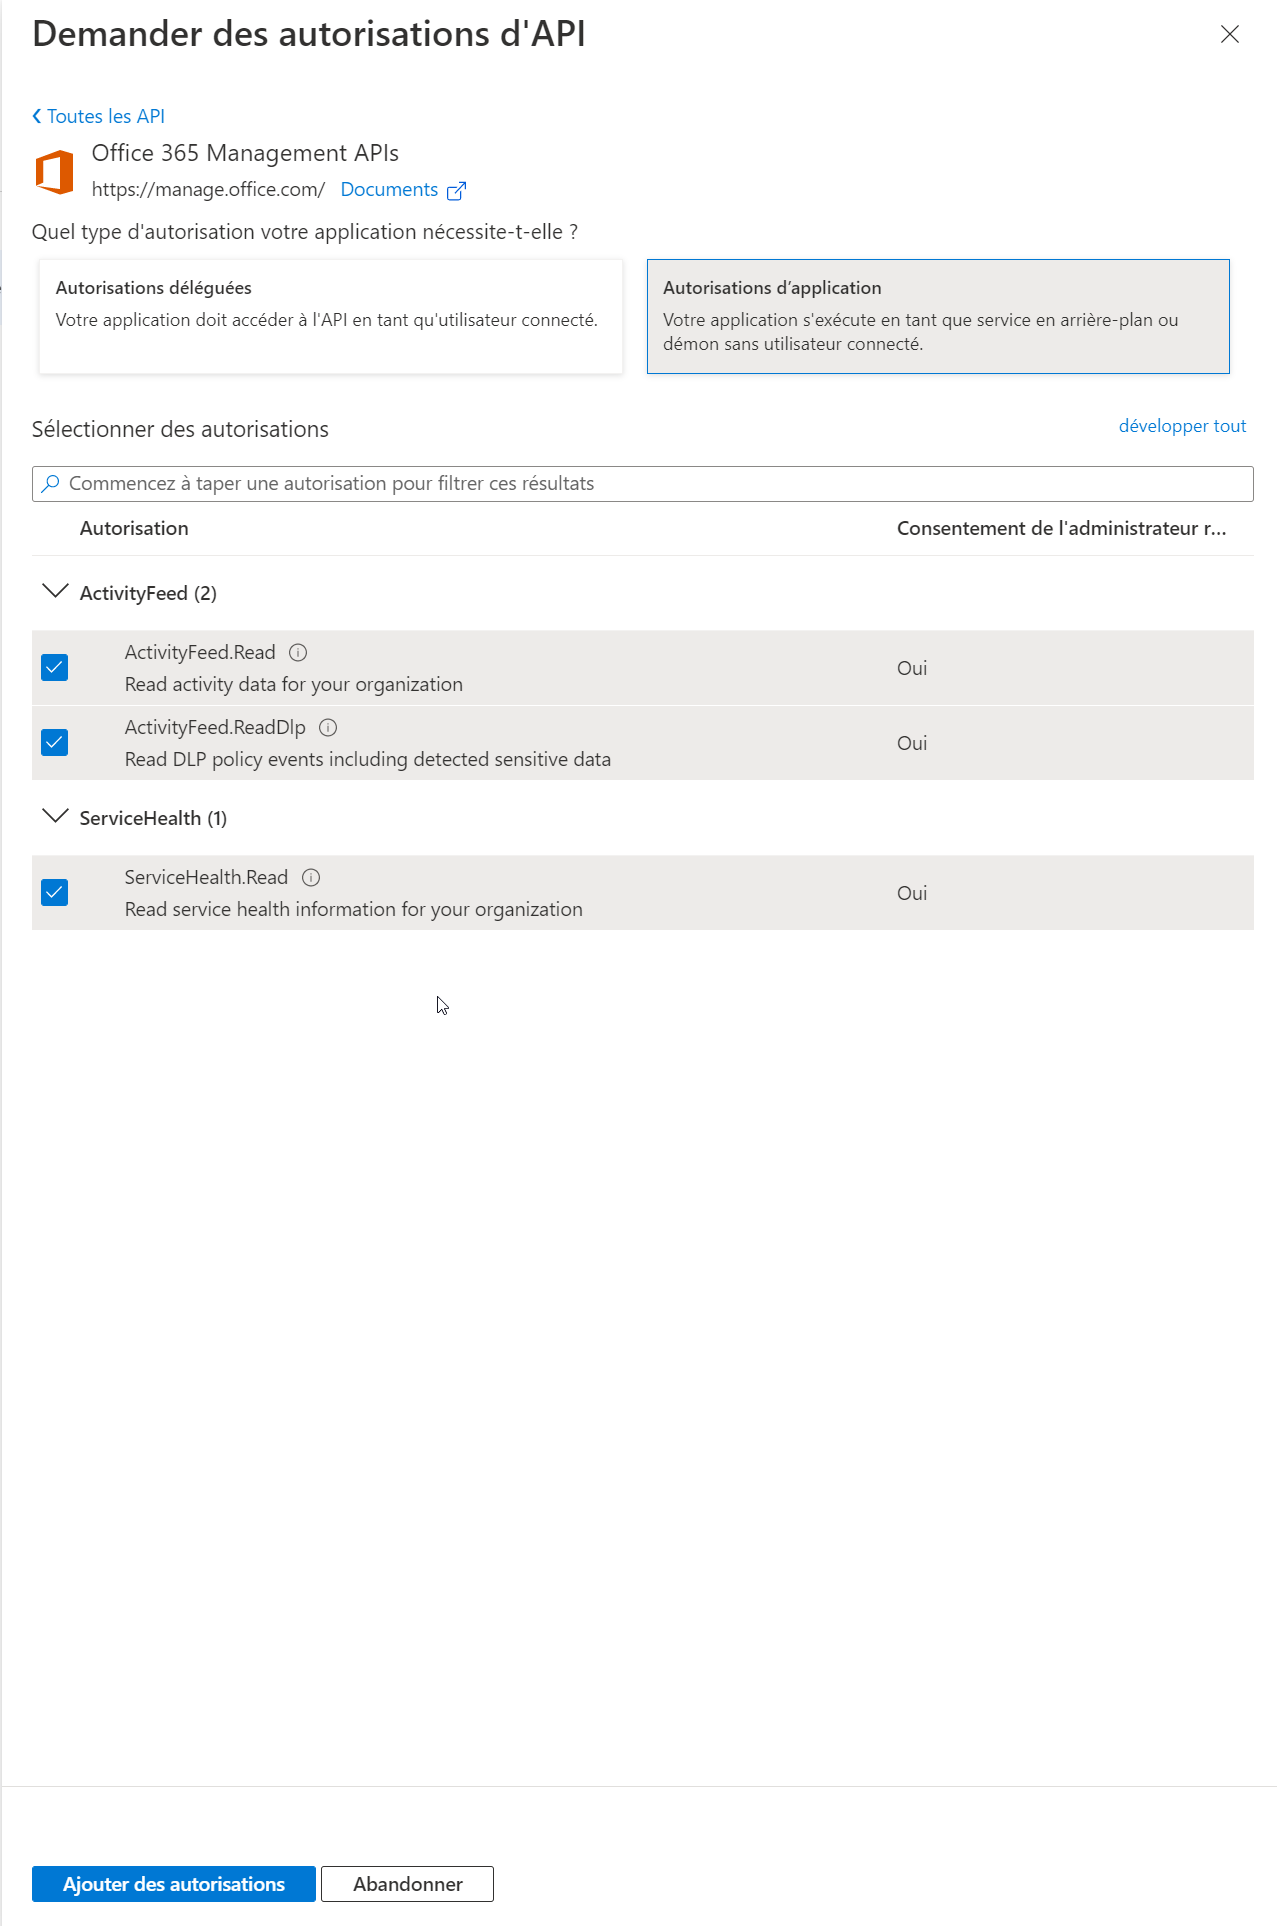
Click on “Application authorisation” and select the following rights:
- ActivityFeed.Read
- ActivityFeed.ReadIp
- ServiceHealth.Read
Click on “Add authorisations”.
Click on “Grant administrator consent”.

Answer “yes” to apply the rights.

The permissions panel should look like this:

Repeat the operation to apply permissions, but to add access rights to the graphics API.
Click on “Add a permission” and select “Microsoft Graphics”. The following rights are required:
- Agreement.Read.All
- APIConnectors.read.all
- Application.Read.All
- Directory.Read.All
- Organization.Read.All
- Reports.Read.All
- ServiceHealth.Read.All
- User.Read.All
Access rights for the Defender node. Requires a Svalinn license (Available from Esia version 3.5.2) :
- SecurityEvents.Read.All
- SecurityAlert.Read.All
- SecurityIncident.Read.All
- AuditLog.Read.All
In the end, your panel will look like this:
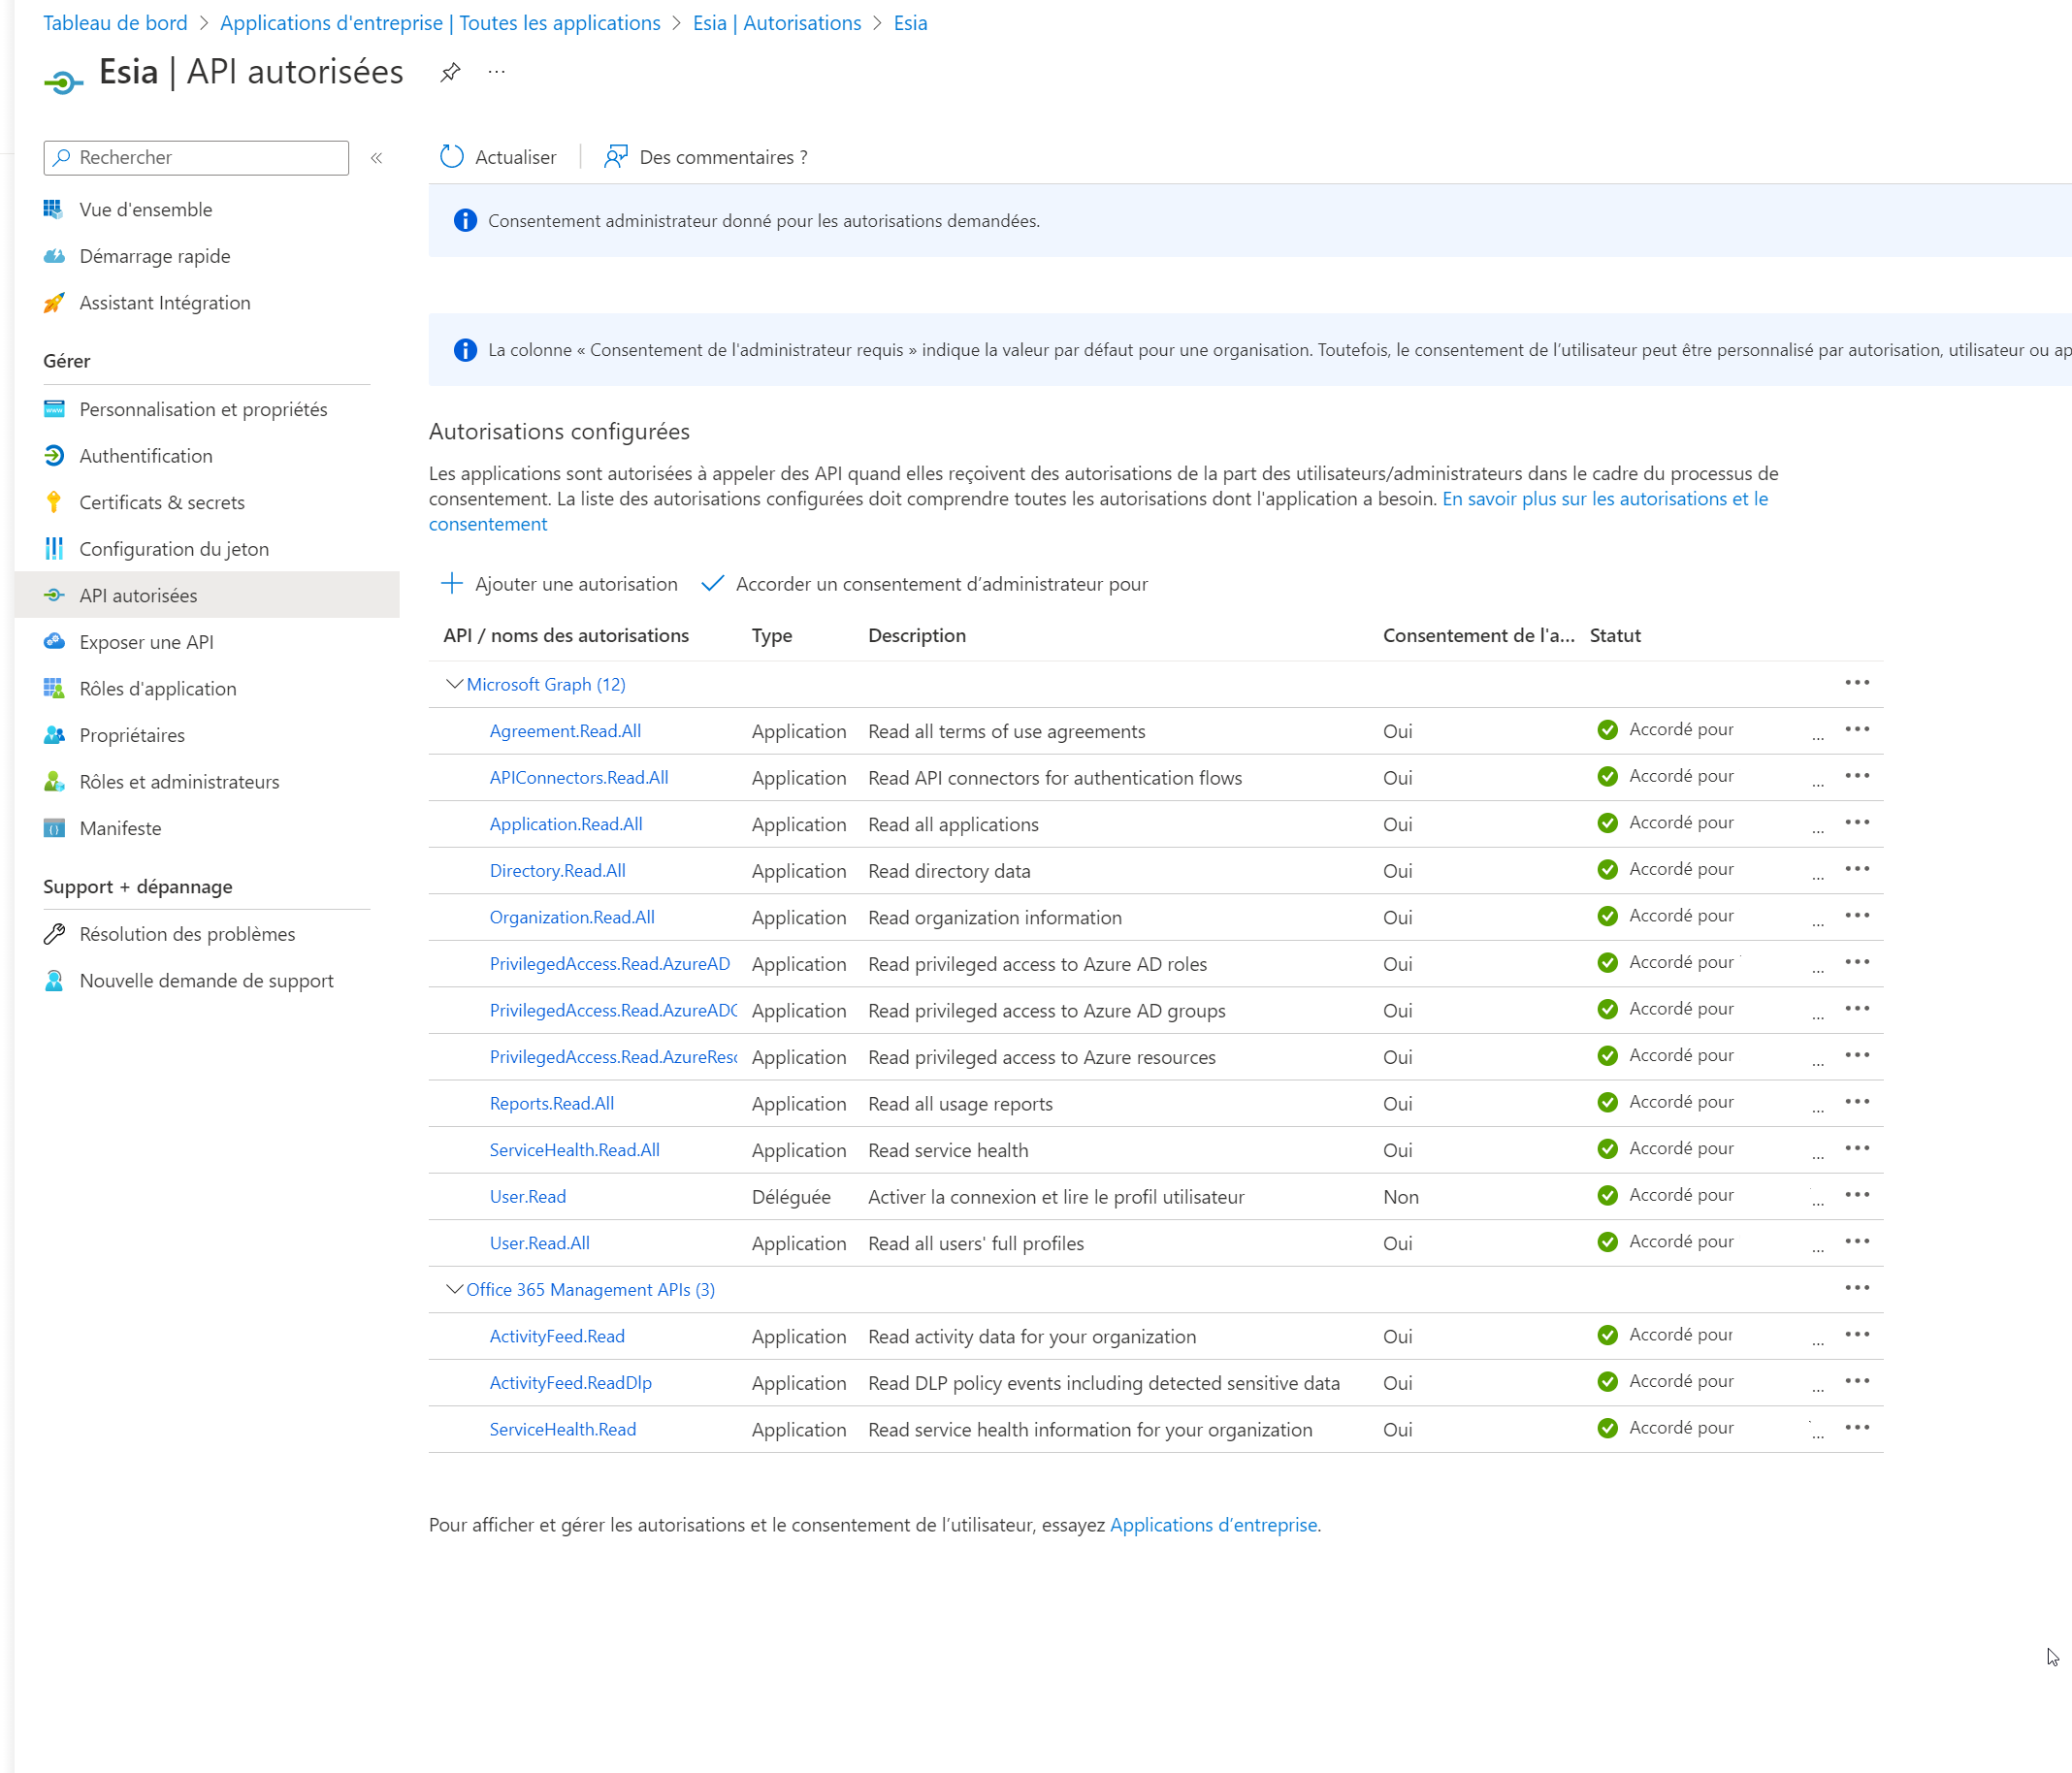
The rights are now configured.
Tenant ID, client ID and API key
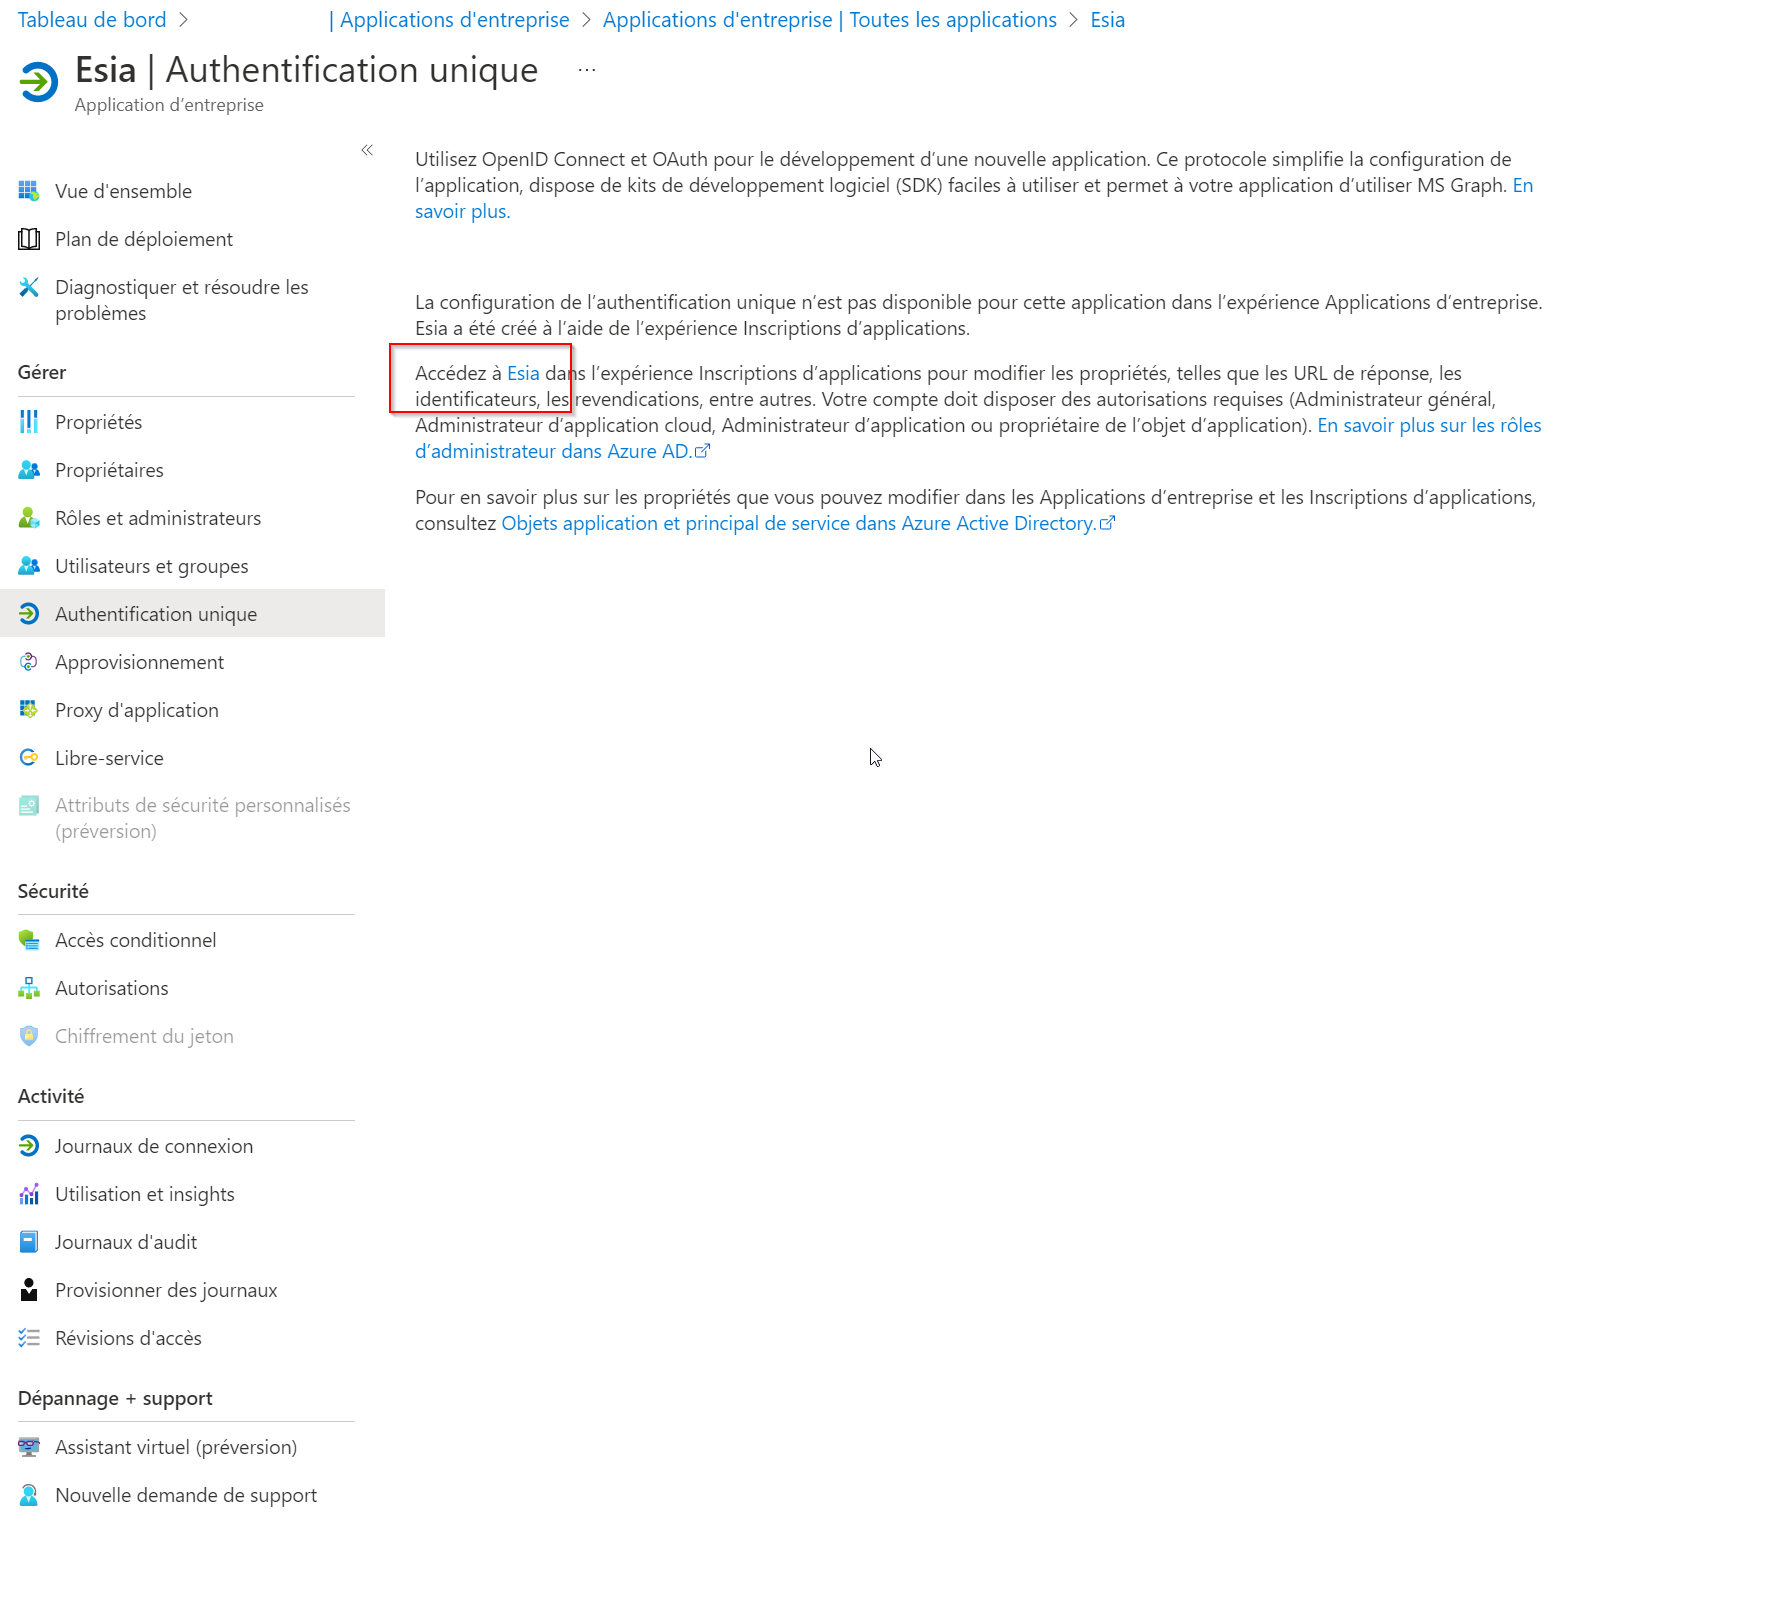
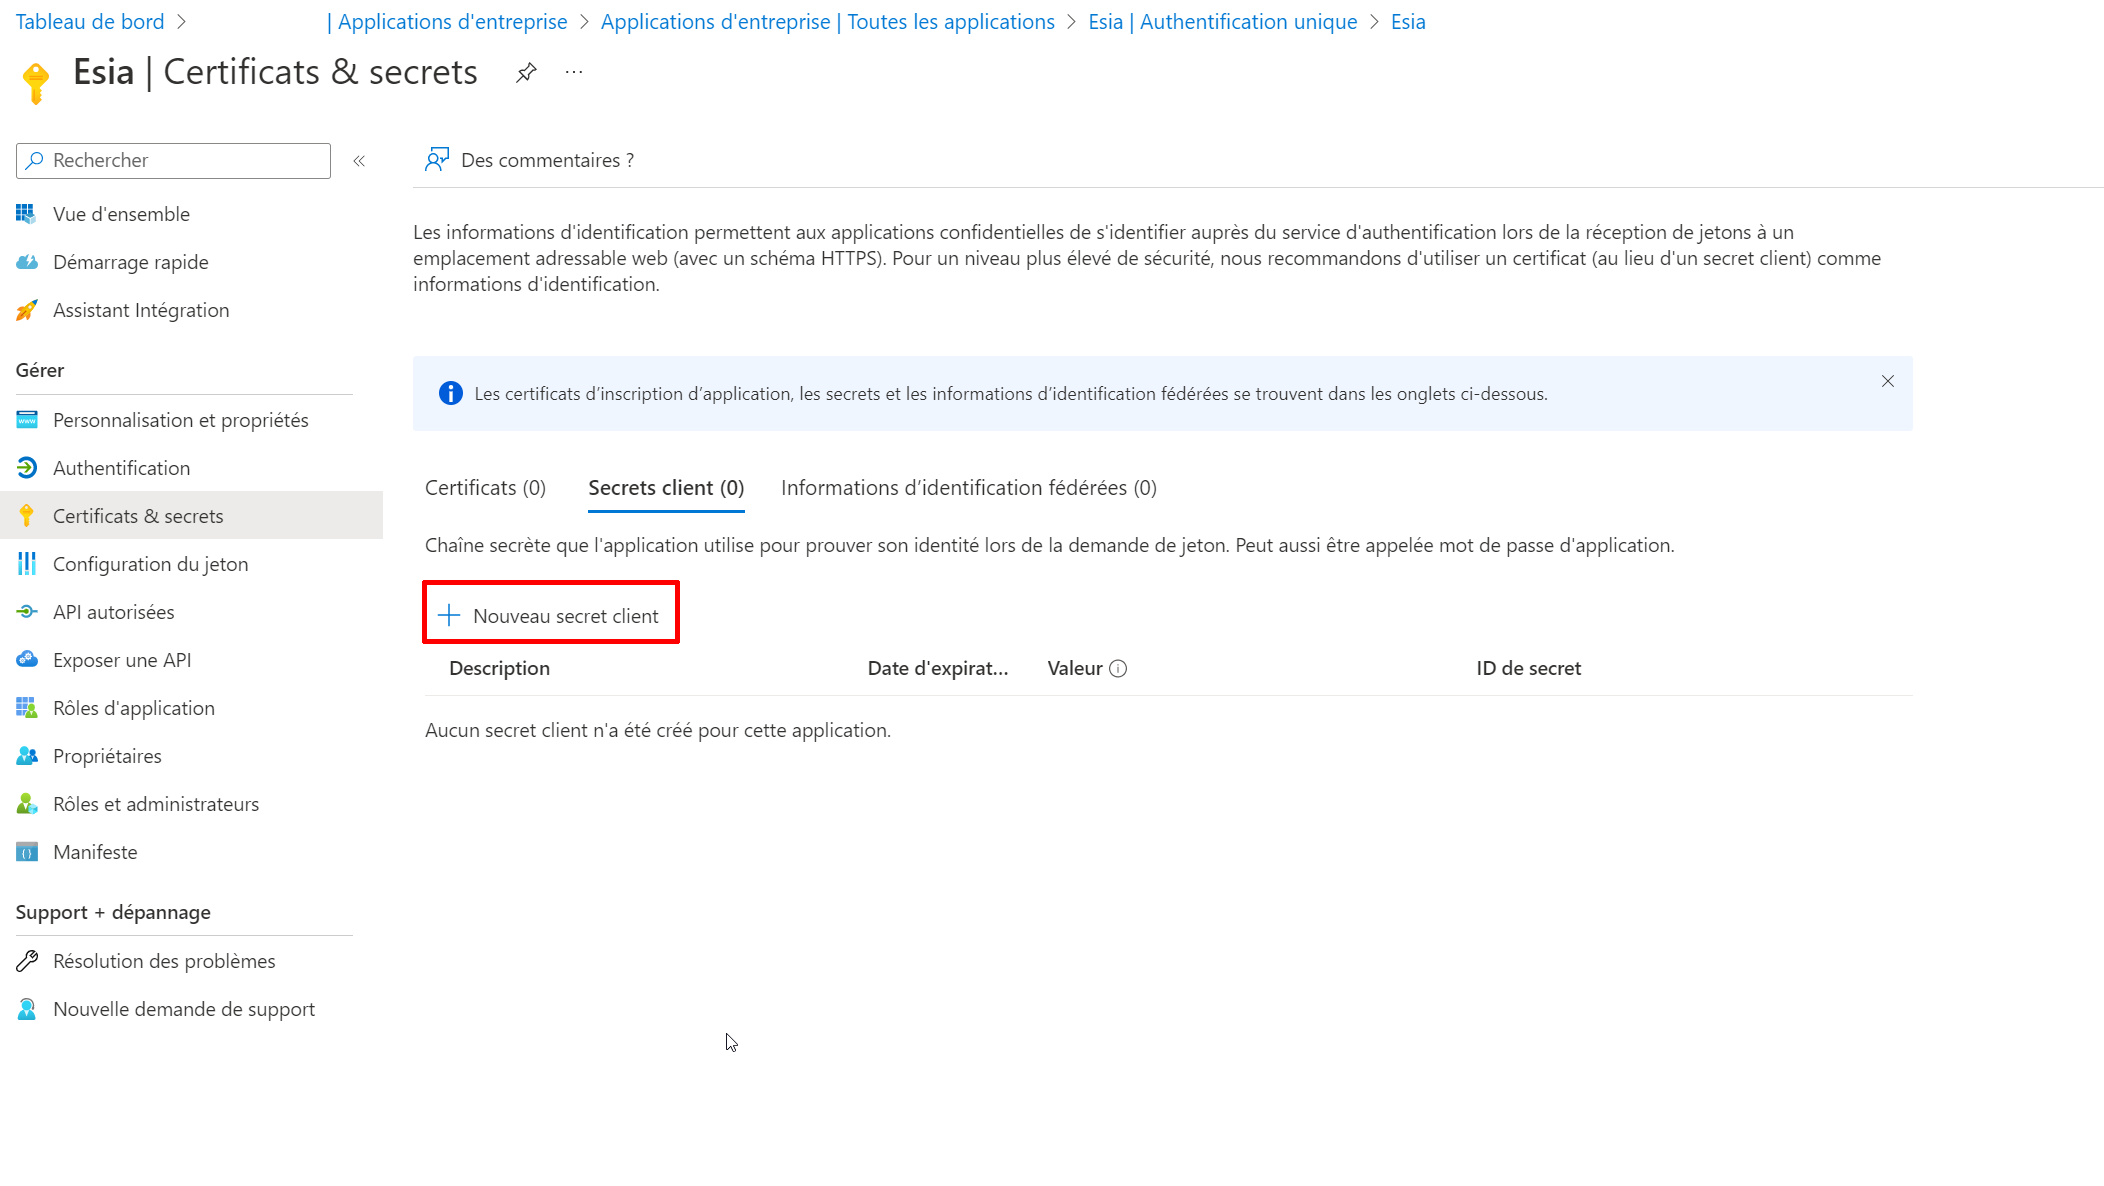
You now need to configure the application key so that you can connect. Click on “Single sign-on” in the menu and look for the name of your application (here: “esia”) and click on it (red box in the screenshot).
Click on “certificates & secrets” and then on “new client secret”.
Select the key expiry date (maximum 24 months).
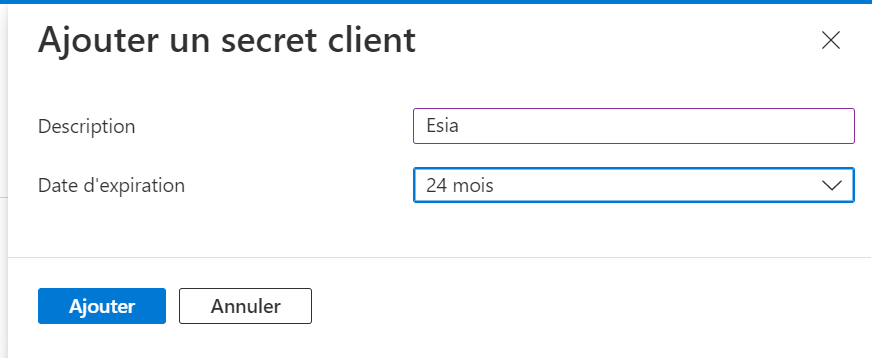
Save the “Key value” in a text file and enter it in Esia.

Click on “Overview” and copy the application ID (ClientID) and directory ID (TenantID) into your file.

We now have all the data we need to create the link with Esia.
You can go to the following tutorial to complete the configuration:
Display email addresses and not hashes
In order to comply with the GDPR, Microsoft has hidden user information by default. Consult your DPO or update your terms of use.
To display them, go to “Administration Centre”, then “Settings”, then “Organisation settings”, then “Services” and finally “Reports”.
Make sure the box is unchecked, as the translation can be confusing.

The next time esia is tested, the data is reloaded (+- 30 min). If you don't want to wait, you can delete the cache.
rm /tmp/o365/*