Table of Contents
Node management
Add a node
Scanning a network
Start a scan
In the left-hand side menu, click on the scan module « Importation ».
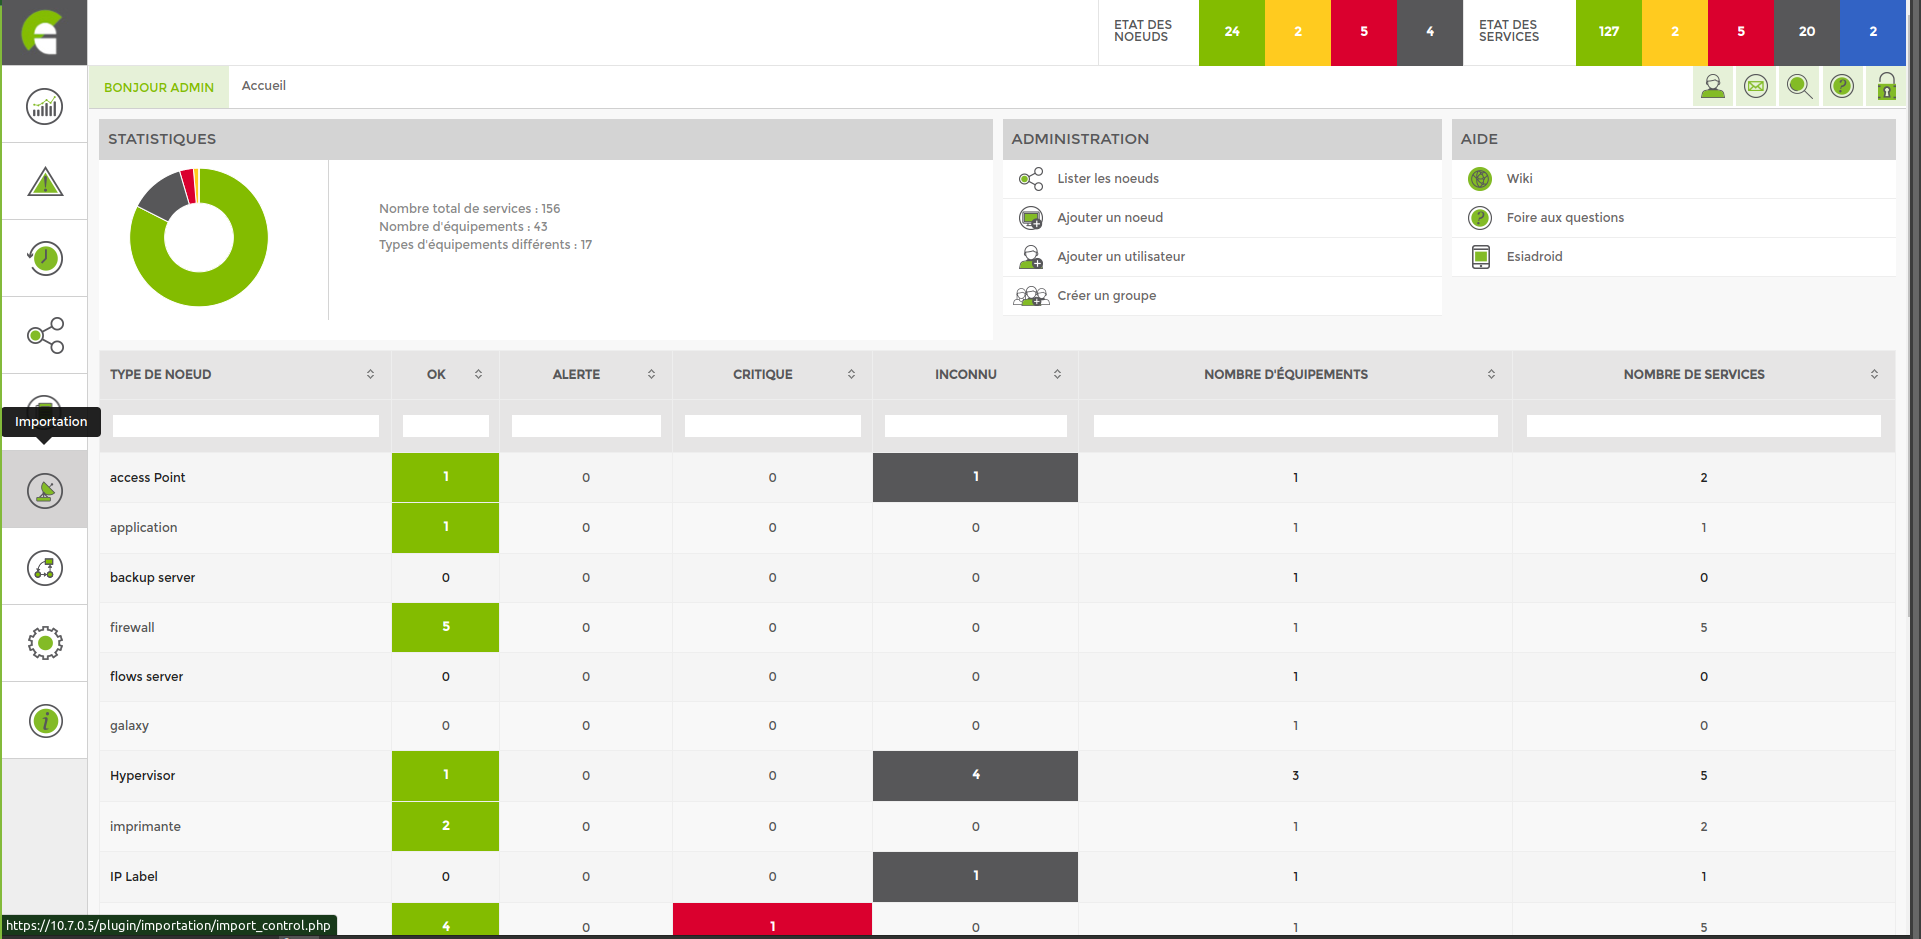
You can start your first scan from this page.

Scan type :
- ICMP for scanning via ping
- MAC-ICMP for scanning mac addresses via ping
- SNMP
Scan source If you need to scan from the same server, leave this (127.0.0.1). If you need to scan from a different Unity, select the appropriate one.
First IP Enter the first IP address of the range you wish to scan.
Last IP Enter the last ip address of the range you want to scan.
SNMP community Community: Enter the community previously configured on your nodes. The default community is « public ».
When the scan of your network is complete, you will be taken to the following page:
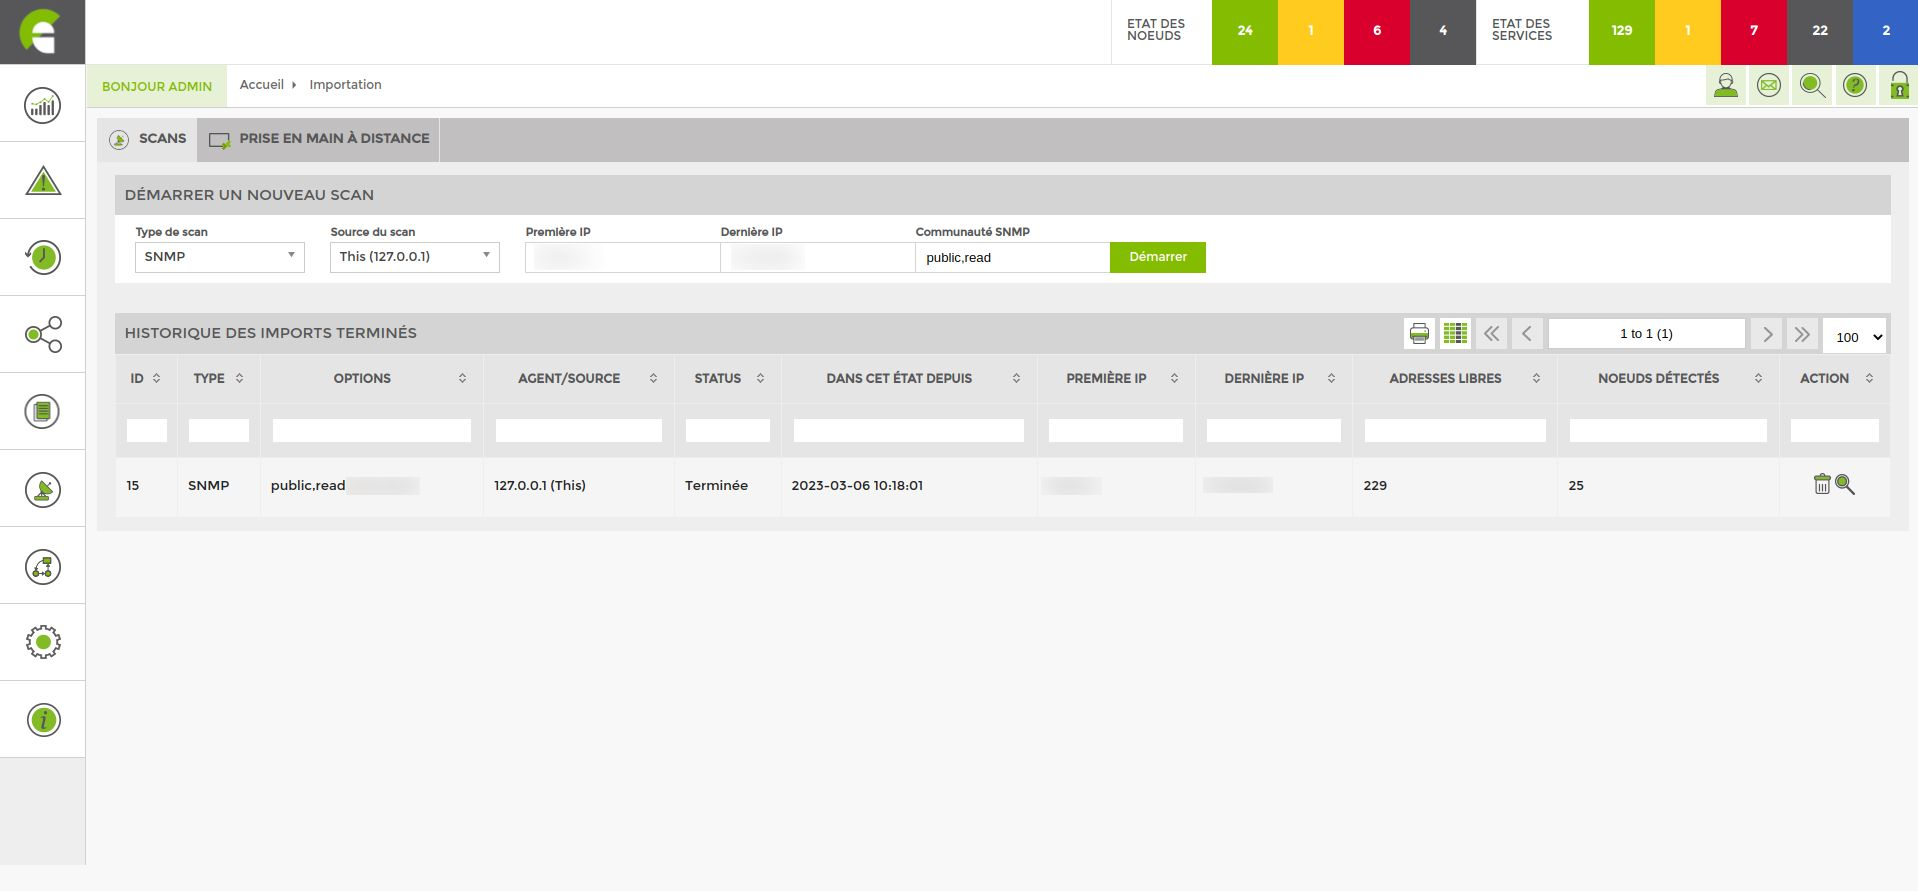
Here you can see all the scans that have been performed. To access the results of a scan, simply click on the magnifying glass in the last column.
Adding nodes following a scan
The result of a scan is shown below:
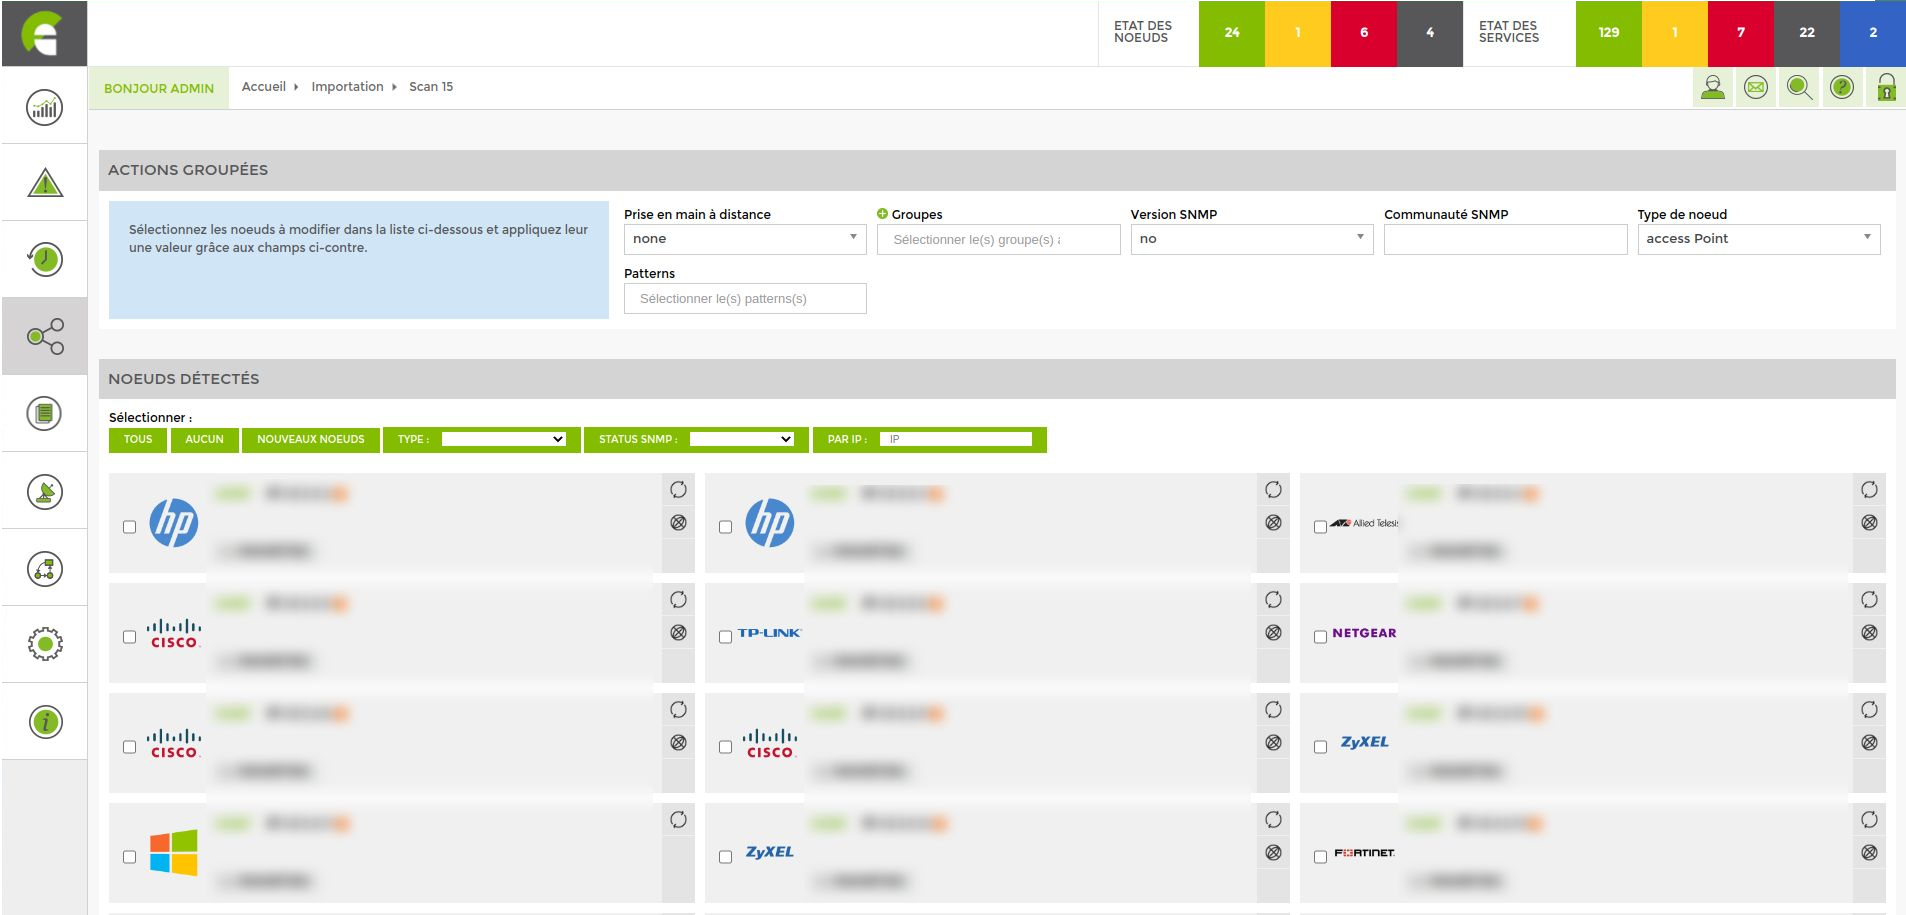
The list that appears after the scan includes all the nodes detected by ESIA Unity on your network.
The programme will bring up all the information it is possible to collect on each piece of equipment (to maximise the amount of information retrieved, please activate SNMP on each machine). To add a node, tick the desired nodes and fill in the parameters (if they are not already filled in by ESIA).
- Give it a name
- Link it to a group
- Choose the SNMP version
- Choose the SNMP community (public or read)
- Choose the node type
- Link it to a service pattern
Note that you can configure the nodes one by one via the menu corresponding to each of them. Or configure all the selected nodes at once via the 'Grouped actions' menu at the top of the window.
Then click on the “Add nodes” button at the bottom of the page.
You can nowAdd tests to your nodes.
In video
Adding nodes manually
Adding nodes manually
You can add a new node via :
- The menu « nœud ». Click on « liste des nœuds » then on the icon
 .
.
- The « administration >Click on > on the home page ⇒ Add a node.
The following window appears:
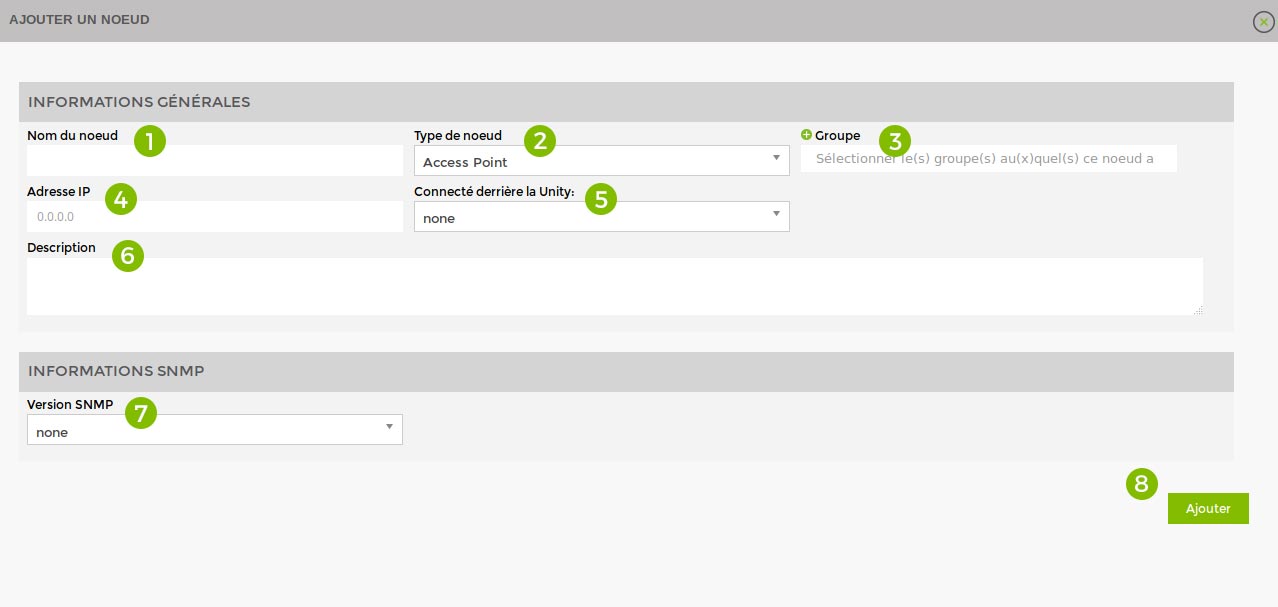
Fill in the following fields:
* Optional
- Give the node a name
- Choose the type of node
- Link it to a node group
- Specify IP
- Specify the linked Unity (If required)
- Give a description
- Specify SNMP community
- Click on “Add
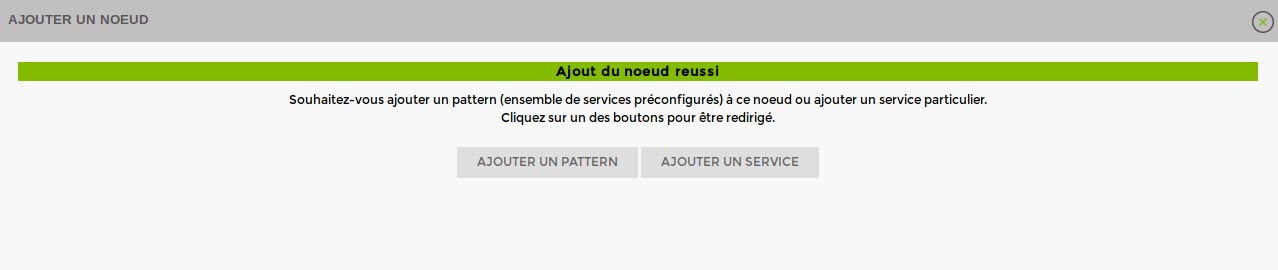
You can then Add patterns or Add services.
Node administration
You can find all the settings for your nodes via the “administration” tab. 
Specifications by hardware
If you do not have Unity, please ensure you choose the check_icmp plugin and not gesa_icmp (for example).
Access Point
| For any Access Point | |
|---|---|
| Availability of the access point (PING) | GESA_ICMP |
| Interfaces | Via the web interface (see Special features of switch, router and access point interfaces) |
Camera
| For any camera | |
|---|---|
| Camera availability (PING) | GESA_ICMP |
Evision
| For each Evision | |
|---|---|
| Add the | GESA_ICMP |
Firewall/Router
| Depending on the brand of firewall | |
|---|---|
| Clavister | default_gesa_snmp_clavister |
| Cyberoam | default_gesa_snmp_cyberoam |
| Fortinet | default_gesa_snmp_fortinet |
| Fortigate | default_gesa_snmp_fortigate |
| Stormshield | default_gesa_snmp_Stormshield |
| Watchguard | default_gesa_snmp_watchguard |
| For all others | |
| Add the plugin | GESA_ICMP |
| And activate the interfaces | Via the web interface (see Special features of the switch, router and access point interface) |
Printers
| For any printer | |
|---|---|
| Printer availability | GESA_ICMP |
| Consumables | GESA_SNMP_PRINTER |
NAS
| Patterns for the following brands | |
|---|---|
| QNAP | default_gesa_nas_qnap |
| Seagate | default_gesa_nas_seagate |
| Synology | default_gesa_nas_synology |
| Patterns for other NAS | |
| Linux | default_gesa_linux_server |
| Windows | default_gesa_windows_server |
PC
| For any PC | |
|---|---|
| Printer availability (PING) | GESA_ICMP |
| Enable WMI | Enable WMI on Windows 7 & 8 |
| Enabling WMI via GPO on Active Directory 2012 | |
PDU
| For any PDU | |
|---|---|
| PDU availability (PING) | GESA_ICMP |
| Brand-specific patterns | |
| Raritan | default_gesa_snmp_raritan |
Server
| Available patterns | |
|---|---|
| For a Linux server | default_gesa_linux_server |
| For a Windows server | default_gesa_windows_server |
Virtual server
| Available patterns | |
|---|---|
| For a Linux NAS | default_gesa_linux_server |
| For a Windows NAS | default_gesa_windows_server |
Switch
| For any Switch | |
|---|---|
| The interfaces | Via the web interface (see Special features of switch, router and access point interfaces) |
Telephone
| For any IP telephone | |
|---|---|
| Phone availability (PING) | GESA_ICMP |
UPS
| For any UPS | |
|---|---|
| UPS availability (PING) | GESA_ICMP |
WiFi controller
| For any wifi controller | |
|---|---|
| WiFi controller availability (PING) | GESA_ICMP |
| If there are interfaces | |
| Interfaces | Via the web interface (see Special features of switch, router and access point interfaces) |
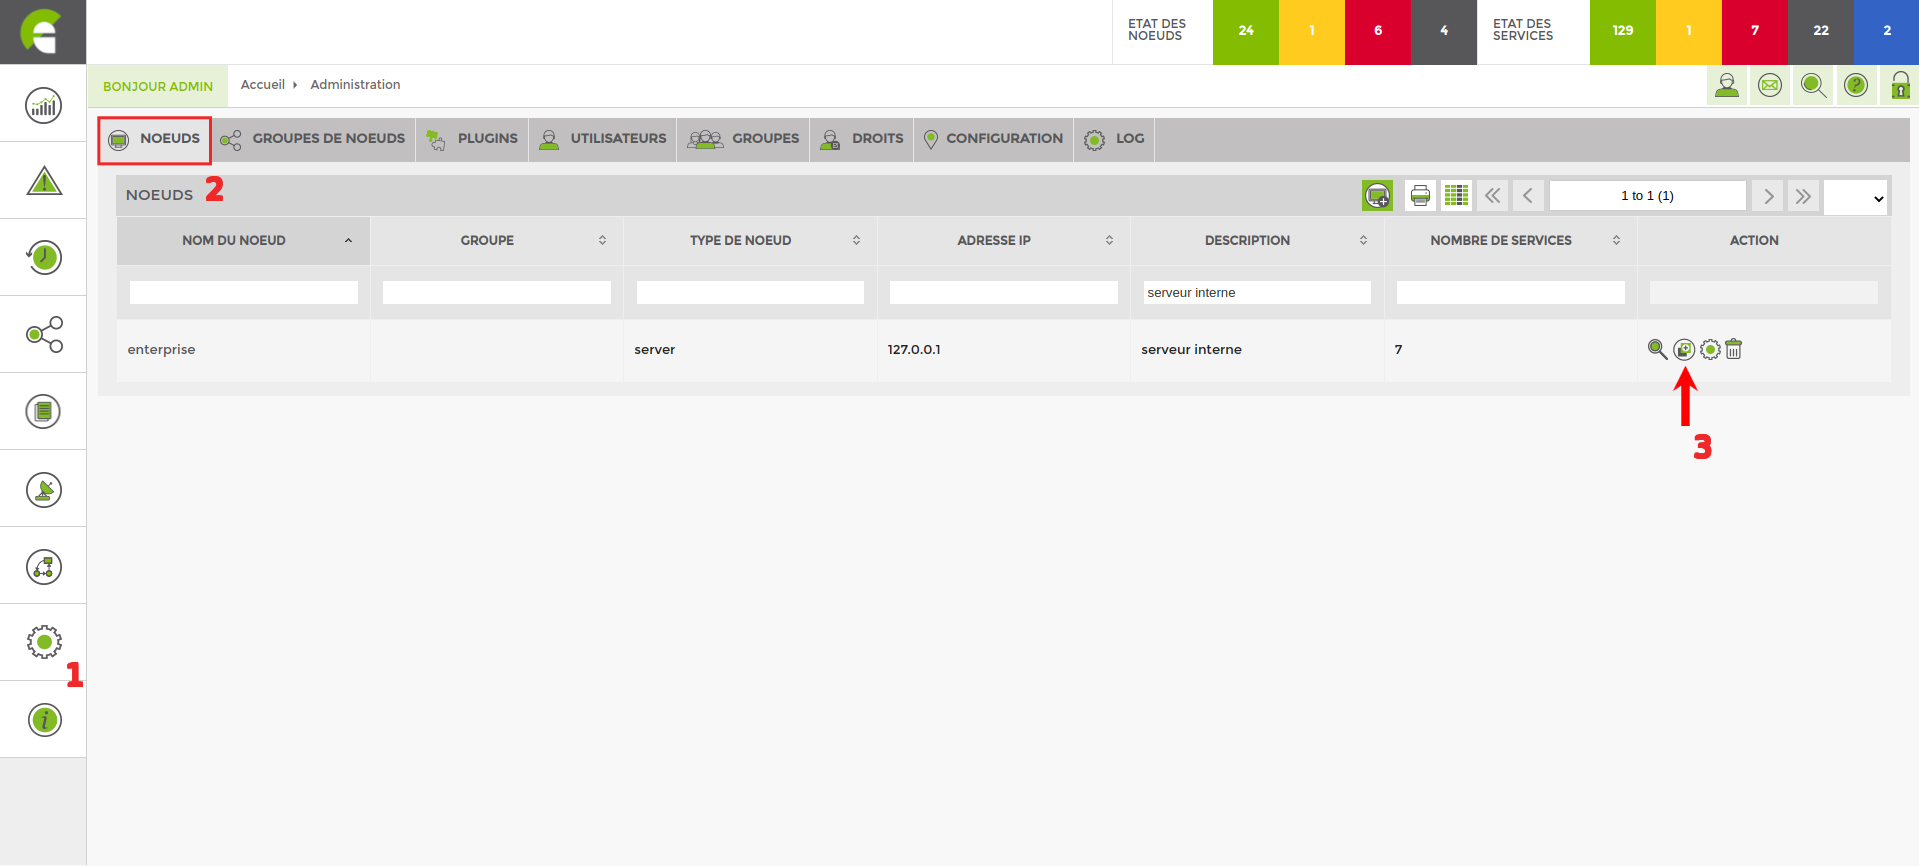
Modify a node
Go to the administration page and then « noeuds ». Click the « modifier » button of the node you wish to modify.

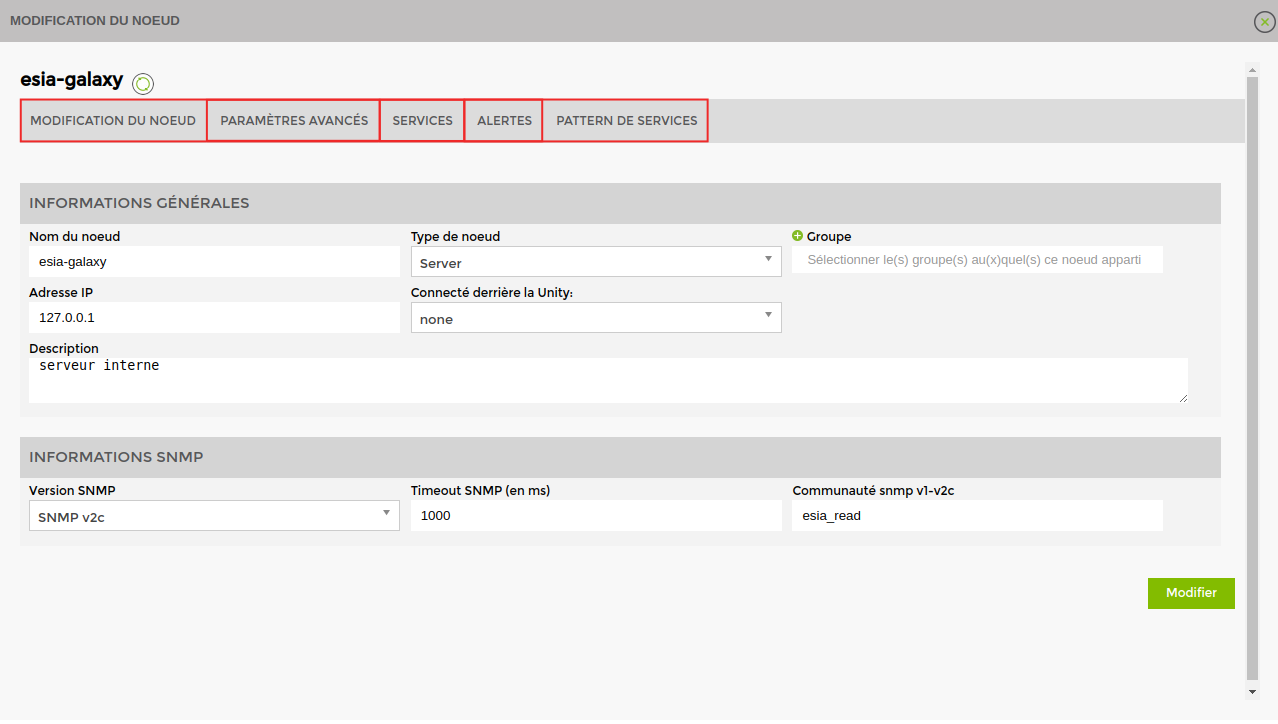
- Modify node Allows you to modify all the node parameters.
- Advanced settings Allows you to configure rdp.
- Services Allows you to add, modify or delete a service.
- Alerts Allows you to configure/modify alerts.
- Service pattern Allows you to add or remove a pattern on the node.
Delete a node
Go to the administration page, then « noeuds ». Click the « supprimer » button of the node you wish to delete.

Duplicating a node
You can also duplicate a node. All the parameters of the node are also duplicated (patterns, services, etc.). All you have to change is the IP address and the name.
Go to the « administration » then node. Click on the « dupliquer » button of the node you wish to duplicate.